𝕭𝖄𝕿𝕮𝕻𝕬𝕿𝕳 𝖉𝖑𝖔𝖌𝖘
A Blog/DevLog copy/notebook binding from blog of BYTEPATH.
Game Loop
Start
To start off you need to install LÖVE on your system and then figure out how to run LÖVE projects. The LÖVE version we'll be using is 0.10.2 and it can be downloaded here. If you're in the future and a new version of LÖVE has been released you can get 0.10.2 here. You can follow the steps from this page for further details. Once that's done you should create a main.lua file in your project folder with the following contents:
function love.load()

end

function love.update(dt)

end

function love.draw()

end
If you run this you should see a window popup and it should show a black screen. In the code above, once your LÖVE project is run the love.load function is run once at the start of the program and love.update and love.draw are run every frame. So, for instance, if you wanted to load an image and draw it, you'd do something like this:
function love.load()
    image = love.graphics.newImage('image.png')
end

function love.update(dt)

end

function love.draw()
    love.graphics.draw(image, 0, 0)
end
love.graphics.newImage loads the image texture to the image variable and then every frame it's drawn at position 0, 0. To see that love.draw actually draws the image on every frame, try this:
love.graphics.draw(image, love.math.random(0, 800), love.math.random(0, 600))
The default size of the window is 800x600, so what this should do is randomly draw the image around the screen really fast:
Note that between every frame the screen is cleared, otherwise the image you're drawing randomly would slowly fill the entire screen as it is drawn in random positions. This happens because LÖVE provides a default game loop for its projects that clears the screen at the end of every frame. I'll go over this game loop and how you can change it now.
Game Loop
The default game loop LÖVE uses can be found in the love.run page, and it looks like this:
function love.run()
    if love.math then
    love.math.setRandomSeed(os.time())
    end

    if love.load then love.load(arg) end

    -- We don't want the first frame's dt to include time taken by love.load.
    if love.timer then love.timer.step() end

    local dt = 0

    -- Main loop time.
    while true do
        -- Process events.
        if love.event then
    love.event.pump()
    for name, a,b,c,d,e,f in love.event.poll() do
        if name == "quit" then
    if not love.quit or not love.quit() then
        return a
    end
        end
    love.handlers[name](a,b,c,d,e,f)
    end
    end

    -- Update dt, as we'll be passing it to update
    if love.timer then
        love.timer.step()
        dt = love.timer.getDelta()
    end

    -- Call update and draw
    if love.update then love.update(dt) end -- will pass 0 if love.timer is disabled

    if love.graphics and love.graphics.isActive() then
        love.graphics.clear(love.graphics.getBackgroundColor())
        love.graphics.origin()
                if love.draw then love.draw() end
        love.graphics.present()
    end

    if love.timer then love.timer.sleep(0.001) end
    end
end
When the program starts love.run is run and then from there everything happens. The function is fairly well commented and you can find out what each function does on the LÖVE wiki. But I'll go over the basics:
if love.math then
    love.math.setRandomSeed(os.time())
end
In the first line we're checking to see if love.math is not nil. In Lua all values are true, except for false and nil, so the if love.math condition will be true if love.math is defined as anything at all. In the case of LÖVE these variables are set to be enabled or not in the conf.lua file. You don't need to worry about this file for now, but I'm just mentioning it because it's in that file that you can enable or disable individual systems like love.math, and so that's why there's a check to see if it's enabled or not before anything is done with one of its functions.
In general, if a variable is not defined in Lua and you refer to it in any way, it will return a nil value. So if you ask if random_variable then this will be false unless you defined it before, like random_variable = 1.
In any case, if the love.math module is enabled (which it is by default) then its seed is set based on the current time. See love.math.setRandomSeed and os.time. After doing this, the love.load function is called:
if love.load then love.load(arg) end
arg are the command line arguments passed to the LÖVE executable when it runs the project. And as you can see, the reason why love.load only runs once is because it's only called once, while the update and draw functions are called multiple times inside a loop (and each iteration of that loop corresponds to a frame).
-- We don't want the first frame's dt to include time taken by love.load.
if love.timer then love.timer.step() end

local dt = 0
After calling love.load and after that function does all its work, we verify that love.timer is defined and call love.timer.step, which measures the time taken between the two last frames. As the comment explains, love.load might take a long time to process (because it might load all sorts of things like images and sounds) and that time shouldn't be the first thing returned by love.timer.getDelta on the first frame of the game.
dt is also initialized to 0 here. Variables in Lua are global by default, so by saying local dt it's being defined only to the local scope of the current block, which in this case is the love.run function. See more on blocks here.
-- Main loop time.
while true do
    -- Process events.
    if love.event then
        love.event.pump()
        for name, a,b,c,d,e,f in love.event.poll() do
            if name == "quit" then
                if not love.quit or not love.quit() then
                    return a
                end
            end
            love.handlers[name](a,b,c,d,e,f)
        end
    end
end
This is where the main loop starts. The first thing that is done on each frame is the processing of events. love.event.pump pushes events to the event queue and according to its description those events are generated by the user in some way, so think key presses, mouse clicks, window resizes, window focus lost/gained and stuff like that. The loop using love.event.poll goes over the event queue and handles each event. love.handlers is a table of functions that calls the relevant callbacks. So, for instance, love.handlers.quit will call the love.quit function if it exists.
One of the things about LÖVE is that you can define callbacks in the main.lua file that will get called when an event happens. A full list of all callbacks is available here. I'll go over callbacks in more detail later, but this is how all that happens. The a, b, c, d, e, f arguments you can see passed to love.handlers[name] are all the possible arguments that can be used by the relevant functions. For instance, love.keypressed receives as arguments the key pressed, its scancode and if the key press event is a repeat. So in the case of love.keypressed the a, b, c values would be defined as something while d, e, f would be nil.
-- Update dt, as we'll be passing it to update
if love.timer then
    love.timer.step()
    dt = love.timer.getDelta()
end

-- Call update and draw
if love.update then love.update(dt) end -- will pass 0 if love.timer is disabled
love.timer.step measures the time between the two last frames and changes the value returned by love.timer.getDelta. So in this case dt will contain the time taken for the last frame to run. This is useful because then this value is passed to the love.update function, and from there it can be used in the game to define things with constant speeds, despite frame rate changes.
if love.graphics and love.graphics.isActive() then
    love.graphics.clear(love.graphics.getBackgroundColor())
    love.graphics.origin()
    if love.draw then love.draw() end
    love.graphics.present()
end
After calling love.update, love.draw is called. But before that we verify that the love.graphics module exists and that we can draw to the screen via love.graphics.isActive. The screen is cleared to the defined background color (initially black) via love.graphics.clear, transformations are reset via love.graphics.origin, love.draw is finally called and then love.graphics.present is used to push everything drawn in love.draw to the screen. And then finally:
if love.timer then love.timer.sleep(0.001) end
I never understood why love.timer.sleep needs to be here at the end of the frame, but the explanation given by a LÖVE developer here seems reasonable enough.
And with that the love.run function ends. Everything that happens inside the while true loop is referred to as a frame, which means that love.update and love.draw are called once per frame. The entire game is basically repeating the contents of that loop really fast (like at 60 frames per second), so get used to that idea. I remember when I was starting it took me a while to get an instinctive handle on how this worked for some reason.
There's a helpful discussion on this function on the LÖVE forums if you want to read more about it.
Anyway, if you don't want to you don't need to understand all of this at the start, but it's helpful to be somewhat comfortable with editing how your game loop works and to figure out how you want it to work exactly. There's an excellent article that goes over different game loop techniques and does a good job of explaining each. You can find it here.
Game Loop Exercises
1. What is the role that Vsync plays in the game loop? It is enabled by default and you can disable it by calling love.window.setMode with the vsync attribute set to false.
2. Implement the Fixed Delta Time loop from the Fix Your Timestep article by changing love.run.
3. Implement the Variable Delta Time loop from the Fix Your Timestep article by changing love.run.
4. Implement the Semi-Fixed Timestep loop from the Fix Your Timestep article by changing love.run.
5. Implement the Free the Physics loop from the Fix Your Timestep article by changing love.run.
Libraries
Introduction
In this article we'll cover a few Lua/LÖVE libraries that are necessary for the project and we'll also explore some ideas unique to Lua that you should start to get comfortable with. There will be a total of 4 libraries used by the end of it, and part of the goal is to also get you used to the idea of downloading libraries built by other people, reading through the documentation of those and figuring out how they work and how you can use them in your game. Lua and LÖVE don't come with lots of features by themselves, so downloading code written by other people and using it is a very common and necessary thing to do.
Object Orientation
The first thing I'll cover here is object orientation. There are many many different ways to get object orientation working with Lua, but I'll just use a library. The OOP library I like the most is rxi/classic because of how small and effective it is. To install it just download it and drop the classic folder inside the project folder. Generally I create a libraries folder and drop all libraries there.
Once that's done you can import the library to the game at the top of the main.lua file by doing:
Object = require 'libraries/classic/classic'
As the github page states, you can do all the normal OOP stuff with this library and it should work fine. When creating a new class I usually do it in a separate file and place that file inside an objects folder. So, for instance, creating a Test class and instantiating it once would look like this:
-- in objects/Test.lua
Test = Object:extend()

function Test:new()

end

function Test:update(dt)

end

function Test:draw()

end
-- in main.lua
Object = require 'libraries/classic/classic'
require 'objects/Test'

function love.load()
    test_instance = Test()
end
So when require 'objects/Test' is called in main.lua, everything that is defined in the Test.lua file happens, which means that the Test global variable now contains the definition for the Test class. For this game, every class definition will be done like this, which means that class names must be unique since they are bound to a global variable. If you don't want to do things like this you can make the following changes:
-- in objects/Test.lua
local Test = Object:extend()
...
return Test
-- in main.lua
Test = require 'objects/Test'
By defining the Test variable as local in Test.lua it won't be bound to a global variable, which means you can bind it to whatever name you want when requiring it in main.lua. At the end of the Test.lua script the local variable is returned, and so in main.lua when Test = require 'objects/Test' is declared, the Test class definition is being assigned to the global variable Test.
Sometimes, like when writing libraries for other people, this is a better way of doing things so you don't pollute their global state with your library's variables. This is what classic does as well, which is why you have to initialize it by assigning it to the Object variable. One good result of this is that since we're assigning a library to a variable, if you wanted to you could have named Object as Class instead, and then your class definitions would look like Test = Class:extend().
One last thing that I do is to automate the require process for all classes. To add a class to the environment you need to type require 'objects/ClassName'. The problem with this is that there will be lots of classes and typing it for every class can be tiresome. So something like this can be done to automate that process:
function love.load()
    local object_files = {}
    recursiveEnumerate('objects', object_files)
end

function recursiveEnumerate(folder, file_list)
    local items = love.filesystem.getDirectoryItems(folder)
    for _, item in ipairs(items) do
        local file = folder .. '/' .. item
        if love.filesystem.isFile(file) then
            table.insert(file_list, file)
        elseif love.filesystem.isDirectory(file) then
            recursiveEnumerate(file, file_list)
        end
    end
end
So let's break this down. The recursiveEnumerate function recursively enumerates all files inside a given folder and adds them as strings to a table. It makes use of LÖVE's filesystem module, which contains lots of useful functions for doing stuff like this.
The first line inside the loop lists all files and folders in the given folder and returns them as a table of strings using love.filesystem.getDirectoryItems. Next, it iterates over all those and gets the full file path of each item by concatenating (concatenation of strings in Lua is done by using ..) the folder string and the item string.
Let's say that the folder string is 'objects' and that inside the objects folder there is a single file named GameObject.lua. And so the items list will look like items = {'GameObject.lua'}. When that list is iterated over, the local file = folder .. '/' .. item line will parse to local file = 'objects/GameObject.lua', which is the full path of the file in question.
Then, this full path is used to check if it is a file or a directory using the love.filesystem.isFile and love.filesystem.isDirectory functions. If it is a file then simply add it to the file_list table that was passed in from the caller, otherwise call recursiveEnumerate again, but now using this path as the folder variable. When this finishes running, the file_list table will be full of strings corresponding to the paths of all files inside folder. In our case, the object_files variable will be a table full of strings corresponding to all the classes in the objects folder.
There's still a step left, which is to take all those paths and require them:
function love.load()
    local object_files = {}
    recursiveEnumerate('objects', object_files)
    requireFiles(object_files)
end

function requireFiles(files)
    for _, file in ipairs(files) do
        local file = file:sub(1, -5)
        require(file)
    end
end
This is a lot more straightforward. It simply goes over the files and calls require on them. The only thing left to do is to remove the .lua from the end of the string, since the require function spits out an error if it's left in. The line that does that is local file = file:sub(1, -5) and it uses one of Lua's builtin string functions. So after this is done all classes defined inside the objects folder can be automatically loaded. The recursiveEnumerate function will also be used later to automatically load other resources like images, sounds and shaders.
OOP Exercises
6. Create a Circle class that receives x, y and radius arguments in its constructor, has x, y, radius and creation_time attributes and has update and draw methods. The x, y and radius attributes should be initialized to the values passed in from the constructor and the creation_time attribute should be initialized to the relative time the instance was created (see love.timer). The update method should receive a dt argument and the draw function should draw a white filled circle centered at x, y with radius radius (see love.graphics). An instance of this Circle class should be created at position 400, 300 with radius 50. It should also be updated and drawn to the screen. This is what the screen should look like:

7. Create an HyperCircle class that inherits from the Circle class. An HyperCircle is just like a Circle, except it also has an outer ring drawn around it. It should receive additional arguments line_width and outer_radius in its constructor. An instance of this HyperCircle class should be created at position 400, 300 with radius 50, line width 10 and outer radius 120. This is what the screen should look like:

8. What is the purpose of the : operator in Lua? How is it different from . and when should either be used?
9. Suppose we have the following code:
function createCounterTable()
    return {
        value = 1,
        increment = function(self) self.value = self.value + 1 end,
    }
end

function love.load()
    counter_table = createCounterTable()
    counter_table:increment()
end
What is the value of counter_table.value? Why does the increment function receive an argument named self? Could this argument be named something else? And what is the variable that self represents in this example?
10. Create a function that returns a table that contains the attributes a, b, c and sum. a, b and c should be initiated to 1, 2 and 3 respectively, and sum should be a function that adds a, b and c together. The final result of the sum should be stored in the c attribute of the table (meaning, after you do everything, the table should have an attribute c with the value 6 in it).
11. If a class has a method with the name of someMethod can there be an attribute of the same name? If not, why not?
12. What is the global table in Lua?
13. Based on the way we made classes be automatically loaded, whenever one class inherits from another we have code that looks like this:
SomeClass = ParentClass:extend()
Is there any guarantee that when this line is being processed the ParentClass variable is already defined? Or, to put it another way, is there any guarantee that ParentClass is required before SomeClass? If yes, what is that guarantee? If not, what could be done to fix this problem?
14. Suppose that all class files do not define the class globally but do so locally, like:
local ClassName = Object:extend()
...
return ClassName
How would the requireFiles function need to be changed so that we could still automatically load all classes?
Input
Now for how to handle input. The default way to do it in LÖVE is through a few callbacks. When defined, these callback functions will be called whenever the relevant event happens and then you can hook the game in there and do whatever you want with it:
function love.load()

end

function love.update(dt)

end

function love.draw()

end

function love.keypressed(key)
    print(key)
end

function love.keyreleased(key)
    print(key)
end

function love.mousepressed(x, y, button)
    print(x, y, button)
end

function love.mousereleased(x, y, button)
    print(x, y, button)
end
So in this case, whenever you press a key or click anywhere on the screen the information will be printed out to the console. One of the big problems I've always had with this way of doing things is that it forces you to structure everything you do that needs to receive input around these calls.
So, let's say you have a game object which has inside it a level object which has inside a player object. To get the player object receive keyboard input, all those 3 objects need to have the two keyboard related callbacks defined, because at the top level you only want to call game:keypressed inside love.keypressed, since you don't want the lower levels to know about the level or the player. So I created a library to deal with this problem. You can download it and install it like the other library that was covered. Here's a few examples of how it works:
function love.load()
    input = Input()
    input:bind('mouse1', 'test')
end

function love.update(dt)
    if input:pressed('test') then print('pressed') end
    if input:released('test') then print('released') end
    if input:down('test') then print('down') end
end
So what the library does is that instead of relying on callback functions for input, it simply asks if a certain key has been pressed on this frame and receives a response of true or false. In the example above on the frame that you press the mouse1 button, pressed will be printed to the screen, and on the frame that you release it, released will be printed. On all the other frames where the press didn't happen the input:pressed or input:released calls would have returned false and so whatever is inside of the conditional wouldn't be run. The same applies to the input:down function, except it returns true on every frame that the button is held down and false otherwise.
Often times you want behavior that repeats at a certain interval when a key is held down, instead of happening every frame. For that purpose you can use the down function like this:
function love.update(dt)
    if input:down('test', 0.5) then print('test event') end
end
So in this example, once the key bound to the test action is held down, every 0.5 seconds test event will be printed to the console.
Input Exercises
15. Suppose we have the following code:
function love.load()
    input = Input()
    input:bind('mouse1', function() print(love.math.random()) end)
end
Will anything happen when mouse1 is pressed? What about when it is released? And held down?
16. Bind the keypad + key to an action named add, then increment the value of a variable named sum (which starts at 0) by 1 every 0.25 seconds when the add action key is held down. Print the value of sum to the console every time it is incremented.
17. Can multiple keys be bound to the same action? If not, why not? And can multiple actions be bound to the same key? If not, why not?
18. If you have a gamepad, bind its DPAD buttons(fup, fdown...) to actions up, left, right and down and then print the name of the action to the console once each button is pressed.
19. If you have a gamepad, bind one of its trigger buttons (l2, r2) to an action named trigger. Trigger buttons return a value from 0 to 1 instead of a boolean saying if its pressed or not. How would you get this value?
20. Repeat the same as the previous exercise but for the left and right stick's horizontal and vertical position.
Timer
Now another crucial piece of code to have are general timing functions. For this I'll use hump, more especifically hump.timer.
Timer = require 'libraries/hump/timer'

function love.load()
    timer = Timer()
end

function love.update(dt)
    timer:update(dt)
end
According to the documentation it can be used directly through the Timer variable or it can be instantiated to a new one instead. I decided to do the latter. I'll use this global timer variable for global timers and then whenever timers inside objects are needed, like inside the Player class, it will have its own timer instantiated locally.
The most important timing functions used throughout the entire game are after, every and tween. And while I personally don't use the script function, some people might find it useful so it's worth a mention. So let's go through them:
function love.load()
    timer = Timer()
    timer:after(2, function() print(love.math.random()) end)
end
after is pretty straightfoward. It takes in a number and a function, and it executes the function after number seconds. In the example above, a random number would be printed to the console 2 seconds after the game is run. One of the cool things you can do with after is that you can chain multiple of those together, so for instance:
function love.load()
    timer = Timer()
    timer:after(2, function()
        print(love.math.random())
        timer:after(1, function()
            print(love.math.random())
            timer:after(1, function()
                print(love.math.random())
            end)
        end)
    end)
end
In this example, a random number would be printed 2 seconds after the start, then another one 1 second after that (3 seconds since the start), and finally another one another second after that (4 seconds since the start). This is somewhat similar to what the script function does, so you can choose which one you like best.
function love.load()
    timer = Timer()
    timer:every(1, function() print(love.math.random()) end)
end
In this example, a random number would be printed every 1 second. Like the after function it takes in a number and a function and executes the function after number seconds. Optionally it can also take a third argument which is the amount of times it should pulse for, so, for instance:
function love.load()
    timer = Timer()
    timer:every(1, function() print(love.math.random()) end, 5)
end
Would only print 5 numbers in the first 5 pulses. One way to get the every function to stop pulsing without specifying how many times it should be run for is by having it return false. This is useful for situations where the stop condition is not fixed or known at the time the every call was made.
Another way you can get the behavior of the every function is through the after function, like so:
function love.load()
    timer = Timer()
    timer:after(1, function(f)
        print(love.math.random())
        timer:after(1, f)
    end)
end
I never looked into how this works internally, but the creator of the library decided to do it this way and document it in the instructions so I'll just take it ^^. The usefulness of getting the funcionality of every in this way is that we can change the time taken between each pulse by changing the value of the second after call inside the first:
function love.load()
    timer = Timer()
    timer:after(1, function(f)
        print(love.math.random())
        timer:after(love.math.random(), f)
    end)
end
So in this example the time between each pulse is variable (between 0 and 1, since love.math.random returns values in that range by default), something that can't be achieved by default with the every function. Variable pulses are very useful in a number of situations so it's good to know how to do them. Now, on to the tween function:
function love.load()
    timer = Timer()
    circle = {radius = 24}
    timer:tween(6, circle, {radius = 96}, 'in-out-cubic')
end

function love.update(dt)
    timer:update(dt)
end

function love.draw()
    love.graphics.circle('fill', 400, 300, circle.radius)
end
The tween function is the hardest one to get used to because there are so many arguments, but it takes in a number of seconds, the subject table, the target table and a tween mode. Then it performs the tween on the subject table towards the values in the target table. So in the example above, the table circle has a key radius in it with the initial value of 24. Over the span of 6 seconds this value will changed to 96 using the in-out-cubic tween mode. (here's a useful list of all tweening modes) It sounds complicated but it looks like this:

The tween function can also take an additional argument after the tween mode which is a function to be called when the tween ends. This can be used for a number of purposes, but taking the previous example, we could use it to make the circle shrink back to normal after it finishes expanding:
function love.load()
    timer = Timer()
    circle = {radius = 24}
    timer:after(2, function()
        timer:tween(6, circle, {radius = 96}, 'in-out-cubic', function()
            timer:tween(6, circle, {radius = 24}, 'in-out-cubic')
        end)
    end)
end
And that looks like this:

These 3 functions - after, every and tween - are by far in the group of most useful functions in my code base. They are very versatile and they can achieve a lot of stuff. So make you sure you have some intuitive understanding of what they're doing!
One important thing about the timer library is that each one of those calls returns a handle. This handle can be used in conjunction with the cancel call to abort a specific timer:
function love.load()
    timer = Timer()
    local handle_1 = timer:after(2, function() print(love.math.random()) end)
    timer:cancel(handle_1)
So in this example what's happening is that first we call after to print a random number to the console after 2 seconds, and we store the handle of this timer in the handle_1 variable. Then we cancel that call by calling cancel with handle_1 as an argument. This is an extremely important thing to be able to do because often times we will get into a situation where we'll create timed calls based on certain events. Say, when someone presses the key r we want to print a random number to the console after 2 seconds:
function love.keypressed(key)
    if key == 'r' then
        timer:after(2, function() print(love.math.random()) end)
    end
end
If you add the code above to the main.lua file and run the project, after you press r a random number should appear on the screen with a delay. If you press r multiple times repeatedly, multiple numbers will appear with a delay in quick succession. But sometimes we want the behavior that if the event happens repeated times it should reset the timer and start counting from 0 again. This means that whenever we press r we want to cancel all previous timers created from when this event happened in the past. One way of doing this is to somehow store all handles created somewhere, bind them to an event identifier of some sort, and then call some cancel function on the event identifier itself which will cancel all timer handles associated with that event. This is what that solution looks like:
function love.keypressed(key)
    if key == 'r' then
        timer:after('r_key_press', 2, function() print(love.math.random()) end)
    end
end
I created an enhancement of the current timer module that supports the addition of event tags. So in this case, the event r_key_press is attached to the timer that is created whenever the r key is pressed. If the key is pressed multiple times repeatedly, the module will automatically see that this event has other timers registered to it and cancel those previous timers as a default behavior, which is what we wanted. If the tag is not used then it defaults to the normal behavior of the module.
You can download this enhanced version here and swap the timer import in main.lua from libraries/hump/timer to wherever you end up placing the EnhancedTimer.lua file, I personally placed it in libraries/enhanced_timer/EnhancedTimer. This also assumes that the hump library was placed inside the libraries folder. If you named your folders something different you must change the path at the top of the EnhancedTimer file. Additionally, you can also use this library I wrote which has the same functionality as hump.timer, but also handles event tags in the way I described.
Timer Exercises
21. Using only a for loop and one declaration of the after function inside that loop, print 10 random numbers to the screen with an interval of 0.5 seconds between each print.
22. Suppose we have the following code:
function love.load()
    timer = Timer()
    rect_1 = {x = 400, y = 300, w = 50, h = 200}
    rect_2 = {x = 400, y = 300, w = 200, h = 50}
end

function love.update(dt)
    timer:update(dt)
end

function love.draw()
    love.graphics.rectangle('fill', rect_1.x - rect_1.w/2, rect_1.y - rect_1.h/2, rect_1.w, rect_1.h)
    love.graphics.rectangle('fill', rect_2.x - rect_2.w/2, rect_2.y - rect_2.h/2, rect_2.w, rect_2.h)
end
Using only the tween function, tween the w attribute of the first rectangle over 1 second using the in-out-cubic tween mode. After that is done, tween the h attribute of the second rectangle over 1 second using the in-out-cubic tween mode. After that is done, tween both rectangles back to their original attributes over 2 seconds using the in-out-cubic tween mode. It should look like this:

23. For this exercise you should create an HP bar. Whenever the user presses the d key the HP bar should simulate damage taken. It should look like this:

As you can see there are two layers to this HP bar, and whenever damage is taken the top layer moves faster while the background one lags behind for a while.
24. Taking the previous example of the expanding and shrinking circle, it expands once and then shrinks once. How would you change that code so that it expands and shrinks continually forever?
25. Accomplish the results of the previous exercise using only the after function.
26. Bind the e key to expand the circle when pressed and the s to shrink the circle when pressed. Each new key press should cancel any expansion/shrinking that is still happening.
27. Suppose we have the following code:
function love.load()
    timer = Timer()
    a = 10
end

function love.update(dt)
    timer:update(dt)
end
Using only the tween function and without placing the a variable inside another table, how would you tween its value to 20 over 1 second using the linear tween mode?
Table Functions
Now for the final library I'll go over Yonaba/Moses which contains a bunch of functions to handle tables more easily in Lua. The documentation for it can be found here. By now you should be able to read through it and figure out how to install it and use it yourself.
But before going straight to exercises you should know how to print a table to the console and verify its values:
for k, v in pairs(some_table) do
    print(k, v)
end
Table Exercises
For all exercises assume you have the following tables defined:
a = {1, 2, '3', 4, '5', 6, 7, true, 9, 10, 11, a = 1, b = 2, c = 3, {1, 2, 3}}
b = {1, 1, 3, 4, 5, 6, 7, false}
c = {'1', '2', '3', 4, 5, 6}
d = {1, 4, 3, 4, 5, 6}
You are also required to use only one function from the library per exercise unless explicitly told otherwise.
28. Print the contents of the a table to the console using the each function.
29. Count the number of 1 values inside the b table.
30. Add 1 to all the values of the d table using the map function.
31. Using the map function, apply the following transformations to the a table: if the value is a number, it should be doubled; if the value is a string, it should have 'xD' concatenated to it; if the value is a boolean, it should have its value flipped; and finally, if the value is a table it should be omitted.
32. Sum all the values of the d list. The result should be 23.
33. Suppose you have the following code:
if _______ then
    print('table contains the value 9')
end
Which function from the library should be used in the underscored spot to verify if the b table contains or doesn't contain the value 9?
34. Find the first index in which the value 7 is found in the c table.
35. Filter the d table so that only numbers lower than 5 remain.
36. Filter the c table so that only strings remain.
37. Check if all values of the c and d tables are numbers or not. It should return false for the first and true for the second.
38. Shuffle the d table randomly.
39. Reverse the d table.
40. Remove all occurrences of the values 1 and 4 from the d table.
41. Create a combination of the b, c and d tables that doesn't have any duplicates.
42. Find the common values between b and d tables.
43. Append the b table to the d table.
Rooms and Areas
Introduction
In this article we'll cover some structural code needed before moving on to the actual game. We'll explore the idea of Rooms, which are equivalent to what's called a scene in other engines. And then we'll explore the idea of an Area, which is an object management type of construct that can go inside a Room. Like the two previous tutorials, this one will still have no code specific to the game and will focus on higher level architectural decisions.
Room
I took the idea of Rooms from GameMaker's documentation. One thing I like to do when figuring out how to approach a game architecture problem is to see how other people have solved it, and in this case, even though I've never used GameMaker, their idea of a Room and the functions around it gave me some really good ideas.
As the description there says, Rooms are where everything happens in a game. They're the places where all game objects will be created, updated and drawn and you can change from one Room to the other. Those rooms are also normal objects that I'll place inside a rooms folder. This is what one room called Stage would look like:
Stage = Object:extend()

function Stage:new()

end

function Stage:update(dt)

end

function Stage:draw()

end
Simple Rooms
At its simplest form this system only needs one additional variable and one additional function to work:
function love.load()
    current_room = nil
end

function love.update(dt)
    if current_room then current_room:update(dt) end
end

function love.draw()
    if current_room then current_room:draw() end
end

function gotoRoom(room_type, ...)
    current_room = _G[room_type](...)
end
At first in love.load a global current_room variable is defined. The idea is that at all times only one room can be currently active and so that variable will hold a reference to the current active room object. Then in love.update and love.draw, if there is any room currently active it will be updated and drawn. This means that all rooms must have an update and a draw function defined.
The gotoRoom function can be used to change between rooms. It receives a room_type, which is just a string with the name of the class of the room we want to change to. So, for instance, if there's a Stage class defined as a room, it means the 'Stage' string can be passed in. This works based on how the automatic loading of classes was set up in the previous tutorial, which loads all classes as global variables.
In Lua, global variables are held in a global environment table called _G, so this means that they can be accessed like any other variable in a normal table. If the Stage global variable contains the definition of the Stage class, it can be accessed by just saying Stage anywhere on the program, or also by saying _G['Stage'] or _G.Stage. Because we want to be able to load any arbitrary room, it makes sense to receive the room_type string and then access the class definition via the global table.
So in the end, if room_type is the string 'Stage', the line inside the gotoRoom function parses to current_room = Stage(...), which means that a new Stage room is being instantiated. This also means that any time a change to a new room happens, that new room is created from zero and the previous room is deleted. The way this works in Lua is that whenever a table is not being referred to anymore by any variables, the garbage collector will eventually collect it. And so when the instance of the previous room stops being referred to by the current_room variable, eventually it will be collected.
There are obvious limitations to this setup, for instance, often times you don't want rooms to be deleted when you change to a new one, and often times you don't want a new room to be created from scratch every time you change to it. Avoiding this becomes impossible with this setup.
For this game though, this is what I'll use. The game will only have 3 or 4 rooms, and all those rooms don't need continuity between each other, i.e. they can be created from scratch and deleted any time you move from one to the other and it works fine.
Let's go over a small example of how we can map this system onto a real existing game. Let's look at Nuclear Throne:

Watch the first minute or so of this video until the guy dies once to get an idea of what the game is like.
The game loop is pretty simple and, for the purposes of this simple room setup it fits perfectly because no room needs continuity with previous rooms. (you can't go back to a previous map, for instance) The first screen you see is the main menu:
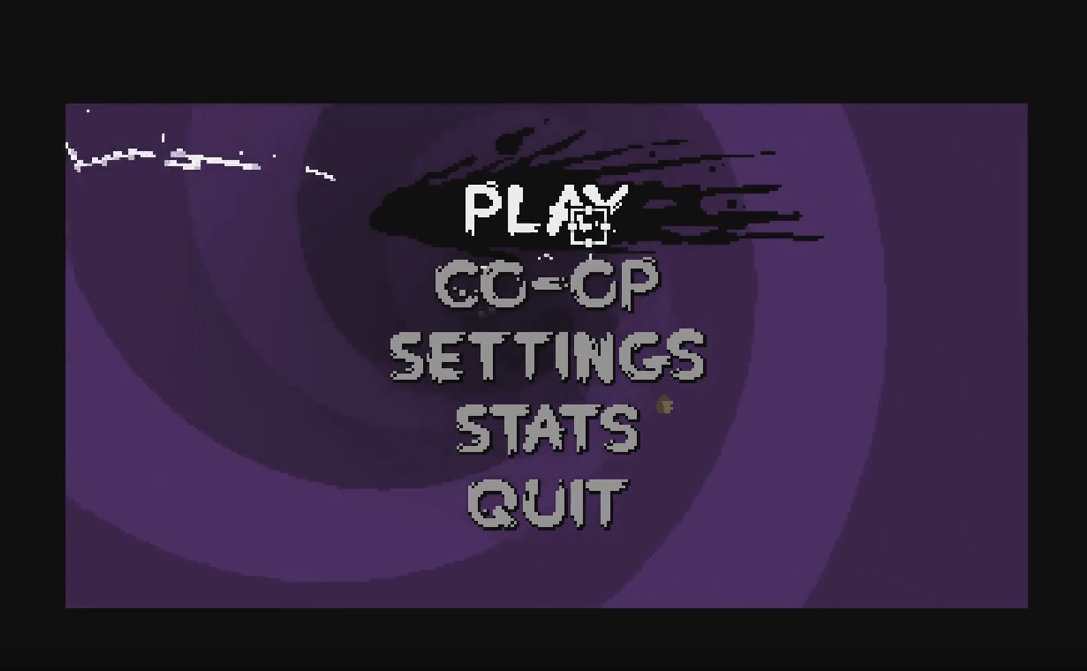
I'd make this a MainMenu room and in it I'd have all the logic needed for this menu to work. So the background, the five options, the effect when you select a new option, the little bolts of lightning on the edges of screen, etc. And then whenever the player would select an option I would call gotoRoom(option_type), which would swap the current room to be the one created for that option. So in this case there would be additional Play, CO-OP, Settings and Stats rooms.
Alternatively, you could have one MainMenu room that takes care of all those additional options, without the need to separate it into multiple rooms. Often times it's a better idea to keep everything in the same room and handle some transitions internally rather than through the external system. It depends on the situation and in this case there's not enough details to tell which is better.
Anyway, the next thing that happens in the video is that the player picks the play option, and that looks like this:
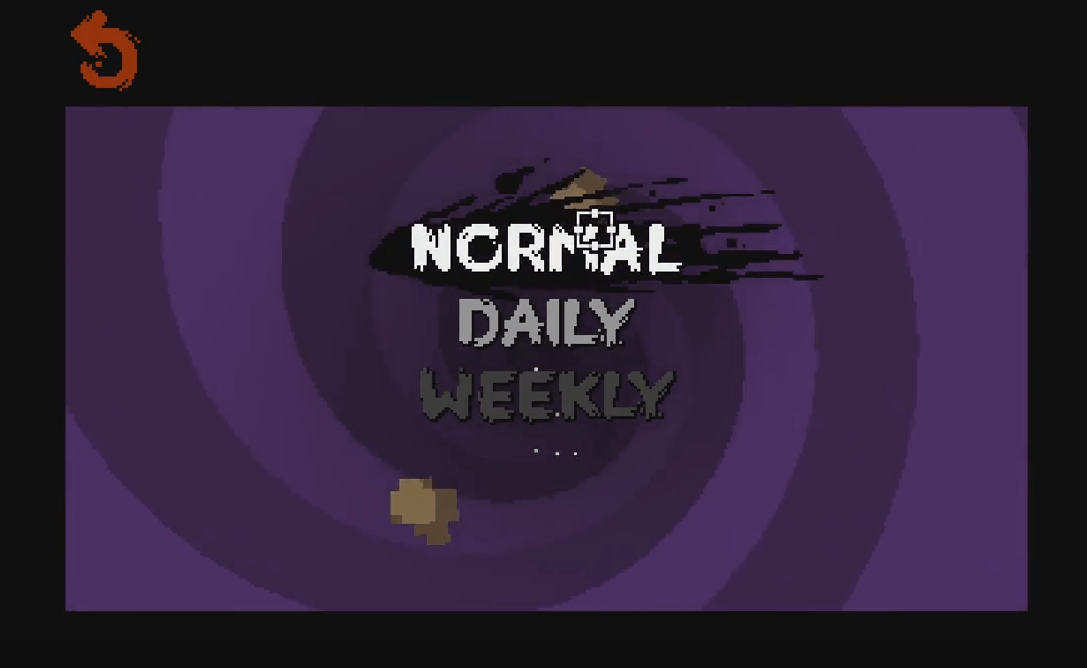
New options appear and you can choose between normal, daily or weekly mode. Those only change the level generation seed as far as I remember, which means that in this case we don't need new rooms for each one of those options (can just pass a different seed as argument in the gotoRoom call). The player chooses the normal option and this screen appears:
I would call this the CharacterSelect room, and like the others, it would have everything needed to make that screen happen, the background, the characters in the background, the effects that happen when you move between selections, the selections themselves and all the logic needed for that to happen. Once the character is chosen the loading screen appears:
Then the game:
When the player finishes the current level this screen popups before the transition to the next one:

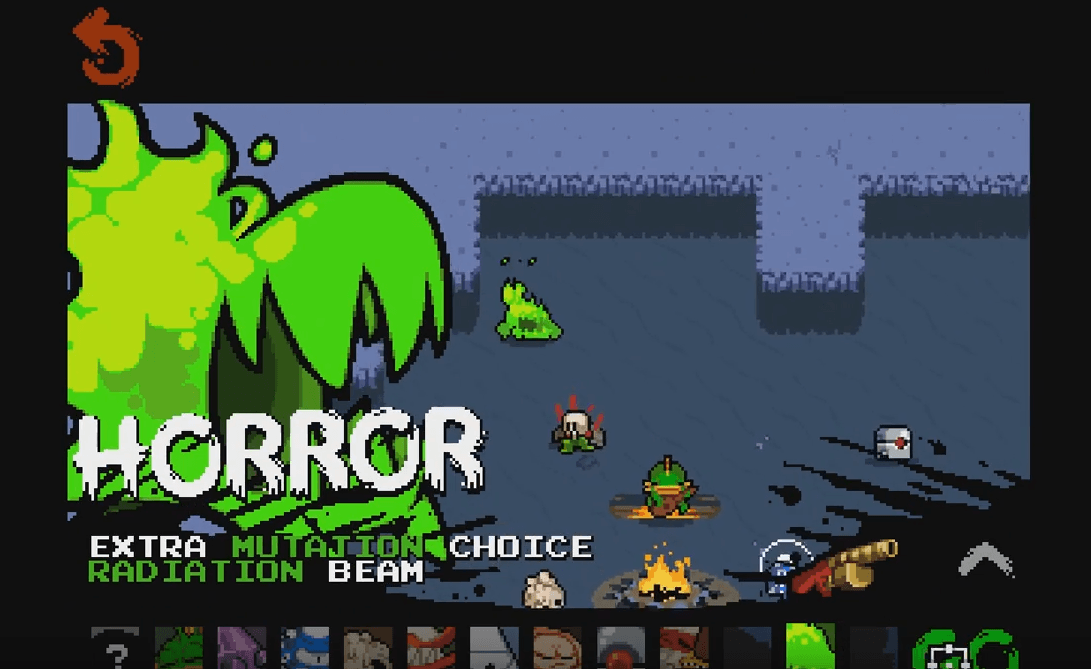
Once the player selects a passive from previous screen another loading screen is shown. Then the game again in another level. And then when the player dies this one:
All those are different screens and if I were to follow the logic I followed until now I'd make them all different rooms: LoadingScreen, Game, MutationSelect and DeathScreen. But if you think more about it some of those become redundant.
For instance, there's no reason for there to be a separate LoadingScreen room that is separate from Game. The loading that is happening probably has to do with level generation, which will likely happen inside the Game room, so it makes no sense to separate that to another room because then the loading would have to happen in the LoadingScreen room, and not on the Game room, and then the data created in the first would have to be passed to the second. This is an overcomplication that is unnecessary in my opinion.
Another one is that the death screen is just an overlay on top of the game in the background (which is still running), which means that it probably also happens in the same room as the game. I think in the end the only one that truly could be a separate room is the MutationSelect screen.
This means that, in terms of rooms, the game loop for Nuclear Throne, as explored in the video would go something like: MainMenu -> Play -> CharacterSelect -> Game -> MutationSelect -> Game -> .... Then whenever a death happens, you can either go back to a new MainMenu or retry and restart a new Game. All these transitions would be achieved through the simple gotoRoom function.
Persistent Rooms
For completion's sake, even though this game will not use this setup, I'll go over one that supports some more situations:
function love.load()
    rooms = {}
    current_room = nil
end

function love.update(dt)
    if current_room then current_room:update(dt) end
end

function love.draw()
    if current_room then current_room:draw() end
end

function addRoom(room_type, room_name, ...)
    local room = _G[room_type](room_name, ...)
    rooms[room_name] = room
    return room
end

function gotoRoom(room_type, room_name, ...)
    if current_room and rooms[room_name] then
        if current_room.deactivate then current_room:deactivate() end
        current_room = rooms[room_name]
        if current_room.activate then current_room:activate() end
    else current_room = addRoom(room_type, room_name, ...) end
end
In this case, on top of providing a room_type string, now a room_name value is also passed in. This is because in this case I want rooms to be able to be referred to by some identifier, which means that each room_name must be unique. This room_name can be either a string or a number, it really doesn't matter as long as it's unique.
The way this new setup works is that now there's an addRoom function which simply instantiates a room and stores it inside a table. Then the gotoRoom function, instead of instantiating a new room every time, can now look in that table to see if a room already exists, if it does, then it just retrieves it, otherwise it creates a new one from scratch.
Another difference here is the use of the activate and deactivate functions. Whenever a room already exists and you ask to go to it again by calling gotoRoom, first the current room is deactivated, the current room is changed to the target room, and then that target room is activated. These calls are useful for a number of things like saving data to or loading data from disk, dereferencing variables (so that they can get collected) and so on.
In any case, what this new setup allows for is for rooms to be persistent and to remain in memory even if they aren't active. Because they're always being referenced by the rooms table, whenever current_room changes to another room, the previous one won't be garbage collected and so it can be retrieved in the future.
Let's look at an example that would make good use of this new system, this time with The Binding of Isaac:

Watch the first minute or so of this video. I'm going to skip over the menus and stuff this time and mostly focus on the actual gameplay. It consists of moving from room to room killing enemies and finding items. You can go back to previous rooms and those rooms retain what happened to them when you were there before, so if you killed the enemies and destroyed the rocks of a room, when you go back it will have no enemies and no rocks. This is a perfect fit for this system.
The way I'd setup things would be to have a Room room where all the gameplay of a room happens. And then a general Game room that coordinates things at a higher level. So, for instance, inside the Game room the level generation algorithm would run and from the results of that multiple Room instances would be created with the addRoom call. Each of those instances would have their unique IDs, and when the game starts, gotoRoom would be used to activate one of those. As the player moves around and explores the dungeon further gotoRoom calls would be made and already created Room instances would be activated/deactivated as the player moves about.
One of the things that happens in Isaac is that as you move from one room to the other there's a small transition that looks like this:

I didn't mention this in the Nuclear Throne example either, but that also has a few transitions that happen in between rooms. There are multiple ways to approach these transitions, but in the case of Isaac it means that two rooms need to be drawn at once, so using only one current_room variable doesn't really work. I'm not going to go over how to change the code to fix this, but I thought it'd be worth mentioning that the code I provided is not all there is to it and that I'm simplifying things a bit. Once I get into the actual game and implement transitions I'll cover this is more detail.
Room Exercises
44. Create three rooms: CircleRoom which draws a circle at the center of the screen; RectangleRoom which draws a rectangle at the center of the screen; and PolygonRoom which draws a polygon to the center of the screen. Bind the keys F1, F2 and F3 to change to each room.
45. What is the closest equivalent of a room in the following engines: Unity, GODOT, HaxeFlixel, Construct 2 and Phaser. Go through their documentation and try to find out. Try to also see what methods those objects have and how you can change from one room to another.
46. Pick two single player games and break them down in terms of rooms like I did for Nuclear Throne and Isaac. Try to think through things realistically and really see if something should be a room on its own or not. And try to specify when exactly do addRoom or gotoRoom calls would happen.
47. In a general way, how does the garbage collector in Lua work? (and if you don't know what a garbage collector is then read up on that) How can memory leaks happen in Lua? What are some ways to prevent those from happening or detecting that they are happening?
Areas
Now for the idea of an Area. One of the things that usually has to happen inside a room is the management of various objects. All objects need to be updated and drawn, as well as be added to the room and removed from it when they're dead. Sometimes you also need to query for objects in a certain area (say, when an explosion happens you need to deal damage to all objects around it, this means getting all objects inside a circle and dealing damage to them), as well as applying certain common operations to them like sorting them based on their layer depth so they can be drawn in a certain order. All these functionalities have been the same across multiple rooms and multiple games I've made, so I condensed them into a class called Area:
Area = Object:extend()

function Area:new(room)
    self.room = room
    self.game_objects = {}
end

function Area:update(dt)
    for _, game_object in ipairs(self.game_objects) do game_object:update(dt) end
end

function Area:draw()
    for _, game_object in ipairs(self.game_objects) do game_object:draw() end
end
The idea is that this object will be instantiated inside a room. At first the code above only has a list of potential game objects, and those game objects are being updated and drawn. All game objects in the game will inherit from a single GameObject class that has a few common attributes that all objects in the game will have. That class looks like this:
GameObject = Object:extend()

function GameObject:new(area, x, y, opts)
    local opts = opts or {}
    if opts then for k, v in pairs(opts) do self[k] = v end end

    self.area = area
    self.x, self.y = x, y
    self.id = UUID()
    self.dead = false
    self.timer = Timer()
end

function GameObject:update(dt)
    if self.timer then self.timer:update(dt) end
end

function GameObject:draw()

end
The constructor receives 4 arguments: an area, x, y position and an opts table which contains additional optional arguments. The first thing that's done is to take this additional opts table and assign all its attributes to this object. So, for instance, if we create a GameObject like this game_object = GameObject(area, x, y, {a = 1, b = 2, c = 3}), the line for k, v in pairs(opts) do self[k] = v is essentially copying the a = 1, b = 2 and c = 3 declarations to this newly created instance. By now you should be able to understand how this works, if you don't then read up more on the OOP section in the past article as well as how tables in Lua work.
Next, the reference to the area instance passed in is stored in self.area, and the position in self.x, self.y. Then an ID is defined for this game object. This ID should be unique to each object so that we can identify which object is which without conflict. For the purposes of this game a simple UUID generating function will do. Such a function exists in a library called lume in lume.uuid. We're not going to use this library, only this one function, so it makes more sense to just take that one instead of installing the whole library:
function UUID()
    local fn = function(x)
        local r = math.random(16) - 1
        r = (x == "x") and (r + 1) or (r % 4) + 9
        return ("0123456789abcdef"):sub(r, r)
    end
    return (("xxxxxxxx-xxxx-4xxx-yxxx-xxxxxxxxxxxx"):gsub("[xy]", fn))
end
I place this code in a file named utils.lua. This file will contain a bunch of utility functions that don't really fit anywhere. What this function spits out is a string like this '123e4567-e89b-12d3-a456-426655440000' that for all intents and purposes is going to be unique.
One thing to note is that this function uses the math.random function. If you try doing print(UUID()) to see what it generates, you'll find that every time you run the project it's going to generate the same IDs. This problem happens because the seed used is always the same. One way to fix this is to, as the program starts up, randomize the seed based on the time, which can be done like this math.randomseed(os.time()).
However, what I did was to just use love.math.random instead of math.random. If you remember the first article of this series, the first function called in the love.run function is love.math.randomSeed(os.time()), which does exactly the same job of randomizing the seed, but for LÖVE's random generator instead. Because I'm using LÖVE, whenever I need some random functionality I'm going to use its functions instead of Lua's as a general rule. Once you make that change in the UUID function you'll see that it starts generating different IDs.
Back to the game object, the dead variable is defined. The idea is that whenever dead becomes true the game object will be removed from the game. Then an instance of the Timer class is assigned to each game object as well. I've found that timing functions are used on almost every object, so it just makes sense to have it as a default for all of them. Finally, the timer is updated on the update function.
Given all this, the Area class should be changed as follows:
Area = Object:extend()

function Area:new(room)
    self.room = room
    self.game_objects = {}
end

function Area:update(dt)
    for i = #self.game_objects, 1, -1 do
        local game_object = self.game_objects[i]
        game_object:update(dt)
        if game_object.dead then table.remove(self.game_objects, i) end
    end
end

function Area:draw()
    for _, game_object in ipairs(self.game_objects) do game_object:draw() end
end
The update function now takes into account the dead variable and acts accordingly. First, the game object is update normally, then a check to see if it's dead happens. If it is, then it's simply removed from the game_objects list. One important thing here is that the loop is happening backwards, from the end of the list to the start. This is because if you remove elements from a Lua table while moving forward in it it will end up skipping some elements, as this discussion shows.
Finally, one last thing that should be added is an addGameObject function, which will add a new game object to the Area:
function Area:addGameObject(game_object_type, x, y, opts)
    local opts = opts or {}
    local game_object = _G[game_object_type](self, x or 0, y or 0, opts)
    table.insert(self.game_objects, game_object)
    return game_object
end
It would be called like this area:addGameObject('ClassName', 0, 0, {optional_argument = 1}). The game_object_type variable will work like the strings in the gotoRoom function work, meaning they're names for the class of the object to be created. _G[game_object_type], in the example above, would parse to the ClassName global variable, which would contain the definition for the ClassName class. In any case, an instance of the target class is created, added to the game_objects list and then returned. Now this instance will be updated and drawn every frame.
And that how this class will work for now. This class is one that will be changed a lot as the game is built but this should cover the basic behavior it should have (adding, removing, updating and drawing objects).
Area Exercises
48. Create a Stage room that has an Area in it. Then create a Circle object that inherits from GameObject and add an instance of that object to the Stage room at a random position every 2 seconds. The Circle instance should kill itself after a random amount of time between 2 and 4 seconds.
49. Create a Stage room that has no Area in it. Create a Circle object that does not inherit from GameObject and add an instance of that object to the Stage room at a random position every 2 seconds. The Circle instance should kill itself after a random amount of time between 2 and 4 seconds.
50. The solution to exercise 1 introduced the random function. Augment that function so that it can take only one value instead of two and it should generate a random real number between 0 and the value on that case (when only one argument is received). Also augment the function so that min and max values can be reversed, meaning that the first value can be higher than the second.
51. What is the purpose of the local opts = opts or {} in the addGameObject function?
Exercises
Introduction
In the previous three tutorials we went over a lot of code that didn't have anything to do directly with the game. All of that code can be used independently of the game you're making which is why I call it the engine code in my head, even though I guess it's not really an engine. As we make more progress in the game I'll constantly be adding more and more code that falls into that category and that can be used across multiple games. If you take anything out of these tutorials that code should definitely be it and it has been extremely useful to me over time.
Before moving on to the next part where we'll start with the game itself you need to be comfortable with some of the concepts taught in the previous tutorials, so here are some more exercises.
Exercises
52. Create a getGameObjects function inside the Area class that works as follows:
-- Get all game objects of the Enemy class
all_enemies = area:getGameObjects(function(e)
    if e:is(Enemy) then
        return true
    end
end)

-- Get all game objects with over 50 HP
healthy_objects = area:getGameObjects(function(e)
    if e.hp and e.hp >= 50 then
        return true
    end
end)
It receives a function that receives a game object and performs some test on it. If the result of the test is true then the game object will be added to the table that is returned once getGameObjects is fully run.
53. What is the value in a, b, c, d, e, f and g?
a = 1 and 2
b = nil and 2
c = 3 or 4
d = 4 or false
e = nil or 4
f = (4 > 3) and 1 or 2
g = (3 > 4) and 1 or 2
54. Create a function named printAll that receives an unknown number of arguments and prints them all to the console. printAll(1, 2, 3) will print 1, 2 and 3 to the console and printAll(1, 2, 3, 4, 5, 6, 7, 8, 9) will print from 1 to 9 to the console, for instance. The number of arguments passed in is unknown and may vary.
55. Similarly to the previous exercise, create a function named printText that receives an unknown number of strings, concatenates them all into a single string and then prints that single string to the console.
56. How can you trigger a garbage collection cycle?
57. How can you show how much memory is currently being used up by your Lua program?
58. How can you trigger an error that halts the execution of the program and prints out a custom error message?
59. Create a class named Rectangle that draws a rectangle with some width and height at the position it was created. Create 10 instances of this class at random positions of the screen and with random widths and heights. When the d key is pressed a random instance should be deleted from the environment. When the number of instances left reaches 0, another 10 new instances should be created at random positions of the screen and with random widths and heights.
60. Create a class named Circle that draws a circle with some radius at the position it was created. Create 10 instances of this class at random positions of the screen with random radius, and also with an interval of 0.25 seconds between the creation of each instance. After all instances are created (so after 2.5 seconds) start deleting once random instance every [0.5, 1] second (a random number between 0.5 and 1). After all instances are deleted, repeat the entire process of recreation of the 10 instances and their eventual deletion. This process should repeat forever.
61. Create a queryCircleArea function inside the Area class that works as follows:
-- Get all objects of class 'Enemy' and 'Projectile' in a circle of 50 radius around point 100, 100
objects = area:queryCircleArea(100, 100, 50, {'Enemy', 'Projectile'})
It receives an x, y position, a radius and a list of strings containing names of target classes. Then it returns all objects belonging to those classes inside the circle of radius radius centered in position x, y.
62. Create a getClosestGameObject function inside the Area class that works follows:
-- Get the closest object of class 'Enemy' in a circle of 50 radius around point 100, 100
closest_object = area:getClosestObject(100, 100, 50, {'Enemy'})
It receives the same arguments as the queryCircleArea function but returns only one object (the closest one) instead.
63. How would you check if a method exists on an object before calling it? And how would you check if an attribute exists before using its value?
64. Using only one for loop, how can you write the contents of one table to another?
Game Basics
Introduction
In this part we'll start going over the game itself. First we'll go over an overview of how the game is structured in terms of gameplay, then we'll focus on a few basics that are common to all parts of the game, like its pixelated look, the camera, as well as the physics simulation. After that we'll go over basic player movement and lastly we'll take a look at garbage collection and how we should look out for possible object leaks.
Gameplay Structure
The game itself is divided in only 3 different Rooms: Stage, Console and SkillTree.
The Stage room is where all the actual gameplay will take place and it will have objects such as the player, enemies, projectiles, resources, powerups and so on. The gameplay is very similar to that of Bit Blaster XL and is actually quite simple. I chose something this simple because it would allow me to focus on the other aspect of the game (the huge skill tree) more thoroughly than if the gameplay was more complicated.
The Console room is where all the "menu" kind of stuff happens: changing sound and video settings, seeing achievements, choosing which ship you want to play with, accessing the skill tree, and so on. Instead of creating various different menus it makes more sense for a game that has this sort of computery look to it (also known as lazy programmer art xD) to go for this, since the console emulates a terminal and the idea is that you (the player) are just playing the game through some terminal somewhere.
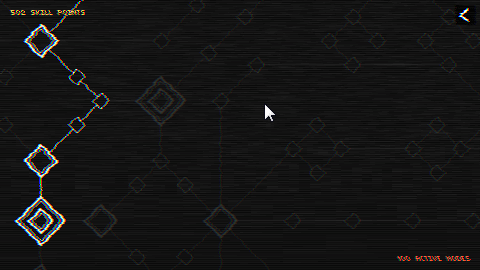
The SkillTree room is where all the passive skills can be acquired. In the Stage room you can get SP (skill points) that spawn randomly or after you kill enemies, and then once you die you can use those skill points to buy passive skills. The idea is to try something massive like Path of Exile's Passive Skill Tree and I think I was mildly successful at that. The skill tree I built has between 600-800 nodes and I think that's good enough.
I'll go over the creation of each of those rooms in detail, including all skills in the skill tree. However, I highly encourage you to deviate from what I'm writing as much as possible. A lot of the decisions I'm making when it comes to gameplay are pretty much just my own preference, and you might prefer something different.
For instance, instead of a huge skill tree you could prefer a huge class system that allows tons of combinations like Tree of Savior's. So instead of building the passive skill tree like I am, you could follow along on the implementation of all passive skills, but then build your own class system that uses those passive skills instead of building a skill tree.
This is just one idea and there are many different areas in which you could deviate in a similar way. One of the reasons I'm writing these tutorials with exercises is to encourage people to engage with the material by themselves instead of just following along because I think that that way people learn better. So whenever you see an opportunity to do something differently I highly recommend trying to do it.
Game Size
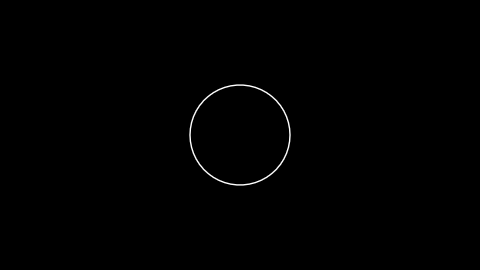
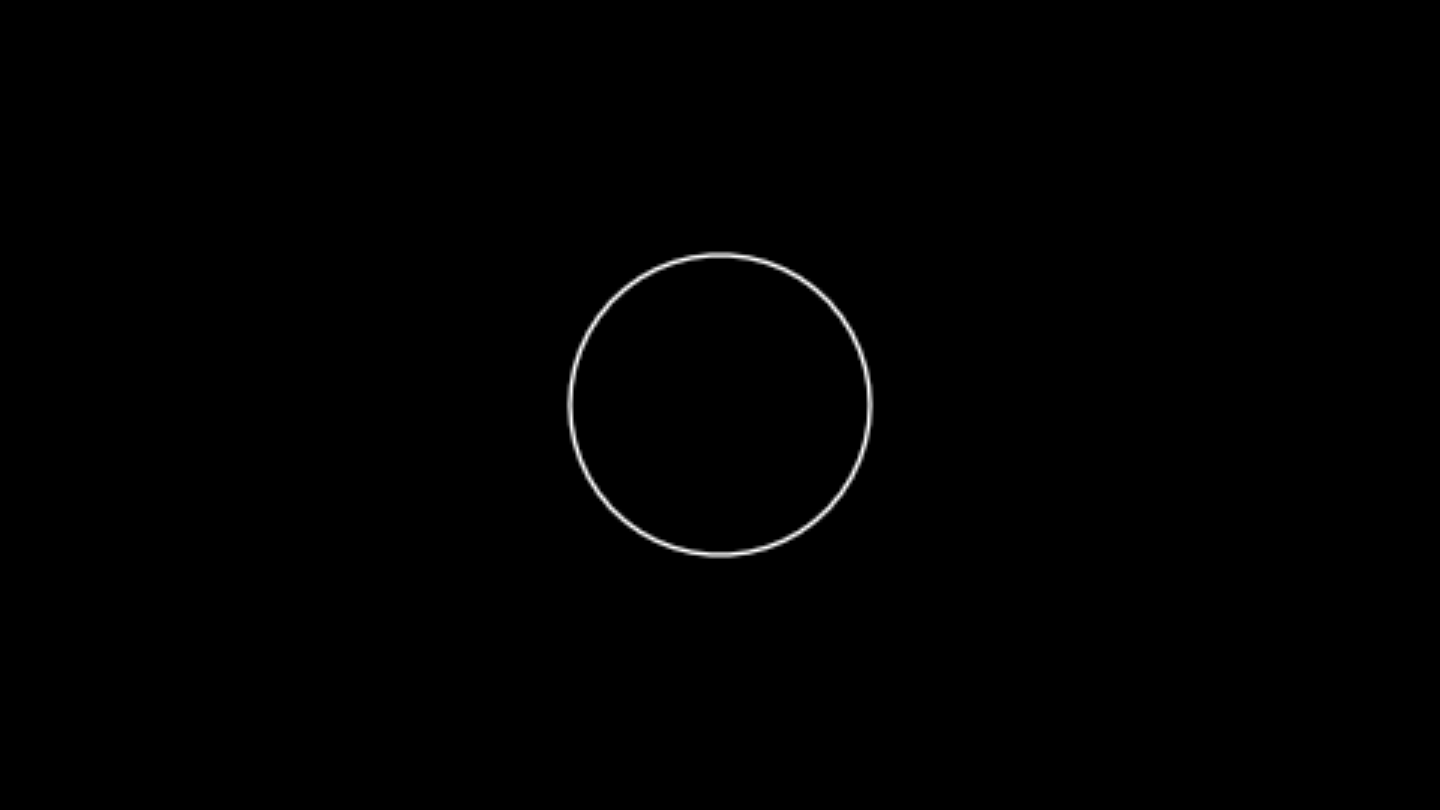
Now let's start with the Stage. The first thing we want (and this will be true for all rooms, not just the Stage) is for it to have a sort low resolution pixelated look to it. For instance, look at this circle:

And then look at this:

I want the second one. The reason for this is purely aesthetic and my own personal preference. There are a number of games that don't go for the pixelated look but still use simple shapes and colors to get a really nice look, like this one. So it just depends on which style you prefer and how much you can polish it. But for this game I'll go with the pixelated look.
The way to achieve that is by defining a very small default resolution first, preferably something that scales up exactly to a target resolution of 1920x1080. For this game I'll go with 480x270, since that's the target 1920x1080 divided by 4. To set the game's size to be this by default we need to use the file conf.lua, which as I explained in a previous article is a configuration file that defines a bunch of default settings about a LÖVE project, including the resolution that the window will start with.
On top of that, in that file I also define two global variables gw and gh, corresponding to width and height of the base resolution, and sx and sy ones, corresponding to the scale that should be applied to the base resolution. The conf.lua file should be placed in the same folder as the main.lua file and this is what it should look like:
gw = 480
gh = 270
sx = 1
sy = 1

function love.conf(t)
    t.identity = nil                   -- The name of the save directory (string)
    t.version = "0.10.2"                -- The LÖVE version this game was made for (string)
    t.console = false                  -- Attach a console (boolean, Windows only)

    t.window.title = "BYTEPATH" -- The window title (string)
    t.window.icon = nil                -- Filepath to an image to use as the window's icon (string)
    t.window.width = gw -- The window width (number)
    t.window.height = gh -- The window height (number)
    t.window.borderless = false        -- Remove all border visuals from the window (boolean)
    t.window.resizable = true          -- Let the window be user-resizable (boolean)
    t.window.minwidth = 1              -- Minimum window width if the window is resizable (number)
    t.window.minheight = 1             -- Minimum window height if the window is resizable (number)
    t.window.fullscreen = false        -- Enable fullscreen (boolean)
    t.window.fullscreentype = "exclusive" -- Standard fullscreen or desktop fullscreen mode (string)
    t.window.vsync = true              -- Enable vertical sync (boolean)
    t.window.fsaa = 0                  -- The number of samples to use with multi-sampled antialiasing (number)
    t.window.display = 1               -- Index of the monitor to show the window in (number)
    t.window.highdpi = false           -- Enable high-dpi mode for the window on a Retina display (boolean)
    t.window.srgb = false              -- Enable sRGB gamma correction when drawing to the screen (boolean)
    t.window.x = nil                   -- The x-coordinate of the window's position in the specified display (number)
    t.window.y = nil                   -- The y-coordinate of the window's position in the specified display (number)

    t.modules.audio = true -- Enable the audio module (boolean)
    t.modules.event = true             -- Enable the event module (boolean)
    t.modules.graphics = true          -- Enable the graphics module (boolean)
    t.modules.image = true             -- Enable the image module (boolean)
    t.modules.joystick = true -- Enable the joystick module (boolean)
    t.modules.keyboard = true          -- Enable the keyboard module (boolean)
    t.modules.math = true              -- Enable the math module (boolean)
    t.modules.mouse = true             -- Enable the mouse module (boolean)
    t.modules.physics = true -- Enable the physics module (boolean)
    t.modules.sound = true -- Enable the sound module (boolean)
    t.modules.system = true            -- Enable the system module (boolean)
    t.modules.timer = true             -- Enable the timer module (boolean), Disabling it will result 0 delta time in love.update
    t.modules.window = true            -- Enable the window module (boolean)
    t.modules.thread = true            -- Enable the thread module (boolean)
end
If you run the game now you should see a smaller window than you had before.
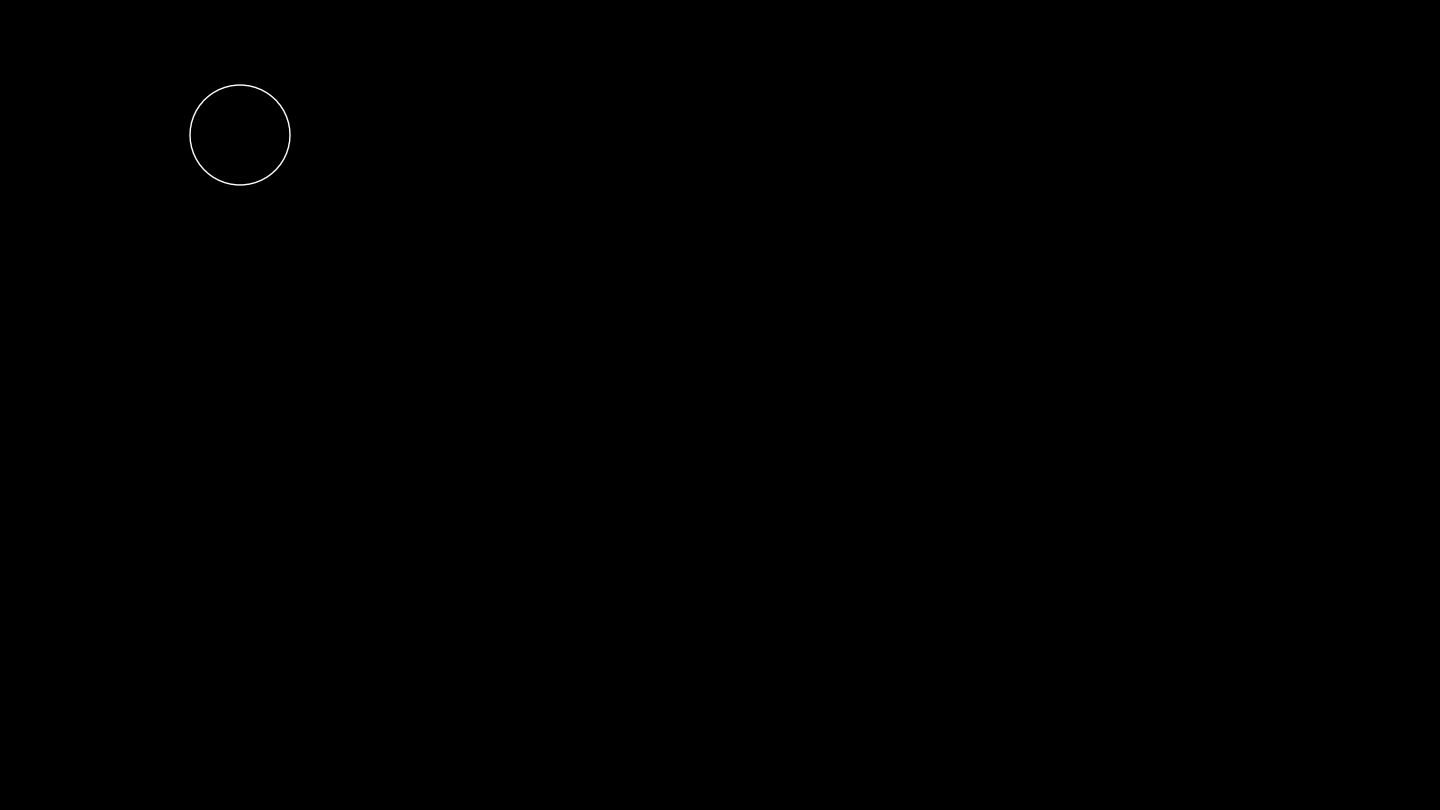
Now, to achieve the pixelated look when we scale the window up we need to do some extra work. If you were to draw a circle at the center of the screen (gw/2, gh/2) right now, like this:
And scale the screen up directly by calling love.window.setMode with width 3*gw and height 3*gh, for instance, you'd get something like this:
And as you can see, the circle didn't scale up with the screen and it just stayed a small circle. And it also didn't stay centered on the screen, because gw/2 and gh/2 isn't the center of the screen anymore when it's scaled up by 3. What we want is to be able to draw a small circle at the base resolution of 480x270, but then when the screen is scaled up to fit a normal monitor, the circle is also scaled up proportionally (and in a pixelated manner) and its position also remains proportionally the same. The easiest way to do that is by using a Canvas, which also goes by the name of framebuffer or render target in other engines. First, we'll create a canvas with the base resolution in the constructor of the Stage class:
function Stage:new()
    self.area = Area(self)
    self.main_canvas = love.graphics.newCanvas(gw, gh)
end
This creates a canvas with size 480x270 that we can draw to:
function Stage:draw()
    love.graphics.setCanvas(self.main_canvas)
    love.graphics.clear()
        love.graphics.circle('line', gw/2, gh/2, 50)
        self.area:draw()
    love.graphics.setCanvas()
end
The way the canvas is being drawn to is simply following the example on the Canvas page. According to the page, when we want to draw something to a canvas we need to call love.graphics.setCanvas, which will redirect all drawing operations to the currently set canvas. Then, we call love.graphics.clear, which will clear the contents of this canvas on this frame, since it was also drawn to in the last frame and every frame we want to draw everything from scratch. Then after that we draw what we want to draw and use setCanvas again, but passing nothing this time, so that our target canvas is unset and drawing operations aren't redirected to it anymore.
If we stopped here then nothing would appear on the screen. This happens because everything we drew went to the canvas but we're not actually drawing the canvas itself. So now we need to draw that canvas itself to the screen, and that looks like this:
function Stage:draw()
    love.graphics.setCanvas(self.main_canvas)
    love.graphics.clear()
        love.graphics.circle('line', gw/2, gh/2, 50)
        self.area:draw()
    love.graphics.setCanvas()

    love.graphics.setColor(255, 255, 255, 255)
    love.graphics.setBlendMode('alpha', 'premultiplied')
    love.graphics.draw(self.main_canvas, 0, 0, 0, sx, sy)
    love.graphics.setBlendMode('alpha')
end
We simply use love.graphics.draw to draw the canvas to the screen, and then we also wrap that with some love.graphics.setBlendMode calls that according to the Canvas page on the LÖVE wiki are used to prevent improper blending. If you run this now you should see the circle being drawn.
Note that we used sx and sy to scale the Canvas up. Those variables are set to 1 right now, but if you change those variables to 3, for instance, this is what would happen:

You can't see anything! But this is the because the circle that was now in the middle of the 480x270 canvas, is now in the middle of a 1440x810 canvas. Since the screen itself is only 480x270, you can't see the entire Canvas that is bigger than the screen. To fix this we can create a function named resize in main.lua that will change both sx and sy as well as the screen size itself whenever it's called:
function resize(s)
    love.window.setMode(s*gw, s*gh)
    sx, sy = s, s
end
And so if we call resize(3) in love.load, this should happen:
And this is roughly what we wanted. There's only one problem though: the circle looks kinda blurry instead of being properly pixelated.
The reason for this is that whenever things are scaled up or down in LÖVE, they use a FilterMode and this filter mode is set to 'linear' by default. Since we want the game to have a pixelated look we should change this to 'nearest'. Calling love.graphics.setDefaultFilter with the 'nearest' argument at the start of love.load should fix the issue. Another thing to do is to set the LineStyle to 'rough'. Because it's set to 'smooth' by default, LÖVE primitives will be drawn with some aliasing to them, and this doesn't work for a pixelated look. If you do all that and run the code again, it should look like this:

And it looks crispy and pixelated like we wanted it to! Most importantly, now we can use one resolution to build the entire game around. If we want to spawn an object at the center of the screen then we can say that it's x, y position should be gw/2, gh/2, and no matter what the resolution that we need to serve, that object will always be at the center of the screen. This significantly simplifies the process and it means we only have to worry about how the game looks and how things are distributed around the screen once.
Game Size Exercises
65. Take a look at Steam's Hardware Survey in the primary resolution section. The most popular resolution, used by almost half the users on Steam is 1920x1080. This game's base resolution neatly multiplies to that. But the second most popular resolution is 1366x768. 480x270 does not multiply into that at all. What are some options available for dealing with odd resolutions once the game is fullscreened into the player's monitor?
66. Pick a game you own that uses the same or a similar technique to what we're doing here (scaling a small base resolution up). Usually games that use pixel art will do that. What is that game's base resolution? How does the game deal with odd resolutions that don't fit neatly into its base resolution? Change the resolution of your desktop and run the game various times with different resolutions to see what changes and how it handles the variance.
Camera
All three rooms will make use of a camera so it makes sense to go through it now. From the second article in this series we used a library named hump for timers. This library also has a useful camera module that we'll also use. However, I use a slightly modified version of it that also has screen shake functionality. You can download the files here. Place the camera.lua file directory of the hump library (and overwrite the already existing camera.lua) and then require the camera module in main.lua. And place the Shake.lua file in the objects folder.
(Additionally, you can also use this library I wrote which has all this functionality already. I wrote this library after I wrote the entire tutorial, so the tutorial will go on as if the library didn't exist. If you do choose to use this library then you can follow along on the tutorial but sort of translating things to use the functions in this library instead.)
One function you'll need after adding the camera is this:
function random(min, max)
    local min, max = min or 0, max or 1
    return (min > max and (love.math.random()*(min - max) + max)) or (love.math.random()*(max - min) + min)
end
This function will allow you to get a random number between any two numbers. It's necessary because the Shake.lua file uses it. After defining that function in utils.lua try something like this:
function love.load()
    ...
    camera = Camera()
    input:bind('f3', function() camera:shake(4, 60, 1) end)
    ...
end

function love.update(dt)
    ...
    camera:update(dt)
    ...
end
And then on the Stage class:
function Stage:draw()
    love.graphics.setCanvas(self.main_canvas)
    love.graphics.clear()
  camera:attach(0, 0, gw, gh)
        love.graphics.circle('line', gw/2, gh/2, 50)
        self.area:draw()
  camera:detach()
    love.graphics.setCanvas()

    love.graphics.setColor(255, 255, 255, 255)
    love.graphics.setBlendMode('alpha', 'premultiplied')
    love.graphics.draw(self.main_canvas, 0, 0, 0, sx, sy)
    love.graphics.setBlendMode('alpha')
end
And you'll see that the screen shakes like this when you press f3:

The shake function is based on the one described on this article and it takes in an amplitude (in pixels), a frequency and a duration. The screen will shake with a decay, starting from the amplitude, for duration seconds with a certain frequency. Higher frequencies means that the screen will oscillate more violently between extremes (amplitude, -amplitude), while lower frequencies will do the contrary.
Another important thing to notice about the camera is that it's not anchored to a certain spot right now, and so when it shakes it will be thrown in all directions, making it be positioned elsewhere by the time the shaking ends, as you could see in the previous gif.
One way to fix this is to center it and this can be achieved with the camera:lockPosition function. In the modified version of the camera module I changed all camera movement functions to take in a dt argument first. And so that would look like this:
function Stage:update(dt)
    camera.smoother = Camera.smooth.damped(5)
    camera:lockPosition(dt, gw/2, gh/2)

    self.area:update(dt)
end
The camera smoother is set to damped with a value of 5. This was reached through trial and error but basically it makes the camera focus on the target point in a smooth and nice way. And the reason I placed this code inside the Stage room is that right now we're working with the Stage room and that room happens to be the one where the camera will need to be centered in the middle and never really move (other than screen shakes). And so that results in this:
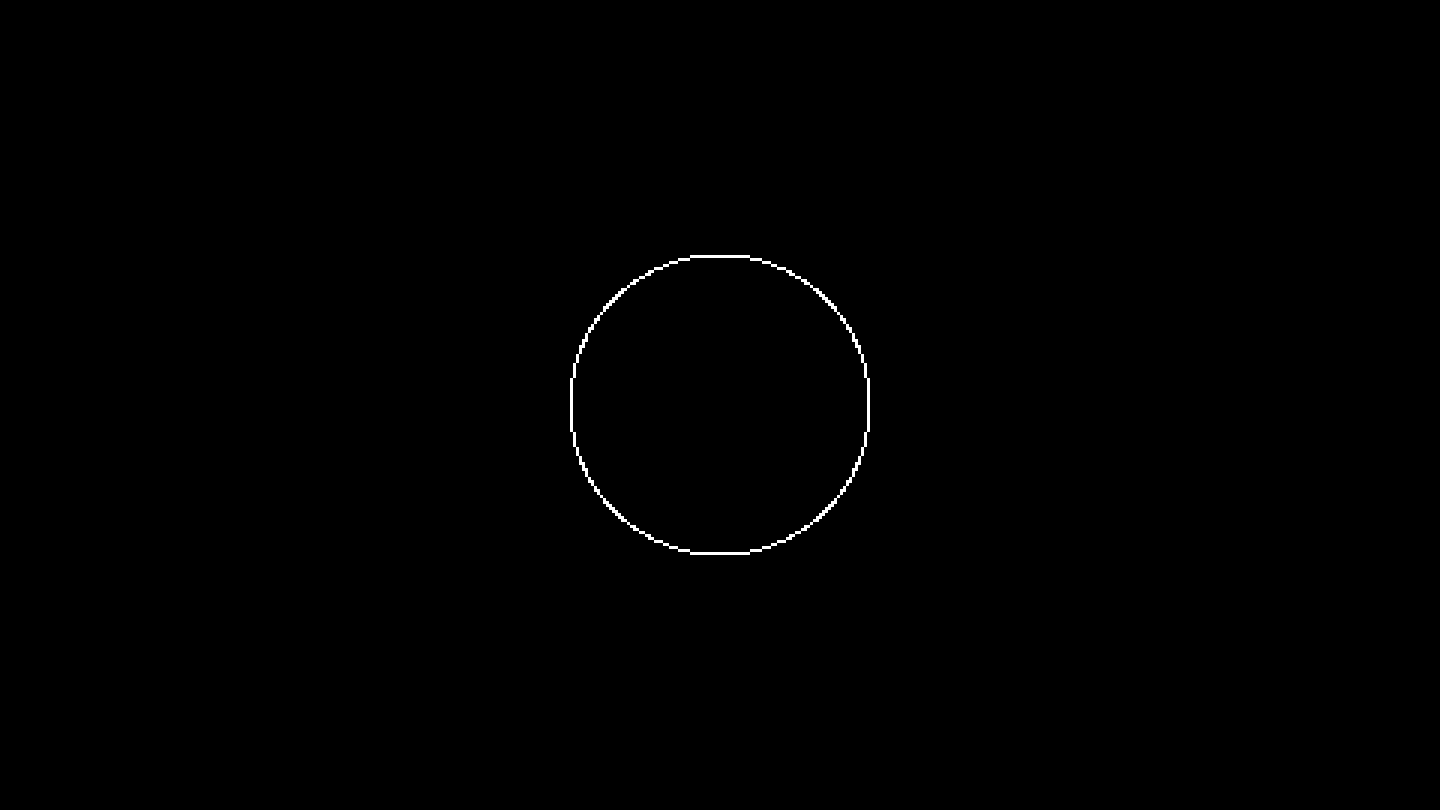
We will use a single global camera for the entire game since there's no real need to instantiate a separate camera for each room. The Stage room will not use the camera in any way other than screen shakes, so that's where I'll stop for now. Both the Console and SkillTree rooms will use the camera more extensively but we'll get to that when we get to it.
Player Physics
Now we have everything needed to start with the actual game and we'll start with the Player object. Create a new file in the objects folder named Player.lua that looks like this:
Player = GameObject:extend()

function Player:new(area, x, y, opts)
    Player.super.new(self, area, x, y, opts)
end

function Player:update(dt)
    Player.super.update(self, dt)
end

function Player:draw()

end
This is the default way a new game object class in the game should be created. All of them will inherit from GameObject and will have the same structure to its constructor, update and draw functions. Now we can instantiate this Player object in the Stage room like this:
function Stage:new()
    ...
    self.area:addGameObject('Player', gw/2, gh/2)
end
To test that the instantiation worked and that the Player object is being updated and drawn by the Area, we can simply have it draw a circle in its position:
function Player:draw()
    love.graphics.circle('line', self.x, self.y, 25)
end
And that should give you a circle at the center of the screen. It's interesting to note that the addGameObject call returns the created object, so we could keep a reference to the player inside Stage's self.player, and then if we wanted we could trigger the Player object's death with a keybind:
function Stage:new()
    ...
    self.player = self.area:addGameObject('Player', gw/2, gh/2)
    input:bind('f3', function() self.player.dead = true end)
end
And if you press the f3 key then the Player object should be killed, which means that the circle will stop being drawn. This happens as a result of how we set up our Area object code from the previous article. It's also important to note that if you decide to hold references returned by addGameObject like this, if you don't set the variable holding the reference to nil that object will never be collected. And so it's important to keep in mind to always nil references (in this case by saying self.player = nil) if you want an object to truly be removed from memory (on top of settings its dead attribute to true).
Now for the physics. The Player (as well as enemies, projectiles and various resources) will be a physics objects. I'll use LÖVE's box2d integration for this, but this is something that is genuinely not necessary for this game, since it benefits in no way from using a full physics engine like box2d. The reason I'm using it is because I'm used to it. But I highly recommend you to try either rolling you own collision routines (which for a game like this is very easy to do), or using a library that handles that for you.
What I'll use and what the tutorial will follow is a library called windfield that I created which makes using box2d with LÖVE a lot easier than it would otherwise be. Other libraries that also handle collisions in LÖVE are HardonCollider or bump.lua.
I highly recommend for you to either do collisions on your own or use one of these two other libraries instead of the one the tutorial will follow. This is because this will make you exercise a bunch of abilities that you'll constantly have to exercise, like picking between various distinct solutions and seeing which one fits your needs and the way you think best, as well as coming up with your own solutions to problems that will likely arise instead of just following a tutorial.
To repeat this again, one of the main reasons why the tutorial has exercises is so that people actively engage with the material so that they actually learn, and this is another opportunity to do that. If you just follow the tutorial along and don't learn to confront things you don't know by yourself then you'll never truly learn. So I seriously recommend deviating from the tutorial here and doing the physics/collision part of the game on your own.
In any case, you can download the windfield library and require it in the main.lua file. According to its documentation there are the two main concepts of a World and a Collider. The World is the physics world that the simulation happens in, and the Colliders are the physics objects that are being simulated inside that world. So our game will need to have a physics world like and the player will be a collider inside that world.
We'll create a world inside the Area class by adding an addPhysicsWorld call:
function Area:addPhysicsWorld()
    self.world = Physics.newWorld(0, 0, true)
end
This will set the area's .world attribute to contain the physics world. We also need to update that world (and optionally draw it for debugging purposes) if it exists:
function Area:update(dt)
    if self.world then self.world:update(dt) end

    for i = #self.game_objects, 1, -1 do
        ...
    end
end

function Area:draw()
    if self.world then self.world:draw() end
    for _, game_object in ipairs(self.game_objects) do game_object:draw() end
end
We update the physics world before updating all the game objects because we want to use up to date information for our game objects, and that will happen only after the physics simulation is done for this frame. If we were updating the game objects first then they would be using physics information from the last frame and this sort of breaks the frame boundary. It doesn't really change the way things work much as far as I can tell but it's conceptually more confusing.
The reason we add the world through the addPhysicsWorld call instead of just adding it directly to the Area constructor is because we don't want all Areas to have physics worlds. For instance, the Console room will also use an Area object to handle its entities, but it will not need a physics world attached to that Area. So making it optional through the call of one function makes sense. We can instantiate the physics world in Stage's Area like this:
function Stage:new()
    self.area = Area(self)
    self.area:addPhysicsWorld()
    ...
end
And so now that we have a world we can add the Player's collider to it:
function Player:new(area, x, y, opts)
    Player.super.new(self, area, x, y, opts)

    self.x, self.y = x, y
    self.w, self.h = 12, 12
    self.collider = self.area.world:newCircleCollider(self.x, self.y, self.w)
    self.collider:setObject(self)
end
Note how the player having a reference to the Area comes in handy here, because that way we can access the Area's World to add new colliders to it. This pattern (of accessing things inside the Area) repeats itself a lot, which is I made it so that all GameObject objects have this same constructor where they receive a reference to the Area object they belong to.
In any case, in the Player's constructor we defined its width and height to be 12 via the w and h attributes. Then we add a new CircleCollider with the radius set to the width. It doesn't make much sense now to make the collider a circle while having width and height defined but it will in the future, because as we add different types of ships that the player can be, visually the ships will have different widths and heights, but physically the collider will always be a circle for fairness between different ships as well as predictability to how they feel.
After the collider is added we call the setObject function which binds the Player object to the Collider we just created. This is useful because when two Colliders collide, we can get information in terms of Colliders but not in terms of objects. So, for instance, if the Player collides with a Projectile we will have in our hands two colliders that represent the Player and the Projectile but we might not have the objects themselves. Using setObject (and getObject) allows us to set and then extract the object that a Collider belongs to.
Finally now we can draw the Player according to its size:
function Player:draw()
    love.graphics.circle('line', self.x, self.y, self.w)
end
If you run the game now you should see a small circle that is the Player:

Player Physics Exercises
If you chose to do collisions yourself or decided to use one of the alternative libraries for collisions/physics then you don't need to do these exercises.
67. Change the physics world's y gravity to 512. What happens to the Player object?
68. What does the third argument of the .newWorld call do and what happens if it's set to false? Are there advantages/disadvantages to setting it to true/false? What are those?
Player Movement
The way movement for the Player works in this game is that there's a constant velocity that you move at and an angle that can be changed by holding left or right. To get that to work we need a few variables:
function Player:new(area, x, y, opts)
    Player.super.new(self, area, x, y, opts)

    ...

    self.r = -math.pi/2
    self.rv = 1.66*math.pi
    self.v = 0
    self.max_v = 100
    self.a = 100
end
Here I define r as the angle the player is moving towards. It starts as -math.pi/2, which is pointing up. In LÖVE angles work in a clockwise way, meaning math.pi/2 is down and -math.pi/2 is up (and 0 is right). Next, the rv variable represents the velocity of angle change when the user presses left or right. Then we have v, which represents the player's velocity, and then max_v, which represents the maximum velocity possible. The last attribute is a, which represents the player's acceleration. These were all arrived at by trial and error.
To update the player's position using all these variables we can do something like this:
function Player:update(dt)
    Player.super.update(self, dt)

    if input:down('left') then self.r = self.r - self.rv*dt end
    if input:down('right') then self.r = self.r + self.rv*dt end

    self.v = math.min(self.v + self.a*dt, self.max_v)
    self.collider:setLinearVelocity(self.v*math.cos(self.r), self.v*math.sin(self.r))
end
The first two lines define what happens when the user presses the left or right keys. It's important to note that according to the Input library we're using those bindings had to be defined beforehand, and I did so in main.lua (since we'll use a global Input object for everything):
function love.load()
    ...
    input:bind('left', 'left')
    input:bind('right', 'right')
    ...
end
And so whenever the user pressed left or right, the r attribute, which corresponds to the player's angle, will be changed by 1.66*math.pi radians in the appropriate direction. One important thing to note here is that this value is being multiplied by dt, which essentially means that this value is operating on a per second basis. So the angle at which the angle change happens is 1.66*math.pi radians per second. This is a result of how the game loop that we went over in the first article works.
After this, we set the v attribute. This one is a bit more involved, but if you've done this in other languages it should be familiar. The original calculation is self.v = self.v + self.a*dt, which is just increasing the velocity by the acceleration. In this case, we increase it by 100 per second. But we also defined the max_v attribute, which should cap the maximum velocity allowed. If we don't cap the maximum velocity allowed then self.v = self.v + self.a*dt will keep increasing v forever with no end and the Player will become Sonic. We don't want that! And so one way to prevent that from happening would be like this:
function Player:update(dt)
    ...

    self.v = self.v + self.a*dt
    if self.v >= self.max_v then
        self.v = self.max_v
    end

    ...
end
In this way, whenever v went over max_v it would be capped at that value instead of going over it. Another shorthand way of writing this is by using the math.min function, which returns the minimum value of all arguments that are passed to it. In this case we're passing in the result of self.v + self.a*dt and self.max_v, which means that if the result of the addition goes over max_v, math.min will return max_v, since its smaller than the addition. This is a very common and useful pattern in Lua (and in other languages as well).
Finally, we set the Collider's x and y velocity to the v attribute multiplied by the appropriate amount given the angle of the object using setLinearVelocity. In general whenever you want to move something in a direction and you have an angle to work with, you want to use cos to move it along the x axis and sin to move it along the y axis. This is also a very common pattern in 2D gamedev in general. I'm going to assume that you learned why this makes sense in school (and if you haven't then look up basic trigonometry on Google).
The final change we can make is one to the GameObject class and it's a simple one. Because we're using a physics engine we essentially have two representations of some variables, like position and velocity. We have the player's position and velocity through x, y and v attributes, and we have the Collider's position and velocity through getPosition and getLinearVelocity. It's a good idea to keep both of those representations synced, and one way to achieve that sort of automatically is by changing the parent class of all game objects:
function GameObject:update(dt)
    if self.timer then self.timer:update(dt) end
    if self.collider then self.x, self.y = self.collider:getPosition() end
end
And so here we simply that if the object has a collider attribute defined, then x and y will be set to the position of that collider. And so whenever the collider's position changes, the representation of that position in the object itself will also change accordingly.
If you run the program now you should see this:
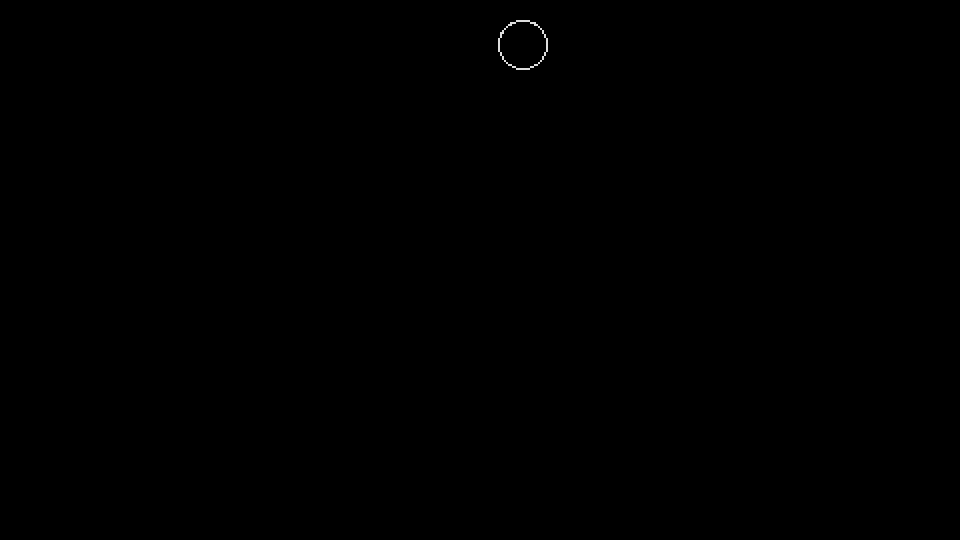
And so you can see that the Player object moves around normally and changes its direction when left or right arrow keys are pressed. One detail that's important here is that what is being drawn is the Collider via the world:draw() call in the Area object. We don't really want to draw colliders only, so it makes sense to comment that line out and draw the Player object directly:
function Player:draw()
    love.graphics.circle('line', self.x, self.y, self.w)
end
One last useful thing we can do is visualize the direction that the player is heading towards. And this can be done by just drawing a line from the player's position that points in the direction he's heading:
function Player:draw()
    love.graphics.circle('line', self.x, self.y, self.w)
    love.graphics.line(self.x, self.y, self.x + 2*self.w*math.cos(self.r), self.y + 2*self.w*math.sin(self.r))
end
And that looks like this:
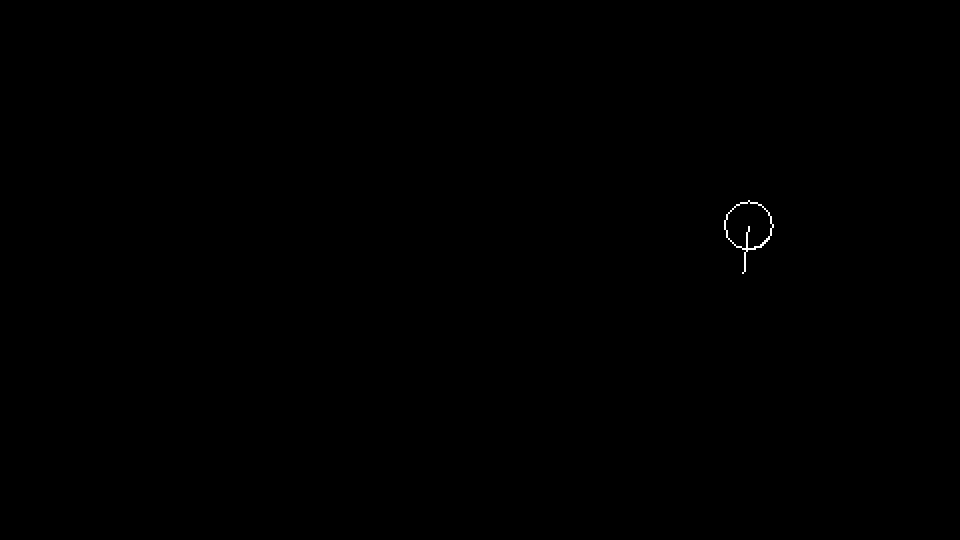
This again is basic trigonometry and uses the same idea as I explained a while ago. Generally whenever you want to get a position B that is distance units away from position A such that position B is positioned at a specific angle in relation to position A, the pattern is something like: bx = ax + distance*math.cos(angle) and by = ay + distance*math.sin(angle). Doing this is a very very common occurence in 2D gamedev (in my experience at least) and so getting an instinctive handle on how this works is useful.
Player Movement Exercises
69. Convert the following angles to degrees (in your head) and also say which quadrant they belong to (top-left, top-right, bottom-left or bottom-right). Notice that in LÖVE the angles are counted in a clockwise manner instead of an anti-clockwise one like you learned in school.
math.pi/2
math.pi/4
3*math.pi/4
-5*math.pi/6
0
11*math.pi/12
-math.pi/6
-math.pi/2 + math.pi/4
3*math.pi/4 + math.pi/3
math.pi
70. Does the acceleration attribute a need to exist? How could would the player's update function look like if it didn't exist? Are there any benefits to it being there at all?
71. Get the (x, y) position of point B from position A if the angle to be used is -math.pi/4, and the distance is 100.
72. Get the (x, y) position of point C from position B if the angle to be used is math.pi/4, and the distance if 50. The position A and B and the distance and angle between them are the same as the previous exercise.
73. Based on the previous two exercises, what's the general pattern involved when you want to get from point A to some point C when you all have to use are multiple points in between that all can be reached at through angles and distances?
74. The syncing of both representations of Player attributes and Collider attributes mentioned positions and velocities, but what about rotation? A collider has a rotation that can be accessed through getAngle. Why not also sync that to the r attribute?
Garbage Collection
Now that we've added the physics engine code and some movement code we can focus on something important that I've been ignoring until now, which is dealing with memory leaks. One of the things that can happen in any programming environment is that you'll leak memory and this can have all sorts of bad effects. In a managed language like Lua this can be an even more annoying problem to deal with because things are more hidden behind black boxes than if you had full control of memory yourself.
The way the garbage collector works is that when there are no more references pointing to an object it will eventually be collected. So if you have a table that is only being referenced to by variable a, once you say a = nil, the garbage collector will understand that the table that was being referenced isn't being referenced by anything and so that table will be removed from memory in a future garbage collection cycle. The problem happens when a single object is being referenced to multiple times and you forget to dereference it in all those locations.
For instance, when we create a new object with addGameObject what happens is that the object gets added to a .game_objects list. This counts as one reference pointing to that object. What we also do in that function, though, is return the object itself. So previously we did something like self.player = self.area:addGameObject('Player', ...), which means that on top of holding a reference to the object in the list inside the Area object, we're also holding a reference to it in the self.player variable. Which means that when we say self.player.dead and the Player object gets removed from the game objects list in the Area object, it will still not be collected because self.player is still pointing to it. So in this instance, to truly remove the Player object from memory we have to both set dead to true and then say self.player = nil.
This is just one example of how it could happen but this is a problem that can happen everywhere, and you should be especially careful about it when using other people's libraries. For instance, the physics library I built has a setObject function in which you pass in the object so that the Collider holds a reference to it. If the object dies will it be removed from memory? No, because the Collider is still holding a reference to it. Same problem, just in a different setting. One way of solving this problem is being explicit about the destruction of objects by having a destroy function for them, which will take care of dereferencing things.
So, one thing we can add to all objects this:
function GameObject:destroy()
    self.timer:destroy()
    if self.collider then self.collider:destroy() end
    self.collider = nil
end
So now all objects have this default destroy function. This function calls the destroy functions of the EnhancedTimer object as well as the Collider's one. What these functions do is essentially dereference things that the user will probably want removed from memory. For instance, inside Collider:destroy, one of the things that happens is that self:setObject(nil) is called, since if we want to destroy this object we don't want the Collider holding a reference to it anymore.
And then we can also change our Area update function like this:
function Area:update(dt)
    if self.world then self.world:update(dt) end

    for i = #self.game_objects, 1, -1 do
        local game_object = self.game_objects[i]
        game_object:update(dt)
        if game_object.dead then
            game_object:destroy()
            table.remove(self.game_objects, i)
        end
    end
end
If an object's dead attribute is set to true, then on top of removing it from the game objects list, we also call its destroy function, which will get rid of most references to it. We can expand this concept further and realize that the physics world itself also has a World:destroy, and so we might want to use it when destroying an Area object:
function Area:destroy()
    for i = #self.game_objects, 1, -1 do
        local game_object = self.game_objects[i]
        game_object:destroy()
        table.remove(self.game_objects, i)
    end
    self.game_objects = {}

    if self.world then
        self.world:destroy()
        self.world = nil
    end
end
When destroying an Area we first destroy all objects in it and then we destroy the physics world if it exists. We can now change the Stage room to accomodate for this:
function Stage:destroy()
    self.area:destroy()
    self.area = nil
end
And then we can also change the gotoRoom function:
function gotoRoom(room_type, ...)
    if current_room and current_room.destroy then current_room:destroy() end
    current_room = _G[room_type](...)
end
We check to see if current_room is a variable that exists and if it contains a destroy attribute (basically we ask if its holding an actual room), and if it does then we call the destroy function. And then we proceed with changing to the target room.
It's important to also remember that now with the addition of the destroy function, all objects have to follow the following template:
NewGameObject = GameObject:extend()

function NewGameObject:new(area, x, y, opts)
    NewGameObject.super.new(self, area, x, y, opts)
end

function NewGameObject:update(dt)
    NewGameObject.super.update(self, dt)
end

function NewGameObject:draw()

end

function NewGameObject:destroy()
    NewGameObject.super.destroy(self)
end
Now, this is all well and good, but how do we test to see if we're actually removing things from memory or not? One blog post I like that answers that question is this one, and it offers a relatively simple solution to track leaks:
function count_all(f)
    local seen = {}
    local count_table
    count_table = function(t)
        if seen[t] then return end
            f(t)
    seen[t] = true
    for k,v in pairs(t) do
        if type(v) == "table" then
    count_table(v)
        elseif type(v) == "userdata" then
    f(v)
        end
end
    end
    count_table(_G)
end

function type_count()
    local counts = {}
    local enumerate = function (o)
        local t = type_name(o)
        counts[t] = (counts[t] or 0) + 1
    end
    count_all(enumerate)
    return counts
end

global_type_table = nil
function type_name(o)
    if global_type_table == nil then
        global_type_table = {}
            for k,v in pairs(_G) do
        global_type_table[v] = k
    end
global_type_table[0] = "table"
    end
    return global_type_table[getmetatable(o) or 0] or "Unknown"
end
I'm not going to over what this code does because its explained in the article, but add it to main.lua and then add this inside love.load:
function love.load()
    ...
    input:bind('f1', function()
        print("Before collection: " .. collectgarbage("count")/1024)
        collectgarbage()
        print("After collection: " .. collectgarbage("count")/1024)
        print("Object count: ")
        local counts = type_count()
        for k, v in pairs(counts) do print(k, v) end
        print("-------------------------------------")
    end)
    ...
end
And so what this does is that whenever you press f1, it will show you the amount of memory before a garbage collection cycle and the amount of memory after it, as well as showing you what object types are in memory. This is useful because now we can, for instance, create a new Stage full of objects, delete it, and then see if the memory remains the same (or acceptably the same hehexD) as it was before the Stage was created. If it remains the same then we aren't leaking memory, if it doesn't then it means we are and we need to track down the cause of it.
Garbage Collection Exercises
75. Bind the f2 key to create and activate a new Stage with a gotoRoom call.
76. Bind the f3 key to destroy the current room.
77. Check the amount of memory used by pressing f1 a few times. After that spam the f2 and f3 keys a few times to create and destroy new rooms. Now check the amount of memory used again by pressing f1 a few times again. Is it the same as the amount of memory as it was first or is it more?
78. Set the Stage room to spawn 100 Player objects instead of only 1 by doing something like this:
function Stage:new()
    ...
    for i = 1, 100 do
        self.area:addGameObject('Player', gw/2 + random(-4, 4), gh/2 + random(-4, 4))
    end
end
Also change the Player's update function so that Player objects don't move anymore (comment out the movement code). Now repeat the process of the previous exercise. Is the amount of memory used different? And do the overall results change?
Player Basics
Introduction
In this section we'll focus on adding more functionality to the Player class. First we'll focus on the player's attack and the Projectile object. After that we'll focus on two of the main stats that the player will have: Boost and Cycle/Tick. And finally we'll start on the first piece of content that will be added to the game, which is different Player ships. From this section onward we'll also only focus on gameplay related stuff, while the previous 5 were mostly setup for everything.
Player Attack
The way the player will attack in this game is that each n seconds an attack will be triggered and executed automatically. In the end there will be 16 types of attacks, but pretty much all of them have to do with shooting projectiles in the direction that the player is facing. For instance, this one shoots homing projectiles:
![]media/(bytepath-6_1.gif)
While this one shoots projectiles at a faster rate but at somewhat random angles:
![]media/(bytepath-6_2.gif)
Attacks and projectiles will have all sorts of different properties and be affected by different things, but the core of it is always the same.
To achieve this we first need to make it so that the player attacks every n seconds. n is a number that will vary based on the attack, but the default one will be 0.24. Using the timer library that was explained in a previous section we can do this easily:
function Player:new()
    ...
    self.timer:every(0.24, function()
        self:shoot()
    end)
end
With this we'll be calling a function called shoot every 0.24 seconds and inside that function we'll place the code that will actually create the projectile object.
So, now we can define what will happen in the shoot function. At first, for every shot fired we'll have a small effect to signify that a shot was fired. A good rule of thumb I have is that whenever an entity is created or deleted from the game, an accompanying effect should appear, as it masks the fact that an entity just appeared/disappeared out of nowhere on the screen and generally makes things feel better.
To create this new effect first we need to create a new game object called ShootEffect (you should know how to do this by now). This effect will simply be a square that lasts for a very small amount of time around the position where the projectile will be created from. The easiest way to get that going is something like this:
function Player:shoot()
    self.area:addGameObject('ShootEffect', self.x + 1.2*self.w*math.cos(self.r),
    self.y + 1.2*self.w*math.sin(self.r))
end
function ShootEffect:new(...)
    ...
    self.w = 8
    self.timer:tween(0.1, self, {w = 0}, 'in-out-cubic', function() self.dead = true end)
end

function ShootEffect:draw()
    love.graphics.setColor(default_color)
    love.graphics.rectangle('fill', self.x - self.w/2, self.y - self.w/2, self.w, self.w)
end
And that looks like this:
![]media/(bytepath-6_3.gif)
The effect code is rather straight forward. It's just a square of width 8 that lasts for 0.1 seconds, and this width is tweened down to 0 along that duration. One problem with the way things are now is that the effect's position is static and doesn't follow the player. It seems like a small detail because the duration of the effect is small, but try changing that to 0.5 seconds or something longer and you'll see what I mean.
One way to fix this is to pass the Player object as a reference to the ShootEffect object, and so in this way the ShootEffect object can have its position synced to the Player object:
function Player:shoot()
    local d = 1.2*self.w

    self.area:addGameObject('ShootEffect', self.x + d*math.cos(self.r),
    self.y + d*math.sin(self.r), {player = self, d = d})
end
function ShootEffect:update(dt)
    ShootEffect.super.update(self, dt)
    if self.player then
    self.x = self.player.x + self.d*math.cos(self.player.r)
    self.y = self.player.y + self.d*math.sin(self.player.r)
  end
end

function ShootEffect:draw()
    pushRotate(self.x, self.y, self.player.r + math.pi/4)
    love.graphics.setColor(default_color)
    love.graphics.rectangle('fill', self.x - self.w/2, self.y - self.w/2, self.w, self.w)
    love.graphics.pop()
end
The player attribute of the ShootEffect object is set to self in the player's shoot function via the opts table. This means that a reference to the Player object can be accessed via self.player in the ShootEffect object. Generally this is the way we'll pass references of objects from one another, because usually objects get created from within another objects function, which means that passing self achieves what we want. Additionally, we set the d attribute to the distance the effect should appear at from the center of the Player object. This is also done through the opts table.
Then in ShootEffect's update function we set its position to the player's. It's important to always check if the reference that will be accessed is actually set (if self.player then) because if it isn't than an error will happen. And often times, as we build more, it will be the case that entities will die while being referenced somewhere else and we'll try to access some of its values, but because it died, those values aren't set anymore and then an error is thrown. It's important to keep this in mind when referencing entities within each other like this.
Finally, the last detail is that I make it so that the square is synced with the player's angle, and then I also rotate that by 45 degrees to make it look cooler. The function used to achieve that was pushRotate and it looks like this:
function pushRotate(x, y, r)
    love.graphics.push()
    love.graphics.translate(x, y)
    love.graphics.rotate(r or 0)
    love.graphics.translate(-x, -y)
end
This is a simple function that pushes a transformation to the transformation stack. Essentially it will rotate everything by r around point x, y until we call love.graphics.pop. So in this example we have a square and we rotate around its center by the player's angle plus 45 degrees (pi/4 radians). For completion's sake, the other version of this function which also contains scaling looks like this:
function pushRotateScale(x, y, r, sx, sy)
    love.graphics.push()
    love.graphics.translate(x, y)
    love.graphics.rotate(r or 0)
    love.graphics.scale(sx or 1, sy or sx or 1)
    love.graphics.translate(-x, -y)
end
These functions are pretty useful and will be used throughout the game so make sure you play around with them and understand them well!
Player Attack Exercises
80. Right now, we simply use an initial timer call in the player's constructor telling the shoot function to be called every 0.24 seconds. Assume an attribute self.attack_speed exists in the Player which changes to a random value between 1 and 2 every 5 seconds:
function Player:new(...)
    ...

    self.attack_speed = 1
    self.timer:every(5, function() self.attack_speed = random(1, 2) end)

    self.timer:every(0.24, function() self:shoot() end)
How would you change the player object so that instead of shooting every 0.24 seconds, it shoots every 0.24/self.attack_speed seconds? Note that simply changing the value in the every call that calls the shoot function will not work.
81. In the last article we went over garbage collection and how forgotten references can be dangerous and cause leaks. In this article I explained how we will reference objects within one another using the Player and ShootEffect objects as examples. In this instance where the ShootEffect is a short-lived object that contains a reference to the Player inside it, do we need to care about dereferencing the Player reference so that it can be collected eventually or is it not necessary? In a more general way, when do we need to care about dereferencing objects that reference each other like this?
82. Using pushRotate, rotate the player around its center by 180 degrees. It should look like this:
![]media/(bytepath-6_4.gif)
83. Using pushRotate, rotate the line that points in the player's moving direction around its center by 90 degrees. It should look like this:
![]media/(bytepath-6_5.gif)
84. Using pushRotate, rotate the line that points in the player's moving direction around the player's center by 90 degrees. It should look like this:
![]media/(bytepath-6_6.gif)
85. Using pushRotate, rotate the ShootEffect object around the player's center by 90 degrees (on top of already rotating it by the player's direction). It should look like this:
![]media/(bytepath-6_7.gif)
Player Projectile
Now that we have the shooting effect done we can move on to the actual projectile. The projectile will have a movement mechanism that is very similar to the player's in that it's a physics object that has an angle and then we'll set its velocity according to that angle. So to start with, the call inside the shoot function:
function Player:shoot()
    ...
    self.area:addGameObject('Projectile', self.x + 1.5*d*math.cos(self.r),
    self.y + 1.5*d*math.sin(self.r), {r = self.r})
end
And this should have nothing unexpected. We use the same d variable that was defined earlier to set the Projectile's initial position, and then pass the player's angle as the r attribute. Note that unlike the ShootEffect object, the Projectile won't need anything more than the angle of the player when it was created, and so we don't need to pass the player in as a reference.
Now for the Projectile's constructor. The Projectile object will also have a circle collider (like the Player), a velocity and a direction its moving along:
function Projectile:new(area, x, y, opts)
    Projectile.super.new(self, area, x, y, opts)

    self.s = opts.s or 2.5
    self.v = opts.v or 200

    self.collider = self.area.world:newCircleCollider(self.x, self.y, self.s)
    self.collider:setObject(self)
    self.collider:setLinearVelocity(self.v*math.cos(self.r), self.v*math.sin(self.r))
end
The s attribute represents the radius of the collider, it isn't r because that one already is used for the movement angle. In general I'll use variables w, h, r or s to represent object sizes. The first two when the object is a rectangle, and the other two when it's a circle. In cases where the r variable is already being used for a direction (like in this one), then s will be used for the radius. Those attributes are also mostly for visual purposes, since most of the time those objects already have the collider doing all collision related work.
Another thing we do here, which I think I already explained in another article, is the opts.attribute or default_value construct. Because of the way or works in Lua, we can use this construct as a fast way of saying this:
if opts.attribute then
    self.attribute = opts.attribute
else
    self.attribute = default_value
end
We're checking to see if the attribute exists, and then setting some variable to that attribute, and if it doesn't then we set it to a default value. In the case of self.s, it will be set to opts.s if it was defined, otherwise it will be set to 2.5. The same applies to self.v. Finally, we set the projectile's velocity by using setLinearVelocity with the initial velocity of the projectile and the angle passed in from the Player. This uses the same idea that the Player uses for movement so that should be already understood.
If we now update and draw the projectile like:
function Projectile:update(dt)
    Projectile.super.update(self, dt)
    self.collider:setLinearVelocity(self.v*math.cos(self.r), self.v*math.sin(self.r))
end

function Projectile:draw()
    love.graphics.setColor(default_color)
    love.graphics.circle('line', self.x, self.y, self.s)
end
And that should look like this:
![]media/(bytepath-6_8.gif)
Player Projectile Exercises
86. From the player's shoot function, change the size/radius of the created projectiles to 5 and their velocity to 150.
87. Change the shoot function to spawn 3 projectiles instead of 1, while 2 of those projectiles are spawned with angles pointing to the player's angle +-30 degrees. It should look like this:
![]media/(bytepath-6_9.gif)
88. Change the shoot function to spawn 3 projectiles instead of 1, with the spawning position of each side projectile being offset from the center one by 8 pixels. It should look like this:
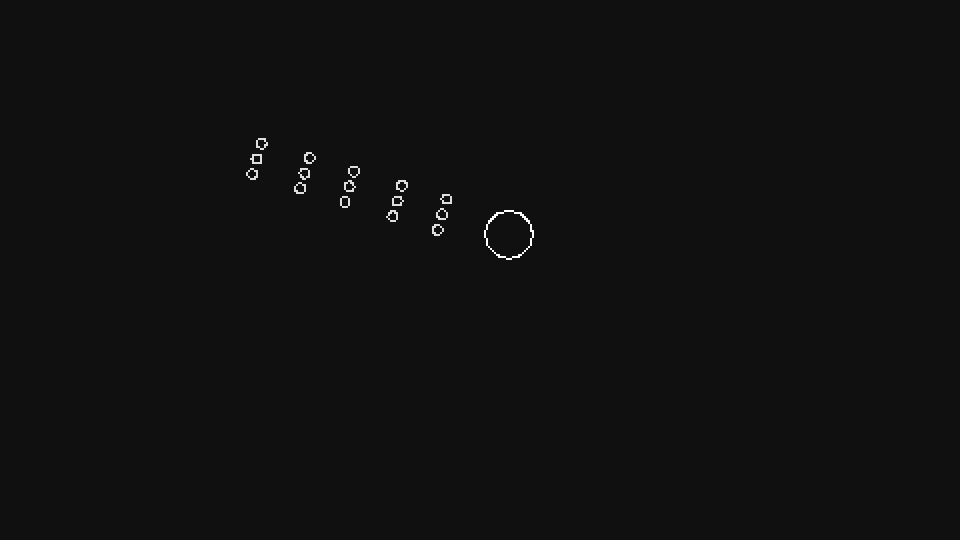
89. Change the initial projectile speed to 100 and make it accelerate up to 400 over 0.5 seconds after its creation.
Player & Projectile Death
Now that the Player can move around and attack in a basic way, we can start worrying about some additional rules of the game. One of those rules is that if the Player hits the edge of the play area, he will die. The same should be the case for Projectiles, since right now they are being spawned but they never really die, and at some point there will be so many of them alive that the game will slow down considerably.
So let's start with the Projectile object:
function Projectile:update(dt)
    ...

    if self.x < 0 then self:die() end
    if self.y < 0 then self:die() end
    if self.x > gw then self:die() end
    if self.y > gh then self:die() end
end
We know that the center of the play area is located at gw/2, gh/2, which means that the top-left corner is at 0, 0 and the bottom-right corner is at gw, gh. And so all we have to do is add a few conditionals to the update function of a projectile checking to see if its position is beyond any of those edges, and if it is, we call the die function.
The same logic applies for the Player object:
function Player:update(dt)
    ...

    if self.x < 0 then self:die() end
    if self.y < 0 then self:die() end
    if self.x > gw then self:die() end
    if self.y > gh then self:die() end
end
Now for the die function. This function is very simple and essentially what it will do it set the dead attribute to true for the entity and then spawn some visual effects. For the projectile the effect spawned will be called ProjectileDeathEffect, and like the ShootEffect, it'll be a square that lasts for a small amount of time and then disappears, although with a few differences. The main difference is that ProjectileDeathEffect will flash for a while before turning to its normal color and then disappearing. This gives a subtle but nice popping effect that looks good in my opinion. So the constructor could look like this:
function ProjectileDeathEffect:new(area, x, y, opts)
    ProjectileDeathEffect.super.new(self, area, x, y, opts)

    self.first = true
    self.timer:after(0.1, function()
        self.first = false
        self.second = true
        self.timer:after(0.15, function()
            self.second = false
            self.dead = true
        end)
    end)
end
We defined two attributes, first and second, which will denote in which stage the effect is in. If in the first stage, then its color will be white, while in the second its color will be what its color should be. After the second stage is done then the effect will die, which is done by setting dead to true. This all happens in a span of 0.25 seconds (0.1 + 0.15) so it's a very short lived and quick effect. Now for how the effect should be drawn, which is very similar to how ShootEffect was drawn:
function ProjectileDeathEffect:draw()
    if self.first then love.graphics.setColor(default_color)
    elseif self.second then love.graphics.setColor(self.color) end
    love.graphics.rectangle('fill', self.x - self.w/2, self.y - self.w/2, self.w, self.w)
end
Here we simply set the color according to the stage, as I explained, and then we draw a rectangle of that color. To create this effect, we do it from the die function in the Projectile object:
function Projectile:die()
    self.dead = true
    self.area:addGameObject('ProjectileDeathEffect', self.x, self.y,
    {color = hp_color, w = 3*self.s})
end
One of the things I failed to mention before is that the game will have a finite amount of colors. I'm not an artist and I don't wanna spend much time thinking about colors, so I just picked a few of them that go well together and used them everywhere. Those colors are defined in globals.lua and look like this:
default_color = {222, 222, 222}
background_color = {16, 16, 16}
ammo_color = {123, 200, 164}
boost_color = {76, 195, 217}
hp_color = {241, 103, 69}
skill_point_color = {255, 198, 93}
For the projectile death effect I'm using hp_color (red) to show what the effect looks like, but the proper way to do this in the future will be to use the color of the projectile object. Different attack types will have different colors and so the death effect will similarly have different colors based on the attack. In any case, the way the effect looks like is this:
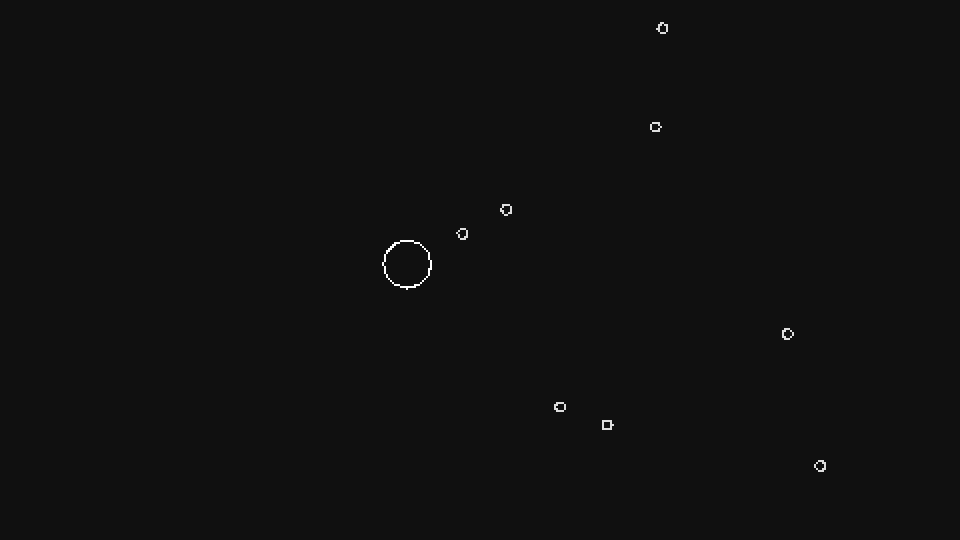
Now for the Player death effect. The first thing we can do is mirror the Projectile die function and set dead to true when the Player reaches the edges of the screen. After that is done we can do some visual effects for it. The main visual effect for the Player death will be a bunch of particles that appear called ExplodeParticle, kinda like an explosion but not really. In general the particles will be lines that move towards a random angle from their initial position and slowly decrease in length. A way to get this working would be something like this:
function ExplodeParticle:new(area, x, y, opts)
    ExplodeParticle.super.new(self, area, x, y, opts)

    self.color = opts.color or default_color
    self.r = random(0, 2*math.pi)
    self.s = opts.s or random(2, 3)
    self.v = opts.v or random(75, 150)
    self.line_width = 2
    self.timer:tween(opts.d or random(0.3, 0.5), self, {s = 0, v = 0, line_width = 0},
    'linear', function() self.dead = true end)
end
Here we define a few attributes, most of them are self explanatory. The additional thing we do is that over a span of between 0.3 and 0.5 seconds, we tween the size, velocity and line width of the particle to 0, and after that tween is done, the particle dies. The movement code for particle is similar to the Projectile, as well as the Player, so I'm going to skip it. It simply follows the angle using its velocity.
And finally the particle is drawn as a line:
function ExplodeParticle:draw()
    pushRotate(self.x, self.y, self.r)
    love.graphics.setLineWidth(self.line_width)
    love.graphics.setColor(self.color)
    love.graphics.line(self.x - self.s, self.y, self.x + self.s, self.y)
    love.graphics.setColor(255, 255, 255)
    love.graphics.setLineWidth(1)
    love.graphics.pop()
end
As a general rule, whenever you have to draw something that is going to be rotated (in this case by the angle of direction of the particle), draw is as if it were at angle 0 (pointing to the right). So, in this case, we have to draw the line from left to right, with the center being the position of rotation. So s is actually half the size of the line, instead of its full size. We also use love.graphics.setLineWidth so that the line is thicker at the start and then becomes skinnier as time goes on.
The way these particles are created is rather simple. Just create a random number of them on the die function:
function Player:die()
    self.dead = true
    for i = 1, love.math.random(8, 12) do
    self.area:addGameObject('ExplodeParticle', self.x, self.y)
  end
end
One last thing you can do is to bind a key to trigger the Player's die function, since the effect won't be able to be seen properly at the edge of the screen:
function Player:new(...)
    ...

    input:bind('f4', function() self:die() end)
end
And all that looks like this:
This doesn't look very dramatic though. One way of really making something seem dramatic is by slowing time down a little. This is something a lot of people don't notice, but if you pay attention lots of games slow time down slightly whenever you get hit or whenever you die. A good example is Downwell, this video shows its gameplay and I marked the time when a hit happens so you can pay attention and see it for yourself.
Doing this ourselves is rather easy. First we can define a global variable called slow_amount in love.load and set it to 1 initially. This variable will be used to multiply the delta that we send to all our update functions. So whenever we want to slow time down by 50%, we set slow_amount to 0.5, for instance. Doing this multiplication can look like this:
function love.update(dt)
    timer:update(dt*slow_amount)
    camera:update(dt*slow_amount)
    if current_room then current_room:update(dt*slow_amount) end
end
And then we need to define a function that will trigger this work. Generally we want the time slow to go back to normal after a small amount of time. So it makes sense that this function should have a duration attached to it, on top of how much the slow should be:
function slow(amount, duration)
    slow_amount = amount
    timer:tween('slow', duration, _G, {slow_amount = 1}, 'in-out-cubic')
end
And so calling slow(0.5, 1) means that the game will be slowed to 50% speed initially and then over 1 second it will go back to full speed. One important thing to note here that the 'slow' string is used in the tween function. As explained in an earlier article, this means that when the slow function is called when the tween of another slow function call is still operating, that other tween will be cancelled and the new tween will continue from there, preventing two tweens from operating on the same variable at the same time.
If we call slow(0.15, 1) when the player dies it looks like this:
Another thing we can do is add a screen shake to this. The camera module already has a :shake function to it, and so we can add the following:
function Player:die()
    ...
    camera:shake(6, 60, 0.4)
    ...
end
And finally, another thing we can do is make the screen flash for a few frames. This is something else that lots of games do that you don't really notice, but it helps sell an effect really well. This is a rather simple effect: whenever we call flash(n), the screen will flash with the background color for n frames. One way we can do this is by defining a flash_frames global variable in love.load that starts as nil. Whenever flash_frames is nil it means that the effect isn't active, and whenever it's not nil it means it's active. The flash function looks like this:
function flash(frames)
    flash_frames = frames
end
And then we can set this up in the love.draw function:
function love.draw()
    if current_room then current_room:draw() end

    if flash_frames then
        flash_frames = flash_frames - 1
        if flash_frames == -1 then flash_frames = nil end
    end
    if flash_frames then
        love.graphics.setColor(background_color)
        love.graphics.rectangle('fill', 0, 0, sx*gw, sy*gh)
        love.graphics.setColor(255, 255, 255)
    end
end
First, we decrease flash_frames by 1 every frame, and then if it reaches -1 we set it to nil because the effect is over. And then whenever the effect is not over, we simply draw a big rectangle covering the whole screen that is colored as background_color. Adding this to the die function like this:
function Player:die()
    self.dead = true
    flash(4)
    camera:shake(6, 60, 0.4)
    slow(0.15, 1)

    for i = 1, love.math.random(8, 12) do
    self.area:addGameObject('ExplodeParticle', self.x, self.y)
  end
end
Gets us this:
Very subtle and barely noticeable, but it's small details like these that make things feel more impactful and nicer.
Player/Projectile Death Exercises
90. Without using the first and second attribute and only using a new current_color attribute, what is another way of achieving the changing colors of the ProjectileDeathEffect object?
91. Change the flash function to accept a duration in seconds instead of frames. Which one is better or is it just a matter of preference? Could the timer module use frames instead of seconds for its durations?
Player Tick
Now we'll move on to another crucial part of the Player which is its cycle mechanism. The way the game works is that in the passive skill tree there will be a bunch of skills you can buy that will have a chance to be triggered on each cycle. And a cycle is just a counter that is triggered every n seconds. We need to set this up in a basic way. And to do that we'll just make it so that the tick function is called every 5 seconds:
function Player:new(...)
    ...

    self.timer:every(5, function() self:tick() end)
end
In the tick function, for now the only thing we'll do is add a little visual effect called TickEffect any time a tick happens. This effect is similar to the refresh effect in Downwell (see Downwell video I mentioned earlier in this article), in that it's a big rectangle over the Player that goes up a little. It looks like this:

The first thing to notice is that it's a big rectangle that covers the player and gets smaller over time. But also that, like the ShootEffect, it follows the player. Which means that we know we'll need to pass the Player object as a reference to the TickEffect object:
function Player:tick()
    self.area:addGameObject('TickEffect', self.x, self.y, {parent = self})
end
function TickEffect:update(dt)
    ...

    if self.parent then self.x, self.y = self.parent.x, self.parent.y end
end
Another thing we can see is that it's a rectangle that gets smaller over time, but only in height. An easy way to do that is like this:
function TickEffect:new(area, x, y, opts)
    TickEffect.super.new(self, area, x, y, opts)

    self.w, self.h = 48, 32
    self.timer:tween(0.13, self, {h = 0}, 'in-out-cubic', function() self.dead = true end)
end
If you try this though, you'll see that the rectangle isn't going up like it should and it's just getting smaller around the middle of the player. One day to fix this is by introducing an y_offset attribute that gets bigger over time and that is subtracted from the y position of the TickEffect object:
function TickEffect:new(...)
    ...

    self.y_offset = 0
    self.timer:tween(0.13, self, {h = 0, y_offset = 32}, 'in-out-cubic',
    function() self.dead = true end)
end

function TickEffect:update(dt)
    ...

    if self.parent then self.x, self.y = self.parent.x, self.parent.y - self.y_offset end
end
And in this way we can get the desired effect. For now this is all that the tick function will do. Later as we add stats and passives it will have more stuff attached to it.
Player Boost
Another important piece of gameplay is the boost. Whenever the user presses up, the player should start moving faster. And whenever the user presses down, the player should start moving slower. This boost mechanic is a core part of the gameplay and like the tick, we'll focus on the basics of it now and later add more to it.
First, lets get the button pressing to work. One of the attributes we have in the player is max_v. This sets the maximum velocity with which the player can move. What we want to do whenever up/down is pressed is change this value so that it becomes higher/lower. The problem with doing this is that after the button is done being pressed we need to go back to the normal value. And so we need another variable to hold the base value and one to hold the current value.
Whenever there's a stat (like velocity) that needs to be changed in game by modifiers, this (needing a base value and a current one) is a very common pattern. Later on as we add more stats and passives into the game we'll go into this with more detail. But for now we'll add an attribute called base_max_v, which will contain the initial/base value of the maximum velocity, and the normal max_v attribute will hold the current maximum velocity, affected by all sorts of modifiers (like the boost).
function Player:new(...)
    ...

    self.base_max_v = 100
    self.max_v = self.base_max_v
end

function Player:update(dt)
    ...

    self.max_v = self.base_max_v
    if input:down('up') then self.max_v = 1.5*self.base_max_v end
    if input:down('down') then self.max_v = 0.5*self.base_max_v end
end
With this, every frame we're setting max_v to base_max_v and then we're checking to see if the up or down buttons are pressed and changing max_v appropriately. It's important to notice that this means that the call to setLinearVelocity that uses max_v has to happen after this, otherwise it will all fall apart horribly!
Now that we have the basic boost functionality working, we can add some visuals. The way we'll do this is by adding trails to the player object. This is what they'll look like:
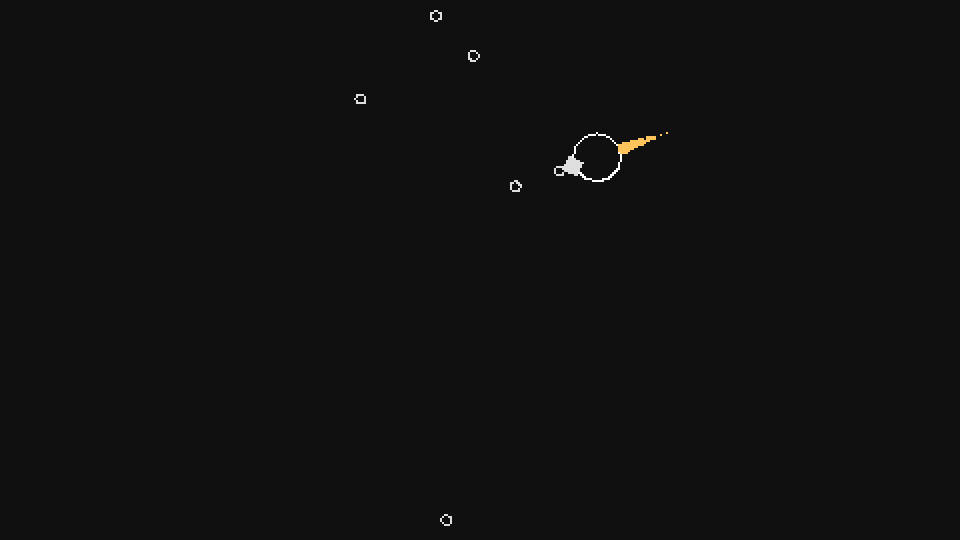
The creation of trails in general follow a pattern. And the way I do it is to create a new object every frame or so and then tween that object down over a certain duration. As the frames pass and you create object after object, they'll all be drawn near each other and the ones that were created earlier will start getting smaller while the ones just created will still be bigger, and the fact that they're all created from the bottom part of the player and the player is moving around, means that we'll get the desired trail effect.
To do this we can create a new object called TrailParticle, which will essentially just be a circle with a certain radius that gets tweened down along some duration:
function TrailParticle:new(area, x, y, opts)
    TrailParticle.super.new(self, area, x, y, opts)

    self.r = opts.r or random(4, 6)
    self.timer:tween(opts.d or random(0.3, 0.5), self, {r = 0}, 'linear',
    function() self.dead = true end)
end
Different tween modes like 'in-out-cubic' instead of 'linear', for instance, will make the trail have a different shape. I used the linear one because it looks the best to me, but your preference might vary. The draw function for this is just drawing a circle with the appropriate color and with the radius using the r attribute.
On the Player object's end, we can create new TrailParticles like this:
function Player:new(...)
    ...

    self.trail_color = skill_point_color
    self.timer:every(0.01, function()
        self.area:addGameObject('TrailParticle',
        self.x - self.w*math.cos(self.r), self.y - self.h*math.sin(self.r),
        {parent = self, r = random(2, 4), d = random(0.15, 0.25), color = self.trail_color})
    end)
And so every 0.01 seconds (this is every frame, essentially), we spawn a new TrailParticle object behind the player, with a random radius between 2 and 4, random duration between 0.15 and 0.25 seconds, and color being skill_point_color, which is yellow.
One additional thing we can do is changing the color of the particles to blue whenever up or down is being pressed. To do this we must add some logic to the boost code, namely, we need to be able to tell when a boost is happening, and to do this we'll add a boosting attribute. Via this attribute we'll be able to know when a boost is happening and then change the color being referenced in trail_color accordingly:
function Player:update(dt)
    ...

    self.max_v = self.base_max_v
    self.boosting = false
    if input:down('up') then
        self.boosting = true
        self.max_v = 1.5*self.base_max_v
    end
    if input:down('down') then
        self.boosting = true
        self.max_v = 0.5*self.base_max_v
    end
    self.trail_color = skill_point_color
    if self.boosting then self.trail_color = boost_color end
end
And so with this we get what we wanted by changing trail_color to boost_color (blue) whenever the player is being boosted.
Player Ship Visuals
Now for the last thing this article will cover: ships! The game will have various different ship types that the player can be, each with different stats, passives and visuals. Right now we'll focus only the visual part and we'll add 1 ship, and as an exercise you'll have to add 7 more.
One thing that I should mention now that will hold true for the entire tutorial is something regarding content. Whenever there's content to be added to the game, like various ships, or various passives, or various options in a menu, or building the skill tree visually, etc, you'll have to do most of that work yourself. In the tutorial I'll cover how to do it once, but when that's covered and it's only a matter of manually and mindlessly adding more of the same, it will be left as an exercise.
This is both because covering literally everything with all details would take a very long time and make the tutorial super big, and also because you need to learn if you actually like doing the manual work of adding content into the game. A big part of game development is just adding content and not doing anything "new", and depending on who you are personality wise you may not like the fact that there's a bunch of work to do that's just dumb work that might be not that interesting. In those cases you need to learn this sooner rather than later, because it's better to then focus on making games that don't require a lot of manual work to be done, for instance. This game is totally not that though. The skill tree will have about 800 nodes and all those have to be set manually (and you will have to do that yourself if you want to have a tree that big), so it's a good way to learn if you enjoy this type of work or not.
In any case, let's get started on one ship. This is what it looks like:
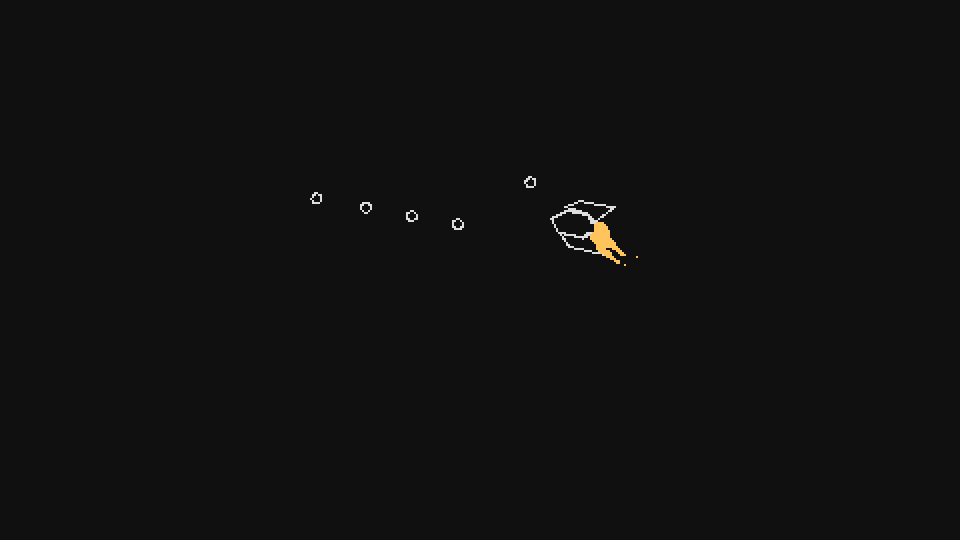
As you can see, it has 3 parts to it, one main body and two wings. The way we'll draw this is as a collection of simple polygons, and so we have to define 3 different polygons. We'll define the polygon's positions as if it is turned to the right (0 angle, as I explained previously). It will be something like this:
function Player:new(...)
    ...

    self.ship = 'Fighter'
    self.polygons = {}

    if self.ship == 'Fighter' then
        self.polygons[1] = {
            ...
        }

        self.polygons[2] = {
            ...
        }

        self.polygons[3] = {
            ...
        }
    end
end
And so inside each polygon table, we'll define the vertices of the polygon. To draw these polygons we'll have to do some work. First, we need to rotate the polygons around the player's center:
function Player:draw()
    pushRotate(self.x, self.y, self.r)
    love.graphics.setColor(default_color)
    -- draw polygons here
    love.graphics.pop()
end
After this, we need to go over each polygon:
function Player:draw()
    pushRotate(self.x, self.y, self.r)
    love.graphics.setColor(default_color)
    for _, polygon in ipairs(self.polygons) do
        -- draw each polygon here
    end
    love.graphics.pop()
end
And then we draw each polygon:
function Player:draw()
    pushRotate(self.x, self.y, self.r)
    love.graphics.setColor(default_color)
    for _, polygon in ipairs(self.polygons) do
        local points = fn.map(polygon, function(k, v)
        if k % 2 == 1 then
          return self.x + v + random(-1, 1)
        else
          return self.y + v + random(-1, 1)
        end
      end)
        love.graphics.polygon('line', points)
    end
    love.graphics.pop()
end
The first thing we do is getting all the points ordered properly. Each polygon will be defined in local terms, meaning, a distance from the center of that is assumed to be 0, 0. This means that each polygon does now not know at which position it is in the game world yet.
The fn.map function goes over each element in a table and applies a function to it. In this case the function is checking to see if the index of the element is odd or even, and if its odd then it means it's for the x component, and if its even then it means it's for the y component. And so in each of those cases we simply add the x or y position of the player to the vertex, as a well as a random number between -1 and 1, so that the ship looks a bit wobbly and cooler. Then, finally, love.graphics.polygon is called to draw all those points.
Now, here's what the definition of each polygon looks like:
self.polygons[1] = {
    self.w, 0, -- 1
    self.w/2, -self.w/2, -- 2
    -self.w/2, -self.w/2, -- 3
    -self.w, 0, -- 4
    -self.w/2, self.w/2, -- 5
    self.w/2, self.w/2, -- 6
}

self.polygons[2] = {
    self.w/2, -self.w/2, -- 7
    0, -self.w, -- 8
    -self.w - self.w/2, -self.w, -- 9
    -3*self.w/4, -self.w/4, -- 10
    -self.w/2, -self.w/2, -- 11
}

self.polygons[3] = {
    self.w/2, self.w/2, -- 12
    -self.w/2, self.w/2, -- 13
    -3*self.w/4, self.w/4, -- 14
    -self.w - self.w/2, self.w, -- 15
    0, self.w, -- 16
}
The first one is the main body, the second is the top wing and the third is the bottom wing. All vertices are defined in an anti-clockwise manner, and the first point of a line is always the x component, while the second is the y component. Here I'll show a drawing that maps each vertex to the numbers outlined to the side of each point pair above:

And as you can see, the first point is way to the right and vertically aligned with the center, so its self.w, 0. The next is a bit to the left and above the first, so its self.w/2, -self.w/2, and so on.
Finally, another thing we can do after adding this is making the trails match the ship. For this one, as you can see in the gif I linked before, it has two trails coming out of the back instead of just one:
function Player:new(...)
    ...

    self.timer:every(0.01, function()
        if self.ship == 'Fighter' then
            self.area:addGameObject('TrailParticle',
            self.x - 0.9*self.w*math.cos(self.r) + 0.2*self.w*math.cos(self.r - math.pi/2),
            self.y - 0.9*self.w*math.sin(self.r) + 0.2*self.w*math.sin(self.r - math.pi/2),
            {parent = self, r = random(2, 4), d = random(0.15, 0.25), color = self.trail_color})
            self.area:addGameObject('TrailParticle',
            self.x - 0.9*self.w*math.cos(self.r) + 0.2*self.w*math.cos(self.r + math.pi/2),
            self.y - 0.9*self.w*math.sin(self.r) + 0.2*self.w*math.sin(self.r + math.pi/2),
            {parent = self, r = random(2, 4), d = random(0.15, 0.25), color = self.trail_color})
        end
    end)
end
And here we use the technique of going from point to point based on an angle to get to our target. The target points we want are behind the player (0.9*self.w behind), but each offset by a small amount (0.2*self.w) along the opposite axis to the player's direction.
And all this looks like this:
Ship Visuals Exercises
As a small note, the (CONTENT) tag will mark exercises that are the content of the game itself. Exercises marked like this will have no answers and you're supposed to do them 100% yourself! From now on, more and more of the exercises will be like this, since we're starting to get into the game itself and a huge part of it is just manually adding content to it.
92. (CONTENT) Add 7 more ship types. To add a new ship type, simply add another conditional elseif self.ship == 'ShipName' then to both the polygon definition and the trail definition. Here's what the ships I made look like (but obviously feel free to be 100% creative and do your own designs):
Player Stats and Attacks
Introduction
In this tutorial we'll focus on getting more basics of gameplay down on the Player side of things. First we'll add the most fundamental stats: ammo, boost, HP and skill points. These stats will be used throughout the entire game and they're the main resources the player will use to do everything he can do. After that we'll focus on the creation of Resource objects, which are objects that the player can gather that contain the stats just mentioned. And finally after that we'll add the attack system as well as a few different attacks to the Player.
Draw Order
Before we go over to the main parts of this article, setting the game's draw order is something important that I forgot to mention in the previous article so we'll go over it now.
The draw order decides which objects will be drawn on top and which will be drawn behind which. For instance, right now we have a bunch of effects that are drawn when something happens. If the effects are drawn behind other objects like the Player then they either won't be visible or they will look wrong. Because of this we need to make sure that they are always drawn on top of everything and for that we need to define some sort of drawing order between objects.
The way we'll set this up is somewhat straight forward. In the GameObject class we'll define a depth attribute which will start at 50 for all entities. Then, in the definition of each class' constructors, we will be able to define the depth attribute ourselves for that class of objects if we want to. The idea is that objects with a higher depth will be drawn in front, while objects with a lower depth will be drawn behind. So, for instance, if we want to make sure that all effects are drawn in front of everything else, we can just set their depth attribute to something like 75.
function TickEffect:new(area, x, y, opts)
    TickEffect.super.new(self, area, x, y, opts)
    self.depth = 75

    ...
end
Now, the way that this works internally is that every frame we'll be sorting the game_objects list according to the depth attribute of each object:
function Area:draw()
    table.sort(self.game_objects, function(a, b)
        return a.depth < b.depth
    end)

    for _, game_object in ipairs(self.game_objects) do game_object:draw() end
end
Here, before drawing we simply use table.sort to sort the entities based on their depth attribute. Entities that have lower depth will be sorted to the front of the table and so will be drawn first (behind everything), and entities that have a higher depth will be sorted to the back of the table and so they will be drawn last (in front of everything). If you try setting different depth values to different types of objects you should see that this works out well.
One small problem that this approach has though is that some objects will have the same depth, and when this happens, depending on how the game_objects table is being sorted over time, flickering can occur. Flickering occurs because if objects have the same depth, in one frame one object might be sorted to be in front of another, but in another frame it might be sorted to be behind another. It's unlikely to happen but it can happen and we should take precautions against that.
One way to solve it is to define another sorting parameter in case objects have the same depth. In this case the other parameter I chose was the object's time of creation:
function Area:draw()
    table.sort(self.game_objects, function(a, b)
        if a.depth == b.depth then return a.creation_time < b.creation_time
        else return a.depth < b.depth end
    end)

    for _, game_object in ipairs(self.game_objects) do game_object:draw() end
end
So if the depths are equal then objects that were created earlier will be drawn earlier, and objects that were created later will be drawn later. This is a reasonable solution and if you test it out you'll see that it also works!
Draw Order Exercises
93. Order objects so that ones with higher depth are drawn behind and ones with lower depth are drawn in front of others. In case the objects have the same depth, they should be ordered by their creation time. Objects that were created earlier should be drawn last, and objects that were created later should be drawn first.
94. In a top-downish 2.5D game like in the gif below, one of the things you have to do to make sure that the entities are drawn in the appropriate order is sort them by their y position. Entities that have a higher y position (meaning that they are closer to the bottom of the screen) should be drawn last, while entities that have a lower y position should be drawn first. What would the sorting function look like in that case?
Basic Stats
Now we'll start with stat building. The first stat we'll focus on is the boost one. The way it works now is that whenever the player presses up or down the ship will take a different speed based on the key pressed. The way it should work is that on top of this basic functionality, it should also be a resource that depletes with use and regenerates over time when not being used. The specific numbers and rules that will be used are these:
- The player will have 100 boost initially
- Whenever the player is boosting 50 boost will be removed per second
- At all times 10 boost is generated per second
- Whenever boost reaches 0 a 2 second cooldown is applied before it can be used again
- Boosts can only happen when the cooldown is off and when the boost resource is above 0
These sound a little complicated but they're not. The first three are just number specifications, and the last two are to prevent boosts from never ending. When the resource reaches 0 it will regenerate to 1 pretty consistently and this can lead to a scenario where you can essentially use the boost forever, so a cooldown has to be added to prevent this from happening.
Now to add this as code:
function Player:new(...)
    ...
    self.max_boost = 100
    self.boost = self.max_boost
end

function Player:update(dt)
    ...
    self.boost = math.min(self.boost + 10*dt, self.max_boost)
    ...
end
So with this we take care of rules 1 and 3. We start boost with max_boost, which is 100, and then we add 10 per second to boost while making sure that it doesn't go over max_boost. We can easily also get rule 2 done by simply decreasing 50 boost per second whenever the player is boosting:
function Player:update(dt)
    ...
    if input:down('up') then
    self.boosting = true
    self.max_v = 1.5*self.base_max_v
    self.boost = self.boost - 50*dt
    end
  if input:down('down') then
    self.boosting = true
    self.max_v = 0.5*self.base_max_v
    self.boost = self.boost - 50*dt
    end
    ...
end
Part of this code was already here from before, so the only lines we really added were the self.boost -= 50*dt ones. Now to check rule 4 we need to make sure that whenever boost reaches 0 a 2 second cooldown is started before the player can boost again. This is a bit more complicated because if involves more moving parts, but it looks like this:
function Player:new(...)
    ...
    self.can_boost = true
    self.boost_timer = 0
    self.boost_cooldown = 2
end
At first we'll introduce 3 variables. can_boost will be used to tell when a boost can happen. By default it's set to true because the player should be able to boost at the start. It will be set to false once boost reaches 0 and then it will be set to true again boost_cooldown seconds after. The boost_timer variable will take care of tracking how much time it has been since boost reached 0, and if this variable goes above boost_cooldown then we will set can_boost to true.
function Player:update(dt)
    ...
    self.boost = math.min(self.boost + 10*dt, self.max_boost)
    self.boost_timer = self.boost_timer + dt
    if self.boost_timer > self.boost_cooldown then self.can_boost = true end
    self.max_v = self.base_max_v
    self.boosting = false
    if input:down('up') and self.boost > 1 and self.can_boost then
        self.boosting = true
        self.max_v = 1.5*self.base_max_v
        self.boost = self.boost - 50*dt
        if self.boost <= 1 then
            self.boosting = false
            self.can_boost = false
            self.boost_timer = 0
        end
    end
    if input:down('down') and self.boost > 1 and self.can_boost then
        self.boosting = true
        self.max_v = 0.5*self.base_max_v
        self.boost = self.boost - 50*dt
        if self.boost <= 1 then
            self.boosting = false
            self.can_boost = false
            self.boost_timer = 0
        end
    end
    self.trail_color = skill_point_color
    if self.boosting then self.trail_color = boost_color end
end
This looks complicated but it just follows from what we wanted to achieve. Instead of just checking to see if a key is being pressed with input:down, we additionally also make sure that boost is above 1 (rule 5) and that can_boost is true (rule 5). Whenever boost reaches 0 we set boosting and can_boost to false, and then we reset boost_timer to 0. Since boost_timer is being added dt every frame, after 2 seconds it will set can_boost to true and we'll be able to boost again (rule 4).
The code above is also the way the boost mechanism should look like now in its complete state. One thing to note is that you might think that this looks ugly or unorganized or any number of combination of bad things. But this is just what a lot of code that takes care of certain aspects of gameplay looks like. It's multiple rules that are being followed and they sort of have to be followed all in the same place. It's important to get used to code like this, in my opinion.
In any case, out of the basic stats, boost was the only one that had some more involved logic to it. There are two more important stats: ammo and HP, but both are way simpler. Ammo will just get depleted whenever the player attacks and regained whenever a resource is collected in gameplay, and HP will get depleted whenever the player is hit and also regained whenever a resource is collected in gameplay. For now, we can just add them as basic stats like we did for the boost:
function Player:new(...)
    ...
    self.max_hp = 100
    self.hp = self.max_hp

    self.max_ammo = 100
    self.ammo = self.max_ammo
end
Resources
What I call resources are small objects that affect one of the main basic stats that we just went over. The game will have a total of 5 of these types of objects and they'll work like this:
- Ammo resource restores 5 ammo to the player and is spawned on enemy death
- Boost resource restores 25 boost to the player and is spawned randomly by the Director
- HP resource restores 25 HP to the player and is spawned randomly by the Director
- SkillPoint resource adds 1 skill point to the player and is spawned randomly by the Director
- Attack resource changes the current player attack and is spawned randomly by the Director
The Director is a piece of code that handles the spawning of enemies as well as resources. I called it that because other games (like L4D) call it that and it just seems to fit. Because we're not going to work on that piece of code yet, for now we'll bind the creation of each resource to a key just to test that it works.
Ammo Resource
So let's get started on the ammo. The final result should be like this:

The little green rectangles are the ammo resource. When the player hits one of them with its body the resource is destroyed and the player gets 5 ammo. We can create a new class named Ammo and start with some definitions:
function Ammo:new(...)
    ...
    self.w, self.h = 8, 8
    self.collider = self.area.world:newRectangleCollider(self.x, self.y, self.w, self.h)
    self.collider:setObject(self)
    self.collider:setFixedRotation(false)
    self.r = random(0, 2*math.pi)
    self.v = random(10, 20)
    self.collider:setLinearVelocity(self.v*math.cos(self.r), self.v*math.sin(self.r))
    self.collider:applyAngularImpulse(random(-24, 24))
end

function Ammo:draw()
    love.graphics.setColor(ammo_color)
    pushRotate(self.x, self.y, self.collider:getAngle())
    draft:rhombus(self.x, self.y, self.w, self.h, 'line')
    love.graphics.pop()
    love.graphics.setColor(default_color)
end
Ammo resources will be physics rectangles that start with some random and small velocity and rotation, set initially by setLinearVelocity and applyAngularImpulse. This object is also drawn using the draft library. This is a small library that lets you draw all sorts of shapes more easily than if you had to do it yourself. For this case you can just draw the resource as a rectangle if you want, but I'll choose to go with this. I'll also assume that you can already install the library yourself and read the documentation to figure out what it can and can't do. Additionally, we're also taking into account the rotation of the physics object by using the result from getAngle in pushRotate.
To test this all out, we can bind the creation of one of these objects to a key like this:
function Stage:new()
    ...
    input:bind('p', function()
        self.area:addGameObject('Ammo', random(0, gw), random(0, gh))
    end)
end
And if you run the game now and press p a bunch of times you should see these objects spawning and moving/rotating around.
The next thing we should do is create the collision interaction between player and resource. This interaction will hold true for all resources and will be mostly the same always. The first thing we want to do is make sure that we can capture an event when the player physics object collides with the ammo physics object. The easiest way to do this is through the use of collision classes. To start with we can define 3 collision classes for objects that are already exist: the Player, the projectiles and the resources.
function Stage:new()
    ...
    self.area = Area(self)
    self.area:addPhysicsWorld()
    self.area.world:addCollisionClass('Player')
    self.area.world:addCollisionClass('Projectile')
    self.area.world:addCollisionClass('Collectable')
    ...
end
And then in each one of those files (Player, Projectile and Ammo) we can set the collider's collision class using setCollisionClass (repeat the code below for the other files):
function Player:new(...)
    ...
    self.collider:setCollisionClass('Player')
    ...
end
By itself this doesn't change anything, but it gives us a base to work with and to capture collision events between physics objects. For instance, if we change the Collectable collision class to ignore the Player like this:
self.area.world:addCollisionClass('Collectable', {ignores = {'Player'}})
Then if you run the game again you'll notice that the player is now physically ignoring the ammo resource objects. This isn't what we want to do in the end but it serves as a nice example of what we can do with collision classes. The rules we actually want these 3 collision classes to follow are the following:
- Projectile will ignore Projectile
- Collectable will ignore Collectable
- Collectable will ignore Projectile
- Player will generate collision events with Collectable
Rules 1, 2 and 3 can be satisfied by making small changes to the addCollisionClass calls:
function Stage:new()
    ...
    self.area.world:addCollisionClass('Player')
    self.area.world:addCollisionClass('Projectile', {ignores = {'Projectile'}})
    self.area.world:addCollisionClass('Collectable', {ignores = {'Collectable', 'Projectile'}})
    ...
end
It's important to note that the order of the declaration of collision classes matters. For instance, if we swapped the order of the Projectile and Collectable declarations a bug would happen because the Collectable collision class makes reference to the Projectile collision class, but since the Projectile collision class isn't yet defined it bugs out.
The fourth rule can be satisfied by using the enter call:
function Player:update(dt)
    ...
    if self.collider:enter('Collectable') then
        print(1)
    end
end
And if you run this you'll see that 1 will be printed to the console every time the player collides with an ammo resource.
Another piece of behavior we need to add to the Ammo class is that it needs to move towards the player slightly. An easy way to do this is to add the Seek Behavior to it. My version of the seek behavior was based on the book Programming Game AI by Example which has a very nice section on steering behaviors in general. I'm not going to explain it in detail because I honestly don't remember how it works, so I'll just assume if you're curious about it you'll figure it out :D
function Ammo:update(dt)
    ...
    local target = current_room.player
    if target then
        local projectile_heading = Vector(self.collider:getLinearVelocity()):normalized()
        local angle = math.atan2(target.y - self.y, target.x - self.x)
        local to_target_heading = Vector(math.cos(angle), math.sin(angle)):normalized()
        local final_heading = (projectile_heading + 0.1*to_target_heading):normalized()
        self.collider:setLinearVelocity(self.v*final_heading.x, self.v*final_heading.y)
    else self.collider:setLinearVelocity(self.v*math.cos(self.r), self.v*math.sin(self.r)) end
end
So here the ammo resource will head towards the target if it exists, otherwise it will just move towards the direction it was initially set to move towards. target contains a reference to the player, which was set in Stage like this:
function Stage:new()
    ...
    self.player = self.area:addGameObject('Player', gw/2, gh/2)
end
Finally, the only thing left to do is what happens when an ammo resource is collected. From the gif above you can see that a little effect plays (like the one for when a projectile dies), along with some particles, and then the player also gets +5 ammo.
Let's start with the effect. This effect follows the exact same logic as the ProjectileDeathEffect object, in that there's a little white flash and then the actual color of the effect comes on. The only difference here is that instead of drawing a square we will be drawing a rhombus, which is the same shape that we used to draw the ammo resource itself. I'll call this new object AmmoEffect and I won't really go over it in detail since it's the same as ProjectileDeathEffect. The way we call it though is like this:
function Ammo:die()
    self.dead = true
    self.area:addGameObject('AmmoEffect', self.x, self.y,
    {color = ammo_color, w = self.w, h = self.h})
    for i = 1, love.math.random(4, 8) do
    self.area:addGameObject('ExplodeParticle', self.x, self.y, {s = 3, color = ammo_color})
    end
end
Here we are creating one AmmoEffect object and then between 4 and 8 ExplodeParticle objects, which we already used before for the Player's death effect. The die function on an Ammo object will get called whenever it collides with the Player:
function Player:update(dt)
    ...
    if self.collider:enter('Collectable') then
        local collision_data = self.collider:getEnterCollisionData('Collectable')
        local object = collision_data.collider:getObject()
        if object:is(Ammo) then
            object:die()
        end
    end
end
Here first we use getEnterCollisionData to get the collision data generated by the last enter collision event for the specified tag. After this we use getObject to get access to the object attached to the collider involved in this collision event, which could be any object of the Collectable collision class. In this case we only have the Ammo object to worry about, but if we had others here's where we'd place the code to separate between them. And that's what we do, to really check that the object we get from getObject is the of the Ammo class we use classic's is function. If it is really is an object of the Ammo class then we call its die function. All that should look like this:
One final thing we forgot to do is actually add +5 ammo to the player whenever an ammo resource is gathered. For this we'll define an addAmmo function which simply adds a certain amount to the ammo variable and checks that it doesn't go over max_ammo:
function Player:addAmmo(amount)
    self.ammo = math.min(self.ammo + amount, self.max_ammo)
end
And then we can just call this after object:die() in the collision code we just added.
Boost Resource
Now for the boost. The final result should look like this:
As you can see, the idea is almost the same as the ammo resource, except that the boost resource's movement is a little different, it looks a little different and the visual effect that happens when one is gathered is different as well.
So let's start with the basics. For every resource other than the ammo one, they'll be spawned either on the left or right of the screen and they'll move really slowly in a straight line to the other side. The same applies to the enemies. This gives the player enough time to move towards the resource to pick it up if he wants to.
The basic starting setup of the Boost class is about the same as the Ammo one and looks like this:
function Boost:new(...)
    ...

    local direction = table.random({-1, 1})
    self.x = gw/2 + direction*(gw/2 + 48)
    self.y = random(48, gh - 48)

    self.w, self.h = 12, 12
    self.collider = self.area.world:newRectangleCollider(self.x, self.y, self.w, self.h)
    self.collider:setObject(self)
    self.collider:setCollisionClass('Collectable')
    self.collider:setFixedRotation(false)
    self.v = -direction*random(20, 40)
    self.collider:setLinearVelocity(self.v, 0)
    self.collider:applyAngularImpulse(random(-24, 24))
end

function Boost:update(dt)
    ...

    self.collider:setLinearVelocity(self.v, 0)
end
There are a few differences though. The 3 first lines in the constructor are picking the initial position of this object. The table.random function is defined in utils.lua as follows:
function table.random(t)
    return t[love.math.random(1, #t)]
end
And as you can see what it does is just pick a random element from a table. In this case, we're picking either -1 or 1 to signify the direction in which the object will be spawned. If -1 is picked then the object will be spawned to the left of the screen, and if 1 is picked then it will be spawned to the right. More precisely, the exact positions chosen for its chosen position will be either -48 or gw+48, so slightly offscreen but close enough to the edge.
After this we define the object mostly like the Ammo one, with a few differences again only when it comes to its velocity. If this object was spawned to the right then we want it to move left, and if it was spawned to the left then we want it to move right. So its velocity is set to a random value between 20 and 40, but also multiplied by -direction, since if the object was to the right, direction was 1, and if we want to move it to the left then the velocity has to be negative (and the opposite for the other side). The object's velocity is always set to the v attribute on the x component and set to 0 on the y component. We want the object to remain moving in a horizontal line no matter what so setting its y velocity to 0 will achieve that.
The final main difference is in the way its drawn:
function Boost:draw()
    love.graphics.setColor(boost_color)
    pushRotate(self.x, self.y, self.collider:getAngle())
    draft:rhombus(self.x, self.y, 1.5*self.w, 1.5*self.h, 'line')
    draft:rhombus(self.x, self.y, 0.5*self.w, 0.5*self.h, 'fill')
    love.graphics.pop()
    love.graphics.setColor(default_color)
end
Here instead of just drawing a single rhombus we draw one inner and one outer to be used as sort of an outline. You can obviously draw all these objects in whatever way you want, but this is what I personally decided to do.
Now for the effects. There are two effects being used here: one that is similar to AmmoEffect (although a bit more involved) and the one that is used for the +BOOST text. We'll start with the one that's similar to AmmoEffect and call it BoostEffect.
This effect has two parts to it, the center with its white flash and the blinking effect before it disappears. The center works in the same way as the AmmoEffect, the only difference is that the timing of each phase is different, from 0.1 to 0.2 in the first phase and from 0.15 to 0.35 in the second:
function BoostEffect:new(...)
    ...
    self.current_color = default_color
    self.timer:after(0.2, function()
        self.current_color = self.color
        self.timer:after(0.35, function()
            self.dead = true
        end)
    end)
end
The other part of the effect is the blinking before it dies. This can be achieved by creating a variable named visible, which when set to true will draw the effect and when set to false will not draw the effect. By changing this variable from false to true really fast we can achieve the desired effect:
function BoostEffect:new(...)
    ...
    self.visible = true
    self.timer:after(0.2, function()
        self.timer:every(0.05, function() self.visible = not self.visible end, 6)
        self.timer:after(0.35, function() self.visible = true end)
    end)
end
Here we use the every call to switch between visible and not visible six times, each with a 0.05 seconds delay in between, and after that's done we set it to be visible in the end. The effect will die after 0.55 seconds anyway (since we set dead to true after 0.55 seconds when setting the current color) so setting it to be visible in the end isn't super important to do. In any case, then we can draw it like this:
function BoostEffect:draw()
    if not self.visible then return end

    love.graphics.setColor(self.current_color)
    draft:rhombus(self.x, self.y, 1.34*self.w, 1.34*self.h, 'fill')
    draft:rhombus(self.x, self.y, 2*self.w, 2*self.h, 'line')
    love.graphics.setColor(default_color)
end
We're simply drawing both the inner and outer rhombus at different sizes. The exact numbers (1.34, 2) were reached through pretty much trial and error based on what looked best.
The final thing we need to do for this effect is to make the outer rhombus outline expand over the life of the object. We can do that like this:
function BoostEffect:new(...)
    ...
    self.sx, self.sy = 1, 1
    self.timer:tween(0.35, self, {sx = 2, sy = 2}, 'in-out-cubic')
end
And then update the draw function like this:
function BoostEffect:draw()
    ...
    draft:rhombus(self.x, self.y, self.sx*2*self.w, self.sy*2*self.h, 'line')
    ...
end
With this, the sx and sy variables will grow to 2 over 0.35 seconds, which means that the outline rhombus will also grow to double its previous value over those 0.35 seconds. In the end the result looks like this (I'm assuming you already linked this object's die function to the collision event with the Player, like we did for the ammo resource):
Now for the other part of the effect, the crazy looking text. This text effect will be used throughout the game pretty much everywhere so let's make sure we get it right. Here's what the effect looks like again:

First let's break this effect down into its multiple parts. The first thing to notice is that it's simply a string being drawn to the screen initially, but then near its end it starts blinking like the BoostEffect object. That blinking part turns out to use exactly the same logic as the BoostEffect so we have that covered already.
What also happens though is that the letters of the string start changing randomly to other letters, and each character's background also changes colors randomly. This suggests that this effect is processing characters individually internally rather than operating on a single string, which probably means we'll have to do something like hold all characters in a characters table, operate on this table, and then draw each character on that table with all its modifications and effects to the screen.
So to start with this in mind we can define the basics of the InfoText class. The way we're gonna call it is like this:
function Boost:die()
    ...
    self.area:addGameObject('InfoText', self.x, self.y, {text = '+BOOST', color = boost_color})
end
And so the text attribute will contain our string. Then the basic definition of the class can look like this:
function InfoText:new(...)
    ...
    self.depth = 80

    self.characters = {}
    for i = 1, #self.text do table.insert(self.characters, self.text:utf8sub(i, i)) end
end
With this we simply define that this object will have depth of 80 (higher than all other objects, so will be drawn in front of everything) and then we separate the initial string into characters in a table. We use an utf8 library to do this. In general it's a good idea to manipulate strings with a library that supports all sorts of characters, and for this object it's really important that we do this as we'll see soon.
In any case, the drawing of these characters should also be done on an individual basis because as we figured out earlier, each character has its own background that can change randomly, so it's probably the case that we'll want to draw each character individually.
The logic used to draw characters individually is basically to go over the table of characters and draw each character at the x position that is the sum of all characters before it. So, for instance, drawing the first O in +BOOST means drawing it at something like initial_x_position + widthOf('+B'). The problem with getting the width of +B in this case is that it depends on the font being used, since we'll use the Font:getWidth function, and right now we haven't set any font. We can solve that easily though!
For this effect the font used will be m5x7 by Daniel Linssen. We can put this font in the folder resources/fonts and then load it. The code needed for loading it will be left as an exercise, since it's somewhat similar to the code used to load class definitions in the objects folder (exercise 14). By the end of this loading process we should have a global table called fonts that has all loaded fonts in the format fontname_fontsize. In this instance we'll use m5x7_16:
function InfoText:new(...)
    ...
    self.font = fonts.m5x7_16
    ...
end
And this is what the drawing code looks like:
function InfoText:draw()
    love.graphics.setFont(self.font)
    for i = 1, #self.characters do
        local width = 0
        if i > 1 then
            for j = 1, i-1 do
                width = width + self.font:getWidth(self.characters[j])
            end
        end

        love.graphics.setColor(self.color)
        love.graphics.print(self.characters[i], self.x + width, self.y,
      0, 1, 1, 0, self.font:getHeight()/2)
    end
    love.graphics.setColor(default_color)
end
First we use love.graphics.setFont to set the font we want to use for the next drawing operations. After this we go over each character and then draw it. But first we need to figure out its x position, which is the sum of the width of the characters before it. The inner loop that accumulates on the variable width is doing just that. It goes from 1 (the start of the string) to i-1 (the character before the current one) and adds the width of each character to a total final width that is the sum of all of them. After that we use love.graphics.print to draw each individual character at its appropriate position. We also offset each character up by half the height of the font (so that the characters are centered around the y position we defined).
If we test all this out now it looks like this:
Which looks about right!
Now we can move on to making the text blink a little before disappearing. This uses the same logic as the BoostEffect object so we can just kinda copy it:
function InfoText:new(...)
    ...
    self.visible = true
    self.timer:after(0.70, function()
        self.timer:every(0.05, function() self.visible = not self.visible end, 6)
        self.timer:after(0.35, function() self.visible = true end)
    end)
    self.timer:after(1.10, function() self.dead = true end)
end
And if you run this you should see that the text stays normal for a while, starts blinking and then disappears.
Now the hard part, which is making each character change randomly as well as its foreground and background colors. This changing starts at about the same that the character starts blinking, so we'll place this piece of code inside the 0.7 seconds after call we just defined above. The way we'll do this is that every 0.035 seconds, we'll run a procedure that will have a chance to change a character to another random character. That looks like this:
self.timer:after(0.70, function()
    ...
    self.timer:every(0.035, function()
    for i, character in ipairs(self.characters) do
            if love.math.random(1, 20) <= 1 then
            -- change character
            else
            -- leave character as it is
            end
       end
    end)
end)
And so each 0.035 seconds, for each character there's a 5% probability that it will be changed to something else. We can complete this by adding a variable named random_characters which is a string that contains all characters a character might change to, and then when a character change is necessary we pick one at random from this string:
self.timer:after(0.70, function()
    ...
    self.timer:every(0.035, function()
        local random_characters = '0123456789!@#$%¨&*()-=+[]^~/;?><.,|abcdefghijklmnopqrstuvwxyzABCDEFGHIJKLMNOPQRSTUVWYXZ'
    for i, character in ipairs(self.characters) do
            if love.math.random(1, 20) <= 1 then
            local r = love.math.random(1, #random_characters)
                self.characters[i] = random_characters:utf8sub(r, r)
            else
                self.characters[i] = character
            end
       end
    end)
end)
And if you run that now it should look like this:
We can use the same logic we used here to change the character's colors as well as their background colors. For that we'll define two tables, background_colors and foreground_colors. Each table will be the same size of the characters table and will simply hold the background and foreground colors for each character. If a certain character doesn't have any colors set in these tables then it just defaults to the default color for the foreground (boost_color ) and to a transparent background.
function InfoText:new(...)
    ...
    self.background_colors = {}
    self.foreground_colors = {}
end

function InfoText:draw()
    ...
    for i = 1, #self.characters do
    ...
    if self.background_colors[i] then
          love.graphics.setColor(self.background_colors[i])
          love.graphics.rectangle('fill', self.x + width, self.y - self.font:getHeight()/2,
          self.font:getWidth(self.characters[i]), self.font:getHeight())
      end
    love.graphics.setColor(self.foreground_colors[i] or self.color or default_color)
    love.graphics.print(self.characters[i], self.x + width, self.y,
      0, 1, 1, 0, self.font:getHeight()/2)
    end
end
For the background colors we simply draw a rectangle at the appropriate position and with the size of the current character if background_colors[i] (the background color for the current character) is defined. As for the foreground color, we simply set the color to draw the current character with using setColor. If foreground_colors[i] isn't defined then it defauls to self.color, which for this object should always be boost_color since that's what we're passing in when we call it from the Boost object. But if self.color isn't defined either then it defaults to white (default_color). By itself this piece of code won't really do anything, because we haven't defined any of the values inside the background_colors or the foreground_colors tables.
To do that we can use the same logic we used to change characters randomly:
self.timer:after(0.70, function()
    ...
    self.timer:every(0.035, function()
    for i, character in ipairs(self.characters) do
            ...
            if love.math.random(1, 10) <= 1 then
                -- change background color
            else
                -- set background color to transparent
            end

            if love.math.random(1, 10) <= 2 then
                -- change foreground color
            else
                -- set foreground color to boost_color
            end
       end
    end)
end)
The code that changes colors around will have to pick between a list of colors. We defined a group of 6 colors globally and we could just put those all into a list and then use table.random to pick one at random. What we'll do is that but also define 6 more colors on top of it which will be the negatives of the 6 original ones. So say you have 232, 48, 192 as the original color, we can define its negative as 255-232, 255-48, 255-192.
function InfoText:new(...)
    ...
    local default_colors = {default_color, hp_color, ammo_color, boost_color, skill_point_color}
    local negative_colors = {
        {255-default_color[1], 255-default_color[2], 255-default_color[3]},
        {255-hp_color[1], 255-hp_color[2], 255-hp_color[3]},
        {255-ammo_color[1], 255-ammo_color[2], 255-ammo_color[3]},
        {255-boost_color[1], 255-boost_color[2], 255-boost_color[3]},
        {255-skill_point_color[1], 255-skill_point_color[2], 255-skill_point_color[3]}
    }
    self.all_colors = fn.append(default_colors, negative_colors)
    ...
end
So here we define two tables that contain the appropriate values for each color and then we use the append function to join them together. So now we can say something like table.random(self.all_colors) to get a random color out of the 10 defined in those tables, which means that we can do this:
self.timer:after(0.70, function()
    ...
    self.timer:every(0.035, function()
    for i, character in ipairs(self.characters) do
            ...
            if love.math.random(1, 10) <= 1 then
                self.background_colors[i] = table.random(self.all_colors)
            else
                self.background_colors[i] = nil
            end

            if love.math.random(1, 10) <= 2 then
                self.foreground_colors[i] = table.random(self.all_colors)
            else
                self.background_colors[i] = nil
            end
       end
    end)
end)
And if we run the game now it should look like this:
And that's it. We'll improve it even more later on (and on the exercises) but it's enough for now. Lastly, the final thing we should do is make sure that whenever we collect a boost resource we actually add +25 boost to the player. This works exactly the same way as it did for the ammo resource so I'm going to skip it.
Resources Exercises
95. Make it so that the Projectile collision class will ignore the Player collision class.
96. Change the addAmmo function so that it supports the addition of negative values and doesn't let the ammo attribute go below 0. Do the same for the addBoost and addHP functions (adding the HP resource is an exercise defined below).
97. Following the previous exercise, is it better to handle positive and negative values on the same function or to separate between addResource and removeResource functions instead?
98. In the InfoText object, change the probability of a character being changed to 20%, the probability of a foreground color being changed to 5%, and the probability of a background color being changed to 30%.
99. Define the default_colors, negative_colors and all_colors tables globally instead of locally in InfoText.
100. Randomize the position of the InfoText object so that it is spawned between -self.w and self.w in its x component and between -self.h and self.h in its y component. The w and h attributes refer to the Boost object that is spawning the InfoText.
101. Assume the following function:
function Area:getAllGameObjectsThat(filter)
    local out = {}
    for _, game_object in pairs(self.game_objects) do
        if filter(game_object) then
            table.insert(out, game_object)
        end
    end
    return out
end
Which returns all game objects inside an Area that pass a filter function. And then assume that it's called like this inside InfoText's constructor:
function InfoText:new(...)
    ...
    local all_info_texts = self.area:getAllGameObjectsThat(function(o)
        if o:is(InfoText) and o.id ~= self.id then
            return true
        end
    end)
end
Which returns all existing and alive InfoText objects that are not this one. Now make it so that this InfoText object doesn't visually collide with any other InfoText object, meaning, it doesn't occupy the same space on the screen as another such that its text would become unreadable. You may do this in whatever you think is best as long as it achieves the goal.
102. (CONTENT) Add the HP resource with all of its functionality and visual effects. It uses the exact same logic as the Boost resource, but instead adds +25 to HP instead. The resource and effects look like this:
103. (CONTENT) Add the SP resource with all of its functionality and visual effects. It uses the exact same logic as the Boost resource, but instead adds +1 to SP instead. The SP resource should also be defined as a global variable for now instead of an internal one to the Player object. The resource and effects look like this:
Attacks
Alright, so now for attacks. Before anything else the first thing we're gonna do is change the way projectiles are drawn. Right now they're being drawn as circles but we want them as lines. This can be achieved with something like this:
function Projectile:draw()
    love.graphics.setColor(default_color)

    pushRotate(self.x, self.y, Vector(self.collider:getLinearVelocity()):angle())
    love.graphics.setLineWidth(self.s - self.s/4)
    love.graphics.line(self.x - 2*self.s, self.y, self.x, self.y)
    love.graphics.line(self.x, self.y, self.x + 2*self.s, self.y)
    love.graphics.setLineWidth(1)
    love.graphics.pop()
end
In the pushRotate function we use the projectile's velocity so that we can rotate it towards the angle its moving at. Then inside we use love.graphics.setLineWidth and set it to a value somewhat proportional to the s attribute but slightly smaller. This means that projectiles with bigger s will be thicker in general. Then we draw the projectile using love.graphics.line and importantly, we draw one line from -2*self.s to the center and then another from the center to 2*self.s. We do this because each attack will have different colors, and what we'll do is change the color of one those lines but not change the color of another. So, for instance, if we do this:
function Projectile:draw()
    love.graphics.setColor(default_color)

    pushRotate(self.x, self.y, Vector(self.collider:getLinearVelocity()):angle())
    love.graphics.setLineWidth(self.s - self.s/4)
    love.graphics.line(self.x - 2*self.s, self.y, self.x, self.y)
    love.graphics.setColor(hp_color) -- change half the projectile line to another color
    love.graphics.line(self.x, self.y, self.x + 2*self.s, self.y)
    love.graphics.setLineWidth(1)
    love.graphics.pop()
end
It will look like this:
In this way we can make each attack have its own color which helps with letting the player better understand what's going on on the screen.
The game will end up having 16 attacks but we'll cover only a few of them now. The way the attack system will work is very simple and these are the rules:
- Attacks (except the Neutral one) consume ammo with every shot;
- When ammo hits 0 the current attack is changed to Neutral;
- New attacks can be obtained through resources that are spawned randomly;
- When a new attack is obtained, the current attack is removed and ammo is fully regenerated;
- Each attack consumes a different amount of ammo and has different properties.
The first we're gonna do is define a table that will hold information on each attack, such as their cooldown, ammo consumption and color. We'll define this in globals.lua and for now it will look like this:
attacks = {
    ['Neutral'] = {cooldown = 0.24, ammo = 0, abbreviation = 'N', color = default_color},
}
The normal attack that we already have defined is called Neutral and it simply has the stats that the attack we had in the game had so far. Now what we can do is define a function called setAttack which will change from one attack to another and use this global table of attacks:
function Player:setAttack(attack)
    self.attack = attack
    self.shoot_cooldown = attacks[attack].cooldown
    self.ammo = self.max_ammo
end
And then we can call it like this:
function Player:new(...)
    ...
    self:setAttack('Neutral')
    ...
end
Here we simply change an attribute called attack which will contain the name of the current attack. This attribute will be used in the shoot function to check which attack is currently active and how we should proceed with projectile creation.
We also change an attribute named shoot_cooldown. This is an attribute that we haven't created yet, but similar to how the boost_timer and boost_cooldown attributes work, they will be used to control how often something can happen, in this case how often an attack happen. We will remove this line:
function Player:new(...)
    ...
    self.timer:every(0.24, function() self:shoot() end)
    ...
end
And instead do the timing of attacks manually like this:
function Player:new(...)
    ...
    self.shoot_timer = 0
    self.shoot_cooldown = 0.24
    ...
end

function Player:update(dt)
    ...
    self.shoot_timer = self.shoot_timer + dt
    if self.shoot_timer > self.shoot_cooldown then
        self.shoot_timer = 0
        self:shoot()
    end
    ...
end
Finally, at the end of the setAttack function we also regenerate the ammo resource. With this we take care of rule 4. The next thing we can do is change the shoot function a little to start taking into account the fact that different attacks exist:
function Player:shoot()
    local d = 1.2*self.w
    self.area:addGameObject('ShootEffect',
    self.x + d*math.cos(self.r), self.y + d*math.sin(self.r), {player = self, d = d})

    if self.attack == 'Neutral' then
        self.area:addGameObject('Projectile',
      self.x + 1.5*d*math.cos(self.r), self.y + 1.5*d*math.sin(self.r), {r = self.r})
    end
end
Before launching the projectile we check the current attack with the if self.attack == 'Neutral' conditional. This function will grow based on a big conditional chain like this where we'll be checking for all 16 attacks that we add.
So let's get started with adding one actual attack to see what it's like. The attack we'll add will be called Double and it looks like this:
And as you can see it shoots 2 projectiles at an angle instead of one. To get started with this first we'll add the attack's description to the global attacks table. This attack will have a cooldown of 0.32, cost 2 ammo, and its color will be ammo_color (these values were reached through trial and error):
attacks = {
    ...
    ['Double'] = {cooldown = 0.32, ammo = 2, abbreviation = '2', color = ammo_color},
}
Now we can add it to the shoot function as well:
function Player:shoot()
    ...
    elseif self.attack == 'Double' then
        self.ammo = self.ammo - attacks[self.attack].ammo
        self.area:addGameObject('Projectile',
    self.x + 1.5*d*math.cos(self.r + math.pi/12),
    self.y + 1.5*d*math.sin(self.r + math.pi/12),
    {r = self.r + math.pi/12, attack = self.attack})

        self.area:addGameObject('Projectile',
    self.x + 1.5*d*math.cos(self.r - math.pi/12),
    self.y + 1.5*d*math.sin(self.r - math.pi/12),
    {r = self.r - math.pi/12, attack = self.attack})
    end
end
Here we create two projectiles instead of one, each pointing with an angle offset of math.pi/12 radians, or 15 degrees. We also make it so that the projectile receives the attack attribute as the name of the attack. For each projectile type we'll do this as it will help us identify which attack this projectile belongs to. That is helpful for setting its appropriate color as well as changing its behavior when necessary. The Projectile object now looks like this:
function Projectile:new(...)
    ...
    self.color = attacks[self.attack].color
    ...
end

function Projectile:draw()
    pushRotate(self.x, self.y, Vector(self.collider:getLinearVelocity()):angle())
    love.graphics.setLineWidth(self.s - self.s/4)
    love.graphics.setColor(self.color)
    love.graphics.line(self.x - 2*self.s, self.y, self.x, self.y)
    love.graphics.setColor(default_color)
    love.graphics.line(self.x, self.y, self.x + 2*self.s, self.y)
    love.graphics.setLineWidth(1)
    love.graphics.pop()
end
In the constructor we set color to the color defined in the global attacks table for this attack. And then in the draw function we draw one part of the line with its color being the color attribute, and another being default_color. For most projectile types this drawing setup will hold.
The last thing we forgot to do is to make it so that this attack obeys rule 1, meaning that we forgot to add code to make it consume the amount of ammo it should consume. This is a pretty simple fix:
function Player:shoot()
    ...
    elseif self.attack == 'Double' then
        self.ammo = self.ammo - attacks[self.attack].ammo
        ...
    end
end
With this rule 1 (for the Double attack) will be followed. We can also add the code that will make rule 2 come true, which is that when ammo hits 0, we change the current attack to the Neutral one:
function Player:shoot()
    ...
    if self.ammo <= 0 then
        self:setAttack('Neutral')
        self.ammo = self.max_ammo
    end
end
This must come at the end of the shoot function since we don't want the player to be able to shoot one extra time after his ammo resource hits 0.
If you do all this and try running it it should look like this:
Attacks Exercises
104. (CONTENT) Implement the Triple attack. Its definition on the attacks table looks like this:
attacks['Triple'] = {cooldown = 0.32, ammo = 3, abbreviation = '3', color = boost_color}
And the attack itself looks like this:
The angles on the projectile are exactly the same as Double, except that there's one extra projectile also being spawned along the middle (at the same angle that the Neutral projectile is spawned). Create this attack following the same steps that were used for the Double attack.
105. (CONTENT) Implement the Rapid attack. Its definition on the attacks table looks like this:
attacks['Rapid'] = {cooldown = 0.12, ammo = 1, abbreviation = 'R', color = default_color}
And the attack itself looks like this:
106. (CONTENT) Implement the Spread attack. Its definition on the attacks table looks like this:
attacks['Spread'] = {cooldown = 0.16, ammo = 1, abbreviation = 'RS', color = default_color}
And the attack itself looks like this:

The angles used for the shots are a random value between -math.pi/8 and +math.pi/8. This attack's projectile color also works a bit differently. Instead of having one color only, the color changes randomly to one inside the all_colors list every frame (or every other frame depending on what you think is best).
107. (CONTENT) Implement the Back attack. Its definition on the attacks table looks like this:
attacks['Back'] = {cooldown = 0.32, ammo = 2, abbreviation = 'Ba', color = skill_point_color}
And the attack itself looks like this:
108. (CONTENT) Implement the Side attack. Its definition on the attacks table looks like this:
attacks['Side'] = {cooldown = 0.32, ammo = 2, abbreviation = 'Si', color = boost_color}
And the attack itself looks like this:
109. (CONTENT) Implement the Attack resource. Like the Boost and SkillPoint resources, the Attack resource is spawned from either the left or right of the screen at a random y position, and then moves inward very slowly. When the player comes into contact with an Attack resource, his attack is changed to the attack that the resource contains using the setAttack function.
Attack resources look a bit different from the Boost or SkillPoint resources, but the idea behind it and its effects are pretty much the same. The colors used for each different attack are the same as the ones used for its projectiles and the identifying name used is the one that we called abbreviation in the attacks table. Here's what they look like:
Don't forget to create InfoText objects whenever a new attack is gathered by the player!
Enemies
Introduction
In this article we'll go over the creation of a few enemies as well as the EnemyProjectile class, which is a projectile that some enemies can shoot to hurt the player. This article will be a bit shorter than others since we won't focus on creating all enemies now, only the basic behavior that will be shared among most of them.
Enemies
Enemies in this game will work in a similar way to how the resources we created in the last article worked, in the sense that they will be spawned at either left or right of the screen at a random y position and then they will slowly move inward. The code used to make that work will be exactly the same as the one used in each resource we implemented.
We'll get started with the first enemy which is called Rock. It looks like this:

The constructor code for this object will be very similar to the Boost one, but with a few small differences:
function Rock:new(area, x, y, opts)
    Rock.super.new(self, area, x, y, opts)

    local direction = table.random({-1, 1})
    self.x = gw/2 + direction*(gw/2 + 48)
    self.y = random(16, gh - 16)

    self.w, self.h = 8, 8
    self.collider = self.area.world:newPolygonCollider(createIrregularPolygon(8))
    self.collider:setPosition(self.x, self.y)
    self.collider:setObject(self)
    self.collider:setCollisionClass('Enemy')
    self.collider:setFixedRotation(false)
    self.v = -direction*random(20, 40)
    self.collider:setLinearVelocity(self.v, 0)
    self.collider:applyAngularImpulse(random(-100, 100))
end
Here instead of the object using a RectangleCollider, it will use a PolygonCollider. We create the vertices of this polygon with the function createIrregularPolygon which will be defined in utils.lua. This function should return a list of vertices that make up an irregular polygon. What I mean by an irregular polygon is one that is kinda like a circle but where each vertex might be a bit closer or further away from the center, and where the angles between each vertex may be a little random as well.
To start with the definition of that function we can say that it will receive two arguments: size and point_amount. The first will refer to the radius of the circle and the second will refer to the number of points that will compose the polygon:
function createIrregularPolygon(size, point_amount)
    local point_amount = point_amount or 8
end
Here we also say that if point_amount isn't defined it will default to 8.
The next thing we can do is start defining all the points. This can be done by going from 1 to point_amount and in each iteration defining the next vertex based on an angle interval. So, for instance, to define the position of the second point we can say that its angle will be somewhere around 2*angle_interval, where angle_interval is the value 2*math.pi/point_amount. So in this case it would be around 90 degrees. This probably makes more sense in code, so:
function createIrregularPolygon(size, point_amount)
    local point_amount = point_amount or 8
    local points = {}
    for i = 1, point_amount do
        local angle_interval = 2*math.pi/point_amount
        local distance = size + random(-size/4, size/4)
        local angle = (i-1)*angle_interval + random(-angle_interval/4, angle_interval/4)
        table.insert(points, distance*math.cos(angle))
        table.insert(points, distance*math.sin(angle))
    end
    return points
end
And so here we define angle_interval like previously explained, but we also define distance as being around the radius of the circle, but with a random offset between -size/4 and +size/4. This means that each vertex won't be exactly on the edge of the circle but somewhere around it. We also randomize the angle interval a bit to create the same effect. Finally, we add both x and y components to a list of points which is then returned. Note that the polygon is created in local space (assuming that the center is 0, 0), which means that we have to then use setPosition to place the object in its proper place.
Another difference in the constructor of this object is the use of the Enemy collision class. Like all other collision classes, this one should be defined before it can be used:
function Stage:new()
    ...
    self.area.world:addCollisionClass('Enemy')
    ...
end
In general, new collision classes should be added for object types that will have different collision behaviors between each other. For instance, enemies will physically ignore the player but will not physically ignore projectiles. Because no other object type in the game follows this behavior, it means we need to add a new collision class to do it. If the Projectile collision class only ignored the player instead of also ignoring other projectiles, then enemies would be able to have their collision class be Projectile as well.
The last thing about the Rock object is how its drawn. Since it's just a polygon we can simply draw its points using love.graphics.polygon:
function Rock:draw()
    love.graphics.setColor(hp_color)
    local points = {self.collider:getWorldPoints(self.collider.shapes.main:getPoints())}
    love.graphics.polygon('line', points)
    love.graphics.setColor(default_color)
end
We get its points first by using PolygonShape:getPoints. These points are returned in local coordinates, but we want global ones, so we have to use Body:getWorldPoints to convert from local to global coordinates. Once that's done we can just draw the polygon and it will behave like expected. Note that because we're getting points from the collider directly and the collider is a polygon that is rotating around, we don't need to use pushRotate to rotate the object like we did for the Boost object since the points we're getting are already accounting for the objects rotation.
If you do all this it should look like this:
Enemies Exercises
110. Perform the following tasks:
- Add an attribute named
hpto the Rock class that initially is set to 100 - Add a function named
hitto the Rock class. This function should do the following:- It should receives a
damageargument, and in case it isn't then it should default to 100 damagewill be subtracted fromhpand ifhphits 0 or lower then the Rock object will die- If
hpdoesn't hit 0 or lower then an attribute namedhit_flashwill be set to true and then set to false 0.2 seconds later. In the draw function of the Rock object, wheneverhit_flashis set to true the color of the object will be set todefault_colorinstead ofhp_color.
111. Create a new class namedEnemyDeathEffect. This effect gets created whenever an enemy dies and it behaves exactly like theProjectileDeathEffectobject, except that it is bigger according to the size of the Rock object. This effect should be created whenever the Rock object'shpattribute hits 0 or lower.
112. Implement the collision event between an object of the Projectile collision class and an object of the Enemy collision class. In this case, implement it in the Projectile's class update function. Whenever the projectile hits an object of the Enemy class, it should call the enemy'shitfunction with the amount of damage this projectile deals (by default, projectiles will have an attribute nameddamagethat is initially set to 100). Whenever a hit happens the projectile should also call its owndiefunction.
113. Add a function namedhitto the Player class. This function should do the following things:
- It should receives a
- It should receive a
damageargument, and in case it isn't defined it should default to 10 - This function should not do anything whenever the
invincibleattribute is true - Between 4 and 8
ExplodeParticleobjects should be spawned - The
addHP(orremoveHPfunction if you decided to add this one) should take thedamageattribute and use it to remove HP from the Player. Inside theaddHP(orremoveHP) function there should be a way to deal with the case wherehphits or goes below 0 and the player dies.
Additionally, the following conditional operations should hold:
- If the damage received is equal to or above 30, then the
invincibleattribute should be set to true and 2 seconds later it should be set to false. On top of that, the camera should shake with intensity 6 for 0.2 seconds, the screen should flash for 3 frames, and the game should be slowed to 0.25 for 0.5 seconds. Finally, aninvisibleattribute should alternate between true and false every 0.04 for the duration thatinvincibleis set to true, and additionally the Player's draw function shouldn't draw anything wheneverinvisibleis set to true. - If the damage received is below 30, then the camera should shake with intensity 6 for 0.1 seconds, the screen should flash for 2 frames, and the game should be slowed to 0.75 for 0.25 seconds.
This hit function should be called whenever the Player collides with an Enemy. The player should be hit for 30 damage on enemy collision.
After finishing these 4 exercises you should have completed everything needed for the interactions between Player, Projectile and Rock enemy to work like they should in the game. These interactions will hold true and be similar for other enemies as well. And it all should look like this:
EnemyProjectile
So, now we can focus on another part of making enemies which is creating enemies that can shoot projectiles. A few enemies will be able to do that and so we need to create an object, like the Projectile one, but that is used by enemies instead. For this we'll create the EnemyProjectile object.
This object can be created at first by just copypasting the code for the Projectile one and changing it slightly. Both these objects will share a lot of the same code. We could somehow abstract them out into a general projectile-like object that has the common behavior, but that's really not necessary since these are the only two types of projectiles the game will have. After the copypasting is done the things we have to change are these:
function EnemyProjectile:new(...)
    ...
    self.collider:setCollisionClass('EnemyProjectile')
end
The collision class of an EnemyProjectile should also be EnemyProjectile. We want EnemyProjectiles objects to ignore other EnemyProjectiles, Projectiles and the Player. So we must add the collision class such that it fits that purpose:
function Stage:new()
    ...
    self.area.world:addCollisionClass('EnemyProjectile',
    {ignores = {'EnemyProjectile', 'Projectile', 'Enemy'}})
end
The other main thing we have to change is the damage. A normal projectile shot by the player deals 100 damage, but a projectile shot by an enemy should deal 10 damage:
function EnemyProjectile:new(...)
    ...
    self.damage = 10
end
Another thing is that we want projectiles shot by enemies to collide with the Player but not with other enemies. So we can take the collision code that the Projectile object used and just turn it around on the Player instead:
function EnemyProjectile:update(dt)
    ...
    if self.collider:enter('Player') then
        local collision_data = self.collider:getEnterCollisionData('Player')
...
    end
Finally, we want this object to look completely red instead of half-red and half-white, so that the player can tell projectiles shot from an enemy to projectiles shot by himself:
function EnemyProjectile:draw()
    love.graphics.setColor(hp_color)
    ...
    love.graphics.setColor(default_color)
end
With all these small changes we have successfully create the EnemyProjectile object. Now we need to create an enemy that will use it!
Shooter
This is what the Shooter enemy looks like:
As you can see, there's a little effect and then after a projectile is fired. The projectile looks just like the player one, except it's all red.
We can start making this enemy by copypasting the code from the Rock object. This enemy (and all enemies) will share the same property that they code from either left or right of then screen and then move inwards slowly, and since the Rock object already has that code taken care of we can start from there. Once that's done, we have to change a few things:
function Shooter:new(...)
    ...
    self.w, self.h = 12, 6
    self.collider = self.area.world:newPolygonCollider(
    {self.w, 0, -self.w/2, self.h, -self.w, 0, -self.w/2, -self.h})
end
The width, height and vertices of the Shooter enemy are different from the Rock. With the rock we just created an irregular polygon, but here we need the enemy to have a well defined and pointy shape so that the player can instinctively tell where it will come from. The setup here for the vertices is similar to how we did it for designing ships, so if you want you can change the way this enemy looks and make it look cooler.
function Shooter:new(...)
    ...
    self.collider:setFixedRotation(false)
    self.collider:setAngle(direction == 1 and 0 or math.pi)
    self.collider:setFixedRotation(true)
end
The other thing we need to change is that unlike the rock, setting the object's velocity is not enough. We must also set its angle so that physics collider points in the right direction. To do this we first need to disable its fixed rotation (otherwise setting the angle won't work), change the angle, and then set its fixed rotation back to true. The rotation is set to fixed again because we don't want the collider to spin around if something hits it, we want it to remain pointing to the direction it's moving towards.
The line direction == 1 and math.pi or 0 is basically how you do a ternary operator in Lua. In other languages this would look like (direction == 1) ? math.pi : 0. The exercises back in article 2 and 4 I think went over this in detail, but essentially what will happen is that if direction is 1 (coming from the right and pointing to the left) then the first conditional will parse to true, which leaves us with true and math.pi or 0. Because of precedence between and and or, true and math.pi will go first, which leaves us with math.pi or 0, which will return math.pi, since or returns the first element whenever both are true. On the other hand, if direction is -1, then the first conditional will parse to false and we'll have false and math.pi or 0, which will parse to false or 0, which will parse to 0, since or returns the second element whenever the first is false.
With all this, we can spawn Shooter objects and they should look like this:
Now we need to create the pre-attack effect. Usually in most games whenever an enemy is about to attack something happens that tells the player that enemy is about to attack. Most of the time it's an animation, but it could also be an effect. In our case we'll use a simple "charging up" effect, where a bunch of particles are continually sucked into the point where the projectile will come from until the release happens.
At a high level this is how we'll do it:
function Player:new(...)
    ...

    self.timer:every(random(3, 5), function()
        -- spawn PreAttackEffect object with duration of 1 second
        self.timer:after(1, function()
            -- spawn EnemyProjectile
        end)
    end)
end
So this means that with an interval of between 3 and 5 seconds each Shooter enemy will shoot a new projectile. This will happen after the PreAttackEffect effect is up for 1 second.
The basic way effects like these that have to do with particles work is that, like with the trails, some type of particle will be spawned every frame or every other frame and that will make the effect work. In this case, we will spawn particles called TargetParticle. These particles will move towards a point we define as the target and then die after a duration or when they reach the point.
function TargetParticle:new(area, x, y, opts)
    TargetParticle.super.new(self, area, x, y, opts)

    self.r = opts.r or random(2, 3)
    self.timer:tween(opts.d or random(0.1, 0.3), self,
    {r = 0, x = self.target_x, y = self.target_y}, 'out-cubic', function() self.dead = true end)
end

function TargetParticle:draw()
    love.graphics.setColor(self.color)
    draft:rhombus(self.x, self.y, 2*self.r, 2*self.r, 'fill')
    love.graphics.setColor(default_color)
end
Here each particle will be tweened towards target_x, target_y over a d duration (or a random value between 0.1 and 0.3 seconds), and when that position is reached then the particle will die. The particle is also drawn as a rhombus (like one of the effects we made earlier), but it could be drawn as a circle or rectangle since it's small enough and gets smaller over the tween duration.
The way we create these objects in PreAttackEffect looks like this:
function PreAttackEffect:new(...)
    ...
    self.timer:every(0.02, function()
        self.area:addGameObject('TargetParticle',
        self.x + random(-20, 20), self.y + random(-20, 20),
        {target_x = self.x, target_y = self.y, color = self.color})
    end)
end
So here we spawn one particle every 0.02 seconds (almost every frame) in a random location around its position, and then we set the target_x, target_y attributes to the position of the effect itself (which will be at the tip of the ship).
In Shooter, we create PreAttackEffect like this:
function Shooter:new(...)
    ...
    self.timer:every(random(3, 5), function()
        self.area:addGameObject('PreAttackEffect',
        self.x + 1.4*self.w*math.cos(self.collider:getAngle()),
        self.y + 1.4*self.w*math.sin(self.collider:getAngle()),
        {shooter = self, color = hp_color, duration = 1})
        self.timer:after(1, function()

        end)
    end)
end
The initial position we set should be at the tip of the Shooter object, and so we can use the general math.cos and math.sin pattern we've been using so far to achieve that and account for both possible angles (0 and math.pi). We also pass a duration attribute, which controls how long the PreAttackEffect object will stay alive for. Back there we can do this:
function PreAttackEffect:new(...)
    ...
    self.timer:after(self.duration - self.duration/4, function() self.dead = true end)
end
The reason we don't use duration by itself here is because this object is what I call in my head a controller object. For instance, it doesn't have anything in its draw function, so we never actually see it in the game. What we see are the TargetParticle objects that it commands to spawn. Those objects have a random duration of between 0.1 and 0.3 seconds each, which means if we want the last particles to end right as the projectile is being shot, then this object has to die between 0.1 and 0.3 seconds earlier than its 1 second duration. As a general case thing I decided to make this 0.75 (duration - duration/4), but it could be another number that is closer to 0.9 instead.
In any case, if you run everything now it should look like this:
And this works well enough. But if you pay attention you'll notice that the target position of the particles (the position of the PreAttackEffect object) is staying still instead of following the Shooter. We can fix this in the same way we fixed the ShootEffect object for the player. We already have the shooter attribute pointing to the Shooter object that created the PreAttackEffect object, so we can just update PreAttackEffect's position based on the position of this shooter parent object:
function PreAttackEffect:update(dt)
    ...
    if self.shooter and not self.shooter.dead then
        self.x = self.shooter.x + 1.4*self.shooter.w*math.cos(self.shooter.collider:getAngle())
    self.y = self.shooter.y + 1.4*self.shooter.w*math.sin(self.shooter.collider:getAngle())
    end
end
And so here every frame we're updating this objects position to be at the tip of the Shooter object that created it. If you run this it would look like this:
One important thing about the update code about is the not self.shooter.dead part. One thing that can happen when we reference objects within each other like this is that one object dies while another still holds a reference to it. For instance, the PreAttackEffect object lasts 0.75 seconds, but between its creation and its demise, the Shooter object that created it can be killed by the player, and if that happens problems can occur.
In this case the problem is that we have to access the Shooter's collider attribute, which gets destroyed whenever the Shooter object dies. And if that object is destroyed we can't really do anything with it because it doesn't exist anymore, so when we try to getAngle it that will crash our game. We could work out a general system that solves this problem but I don't really think that's necessary. For now we should just be careful whenever we reference objects like this to make sure that we don't access objects that might be dead.
Now for the final part, which is the one where we create the EnemyProjectile object. For now we'll handle this relatively simply by just spawning it like we would spawn any other object, but with some specific attributes:
function Shooter:new(...)
    ...
    self.timer:every(random(3, 5), function()
        ...
        self.timer:after(1, function()
            self.area:addGameObject('EnemyProjectile',
            self.x + 1.4*self.w*math.cos(self.collider:getAngle()),
            self.y + 1.4*self.w*math.sin(self.collider:getAngle()),
            {r = math.atan2(current_room.player.y - self.y, current_room.player.x - self.x),
             v = random(80, 100), s = 3.5})
        end)
    end)
end
Here we create the projectile at the same position that we created the PreAttackEffect, and then we set its velocity to a random value between 80 and 100, and then its size to be slightly larger than the default value. The most important part is that we set its angle (r attribute) to point towards the player. In general, whenever you want something to get the angle of something from source to target, you should do:
angle = math.atan2(target.y - source.y, target.x - source.x)
And that's what we're doing here. After the object is spawned it will point itself towards the player and move there. It should look like this:
If you compare this to the initial gif on this section this looks a bit different. The projectiles there have a period where they slowly turn towards the player rather than coming out directly towards him. This uses the same piece of code as the homing passive that we will add eventually, so I'm gonna leave that for later.
One thing that will happen for the EnemyProjectile object is that eventually it will be filled with lots of functionality so that it can serve the purposes of lots of different enemies. All this functionality, however, will first be implemented in the Projectile object because it will serve as a passive to the player. So, for instance, there's a passive that makes projectiles circle around the player. Once we implement that, we can copypaste that code to the EnemyProjectile object and then implement an enemy that makes use of that idea and has projectiles that circle it instead. A number of enemies will be created in this way so those will be left as an exercise for when we implement passives for the player.
For now, we'll stay with those two enemies (Rock and Shooter) and with the EnemyProjectile object as it is and move on to other things, but we'll come back to create more enemies in the future as we add more functionality to the game.
EnemyProjectile/Shooter Exercises
114. Implement a collision event between Projectile and EnemyProjectile. In the EnemyProjectile class, make it so that whenever it hits an object of the Projectile class, both object's die function will be called and they will both be destroyed.
115. Is the way the direction attribute is named confusing in the Shooter class? If so, what could it be named instead? If not, how is it not?
Director and Gameplay Loop
Introduction
In this article we'll finish up the basic implementation of the entire game with a minimal amount of content. We'll go over the Director, which is the code that will handle spawning of enemies and resources. Then we'll go over restarting the game once the player dies. And after that we'll take care of a basic score system as well as some basic UI so that the player can tell what his stats are.
Director
The Director is the piece of code that will control the creation of enemies, attacks and resources in the game. The goal of the game is to survive as long as possible and get as high a score as possible, and the challenge comes from the ever increasing number and difficulty of enemies that are spawned. This difficulty will be controlled entirely by the code that we will start writing now.
The rules of that the director will follow are somewhat simple:
- Every 22 seconds difficulty will go up;
- In the duration of each difficulty enemies will be spawned based on a point system:
- Each difficulty (or round) has a certain amount of points available to be used;
- Enemies cost a fixed amount of points (harder enemies cost more);
- Higher difficulties have a higher amount of points available;
- Enemies are chosen to be spawned along the round's duration randomly until it runs out of points.
- Every 16 seconds a resource (HP, SP or Boost) will be spawned;
- Every 30 seconds an attack will be spawned.
We'll start by creating the Director object, which is just a normal object (not one that inherits from GameObject to be used in an Area) where we'll place our code:
Director = Object:extend()

function Director:new(stage)
    self.stage = stage
end

function Director:update(dt)

end
We can create this and then instantiate it in the Stage room like this:
function Stage:new()
...
self.director = Director(self)
end
function Stage:update(dt)
self.director:update(dt)
...
end
We want the Director object to have a reference to the Stage room because we'll need it to spawn enemies and resources, and the only way to do that is through stage.area. The director will also have timing needs so it will need to be updated accordingly.
To start with rule 1, we can just define a simple difficulty attribute and a few extra ones to handle the timing of when that attribute goes up. This timing code will be just like the one we did for the Player's boost or cycle mechanisms.
function Director:new(...)
...
self.difficulty = 1
self.round_duration = 22
self.round_timer = 0
end
function Director:update(dt)
self.round_timer = self.round_timer + dt
if self.round_timer > self.round_duration then
self.round_timer = 0
self.difficulty = self.difficulty + 1
self:setEnemySpawnsForThisRound()
end
end
And so difficulty goes up every 22 seconds, according to how we described rule 1. Additionally, here we also call a function called setEnemySpawnsForThisRound, which is essentially where rule 2 will take place.
The first part of rule 2 is that every difficulty has a certain amount of points to spend. The first thing we need to figure out here is how many difficulties we want the game to have and if we want to define all these points manually or through some formula. I decided to do the later and say that the game essentially is infinite and gets harder and harder until the player won't be able to handle it anymore. So for the this purpose I decided that the game would have 1024 difficulties since it's a big enough number that it's very unlikely anyone will hit it.
The way the amount of points each difficulty has will be define through a simple formula that I arrived at through trial and error seeing what felt best. Again, this kind of stuff is more on the design side of things so I don't want to spend much time on my reasoning, but you should try your own ideas here if you feel like you can do something better.
The way I decided to do is was through this formula:
- Difficulty 1 has 16 points;
- From difficulty 2 onwards the following formula is followed on a 4 step basis:
- Difficulty i has difficulty i-1 points + 8
- Difficulty i+1 has difficulty i points
- Difficulty i+2 has difficulty (i+1)/1.5
- Difficulty i+3 has difficulty (i+2)*2
In code that looks like this:
function Director:new(...)
...
self.difficulty_to_points = {}
self.difficulty_to_points[1] = 16
for i = 2, 1024, 4 do
self.difficulty_to_points[i] = self.difficulty_to_points[i-1] + 8
self.difficulty_to_points[i+1] = self.difficulty_to_points[i]
self.difficulty_to_points[i+2] = math.floor(self.difficulty_to_points[i+1]/1.5)
self.difficulty_to_points[i+3] = math.floor(self.difficulty_to_points[i+2]*2)
end
end
And so, for instance, for the first 14 difficulties the amount of points they will have looks like this:
Difficulty - Points
1 - 16
2 - 24
3 - 24
4 - 16
5 - 32
6 - 40
7 - 40
8 - 26
9 - 56
10 - 64
11 - 64
12 - 42
13 - 84
And so what happens is that at first there's a certain level of points that lasts for about 3 rounds, then it goes down for 1 round, and then it spikes a lot on the next round that becomes the new plateau that lasts for ~3 rounds and then this repeats forever. This creates a nice "normalization -> relaxation -> intensification" loop that feels alright to play around.
The way points increase also follows a pretty harsh and fast rule, such that at difficulty 40 for instance a round will be composed of around 400 points. Since enemies spend a fixed amount of points and each round must spend all points its given, the game quickly becomes overwhelming and so at some point players won't be able to win anymore, but that's fine since it's how we're designing the game and it's a game about getting the highest score possible essentially given these circumstances.
Now that we have this sorted we can try to go for the second part of rule 2, which is the definition of how much each enemy should cost. For now we only have two enemies implemented so this is rather trivial, but we'll come back to fill this out more in another article after we've implemented more enemies. What it can look like now is this though:
function Director:new(...)
...
self.enemy_to_points = {
['Rock'] = 1,
['Shooter'] = 2,
}
end
This is a simple table where given an enemy name, we'll get the amount of points it costs to spawn it.
The last part of rule 2 has to do with the implementation of the setEnemySpawnsForThisRound function. But before we get to that I have to introduce a very important construct we'll use throughout the game whenever chances and probabilities are involved.
ChanceList
Let's say you want X to happen 25% of the time, Y to happen 25% of the time and Z to happen 50% of the time. The normal way you'd do this is just use a function like love.math.random, have it generate a value between 1 and 100 and then see where this number lands. If it lands below 25 we say that X event will happen, if it lands between 25 and 50 we say that Y event will happen, and if it lands above 50 then Z event will happen.
The big problem with doing things this way though is that we can't ensure that if we run love.math.random 100 times, X will happen actually 25 times, for instance. If we run it 10000 times maybe it will approach that 25% probability, but often times we want to have way more control over the situation than that. So a simple solution is to create what I call a chanceList.
The way chanceLists work is that you generate a list with values between 1 and 100. Then whenever you want to get a random value on this list you call a function called next. This function will give you a random number in it, let's say it gives you 28. This means that Y event happened. The difference is that once we call that function, we will also remove the random number chosen from the list. This essentially means that 28 can never happen again and that event Y now has a slightly lower chance of happening than the other 2 events. As we call next more and more, the list will get more and more empty and then when it gets completely empty we just regenerate the 100 numbers again.
In this way, we can ensure that event X will happen exactly 25 times, that event Y will happen exactly 25 times, and that event Z will happen exactly 50 times. We can also make it so that instead of it generating 100 numbers, it will generate 20 instead. And so in that case event X would happen 5 times, Y would happen 5 times, and Z would happen 10 times.
The way the interface for this idea works is rather simple looks like this:
events = chanceList({'X', 25}, {'Y', 25}, {'Z', 50})
for i = 1, 100 do
print(events:next()) --> will print X 25 times, Y 25 times and Z 50 times
end
events = chanceList({'X', 5}, {'Y', 5}, {'Z', 10})
for i = 1, 20 do
print(events:next()) --> will print X 5 times, Y 5 times and Z 10 times
end
events = chanceList({'X', 5}, {'Y', 5}, {'Z', 10})
for i = 1, 40 do
print(events:next()) --> will print X 10 times, Y 10 times and Z 20 times
end
We will create the chanceList function in utils.lua and we will make use of some of Lua's features in this that we covered in tutorial 2. Make sure you're up to date on that!
The first thing we have to realize is that this function will return some kind of object that we should be able to call the next function on. The easiest way to achieve that is to just make that object a simple table that looks like this:
function chanceList(...)
return {
next = function(self)
end
}
end
Here we are receiving all the potential definitions for values and chances as ... and we'll handle those in more details soon. Then we're returning a table that has a function called next in it. This function receives self as its only argument, since as we know, calling a function using : passes itself as the first argument. So essentially, inside the next function, self refers to the table that chanceList is returning.
Before defining what's inside the next function, we can define a few attributes that this table will have. The first is the actual chance_list one, which will contain the values that should be returned by next:
function chanceList(...)
return {
chance_list = {},
next = function(self)
end
}
end
This table starts empty and will be filled in the next function. In this example, for instance:
events = chanceList({'X', 3}, {'Y', 3}, {'Z', 4})
The chance_list attribute would look something like this:
.chance_list = {'X', 'X', 'X', 'Y', 'Y', 'Y', 'Z', 'Z', 'Z', 'Z'}
The other attribute we'll need is one called chance_definitions, which will hold all the values and chances passed in to the chanceList function:
function chanceList(...)
return {
chance_list = {},
chance_definitions = {...},
next = function(self)
end
}
end
And that's all we'll need. Now we can move on to the next function. The two behaviors we want out of that function is that it returns us a random value according to the chances described in chance_definitions, and also that it regenerates the internal chance_list whenever it reaches 0 elements. Assuming that the list is filled with elements we can take care of the former behavior like this:
next = function(self)
return table.remove(self.chance_list, love.math.random(1, #self.chance_list))
end
We simply pick a random element inside the chance_list table and then return it. Because of the way elements are laid out inside, all the constraints we had about how this should work are being followed.
Now for the most important part, how we'll actually build the chance_list table. It turns out that we can use the same piece of code to build this list initially as well as whenever it gets emptied after repeated uses. The way this looks is like this:
next = function(self)
if #self.chance_list == 0 then
for _, chance_definition in ipairs(self.chance_definitions) do
for i = 1, chance_definition[2] do
table.insert(self.chance_list, chance_definition[1])
end
end
end
return table.remove(self.chance_list, love.math.random(1, #self.chance_list))
end
And so what we're doing here is first figuring out if the size of chance_list is 0. This will be true whenever we call next for the first time as well as whenever the list gets emptied after we called it multiple times. If it is true, then we start going over the chance_definitions table, which contains tables that we call chance_definition with the values and chances for that value. So if we called the chanceList function like this:
events = chanceList({'X', 3}, {'Y', 3}, {'Z', 4})
The chance_definitions table looks like this:
.chance_definitions = {{'X', 3}, {'Y', 3}, {'Z', 4}}
And so whenever we go over this list, chance_definitions[1] refers to the value and chance_definitions[2] refers to the number of times that value appears in chance_list. Knowing that, to fill up the list we simply insert chance_definition[1] into chance_list chance_definition[2] times. And we do this for all tables in chance_definitions as well.
And so if we try this out now we can see that it works out:
events = chanceList({'X', 2}, {'Y', 2}, {'Z', 4})
for i = 1, 16 do
print(events:next())
end
Director
Now back to the Director, we wanted to implement the last part of rule 2 which deals with the implementation of setEnemySpawnsForThisRound. The first thing we wanna do for this is to define the spawn chances of each enemy. Different difficulties will have different spawn chances and we'll want to define at least the first few difficulties manually. And then the following difficulties will be defined somewhat randomly since they'll have so many points that the player will get overwhelmed either way.
So this is what the first few difficulties could look like:
function Director:new(...)
...
self.enemy_spawn_chances = {
[1] = chanceList({'Rock', 1}),
[2] = chanceList({'Rock', 8}, {'Shooter', 4}),
[3] = chanceList({'Rock', 8}, {'Shooter', 8}),
[4] = chanceList({'Rock', 4}, {'Shooter', 8}),
}
end
These are not the final numbers but just an example. So in the first difficulty only rocks would be spawned, then in the second one shooters would also be spawned but at a lower amount than rocks, then in the third both would be spawned about the same, and finally in the fourth more shooters would be spawned than rocks.
For difficulties past 5 until 1024 we can just assign somewhat random probabilities to each enemy like this:
function Director:new(...)
...
for i = 5, 1024 do
self.enemy_spawn_chances[i] = chanceList(
{'Rock', love.math.random(2, 12)},
{'Shooter', love.math.random(2, 12)}
)
end
end
When we implement more enemies we will do the first 16 difficulties manually and after difficulty 17 we'll do it somewhat randomly. In general, a player with a completely filled skill tree won't be able to go past difficulty 16 that often so it's a good place to stop.
Now for the setEnemySpawnsForThisRound function. The first thing we'll do is use create enemies in a list, according to the enemy_spawn_chances table, until we run out of points for this difficulty. This can look something like this:
function Director:setEnemySpawnsForThisRound()
local points = self.difficulty_to_points[self.difficulty]
-- Find enemies
local enemy_list = {}
while points > 0 do
local enemy = self.enemy_spawn_chances[self.difficulty]:next()
points = points - self.enemy_to_points[enemy]
table.insert(enemy_list, enemy)
end
end
And so with this, the local enemy_list table will be filled with Rock and Shooter strings according to the probabilities of the current difficulty. We put this inside a while loop that stops whenever the number of points left reaches 0.
After this, we need to decide when in the 22 second duration of this round each one of those enemies inside the enemy_list table will be spawned. That could look something like this:
function Director:setEnemySpawnsForThisRound()
...
-- Find enemies spawn times
local enemy_spawn_times = {}
for i = 1, #enemy_list do
enemy_spawn_times[i] = random(0, self.round_duration)
end
table.sort(enemy_spawn_times, function(a, b) return a < b end)
end
Here we make it so that each enemy in enemy_list has a random number of between 0 and round_duration assigned to it and stored in the enemy_spawn_times table. We further sort this table so that the values are laid out in order. So if our enemy_list table looks like this:
.enemy_list = {'Rock', 'Shooter', 'Rock'}
Our enemy_spawn_times table would look like this:
.enemy_spawn_times = {2.5, 8.4, 14.8}
Which means that a Rock would be spawned 2.5 seconds in, a Shooter would be spawned 8.4 seconds in, and another Rock would be spawned 14.8 seconds in since the start of the round.
Finally, now we have to actually set enemies to be spawned using the timer:after call:
function Director:setEnemySpawnsForThisRound()
...
-- Set spawn enemy timer
for i = 1, #enemy_spawn_times do
self.timer:after(enemy_spawn_times[i], function()
self.stage.area:addGameObject(enemy_list[i])
end)
end
end
And this should be pretty straightforward. We go over the enemy_spawn_times list and set enemies from the enemy_list to be spawned according to the numbers in the former. The last thing to do is to call this function once for when the game starts:
function Director:new(...)
...
self:setEnemySpawnsForThisRound()
end
If we don't do this then enemies will only start spawning after 22 seconds. We can also add an Attack resource spawn at the start so that the player has the chance to swap his attack from the get go as well, but that's not mandatory. In any case, if you run everything now it should work like we intended!
This is where we'll stop with the Director for now but we'll come back to it in a future article after we have added more content to the game!
Director Exercises
116. (CONTENT) Implement rule 3. It should work just like rule 1, except that instead of the difficulty going up, either one of the 3 resources listed will be spawned. The chances for each resource to be spawned should follow this definition:
function Director:new(...)
...
self.resource_spawn_chances = chanceList({'Boost', 28}, {'HP', 14}, {'SkillPoint', 58})
end
117. (CONTENT) Implement rule 4. It should work just like rule 1, except that instead of the difficulty going up, a random attack is spawned.
118. The while loop that takes care of finding enemies to spawn has one big problem: it can get stuck indefinitely in an infinite loop. Consider the situation where there's only one point left, for instance, and enemies that cost 1 point (like a Rock) can't be spawned anymore because that difficulty doesn't spawn Rocks. Find a general fix for this problem without changing the cost of enemies, the number of points in a difficulty, or without assuming that the probabilities of enemies being spawned will take care of it (making all difficulties always spawn low cost enemies like Rocks).
Game Loop
Now for the game loop. What we'll do here is make sure that the player can play the game over and over by making it so that whenever the player dies it restarts another run from scratch. In the final game the loop will be a bit different, because after a playthrough you'll be thrown back into the Console room, but since we don't have the Console room ready now, we'll just restart a Stage one. This is also a good place to check for memory problems, since we'll be restarting the Stage room over and over after the game has been played thoroughly.
Because of the way we structured things it turns out that doing this is incredibly simple. We'll do it by defining a finish function in the Stage class, which will take care of using gotoRoom to change to another Stage room. This function looks like this:
function Stage:finish()
timer:after(1, function()
gotoRoom('Stage')
end)
end
gotoRoom will take care of destroying the previous Stage instance and creating the new one, so we don't have to worry about manually destroying objects here or there. The only one we have worry about is setting the player attribute in the Stage class to nil in its destroy function, otherwise the Player object won't be collected properly.
The finish function can be called whenever the player dies from the Player object itself:
function Player:die()
...
current_room:finish()
end
We know that current_room is a global variable that holds the currently active room, and whenever the die function is called on a player the only room that could be active is a Stage, so this works out well. If you run all this you'll see that it works as expected. Once the player dies, after 1 second a new Stage room will start and you can play right away.
Note that this was this simple because of how we structured our game with the idea of Rooms and Areas. If we had structured things differently it would have been considerably harder and this is (in my opinion) where a lot of people get lost when making games with LÖVE. Because you can structure things in whatever way you want, it's easy to do it in a way that doesn't make doing things like resetting gameplay simple. So it's important to understand the role that the way we architectured everything plays.
Score
The main goal of the game is to have the highest score possible, so we need to create a score system. This one is also fairly simple compared to everything else we've been doing. All we need to do for now is create a score attribute in the Stage class that will keep track of how well we're doing on this run. Once the game ends that score will get saved somewhere else and then we'll be able to compare it against our highest scores ever. For now we'll skip the second part of comparing scores and just focus on getting the basics of it down.
function Stage:new()
...
self.score = 0
end
And then we can increase the score whenever something that should increase it happens. Here are all the score rules for now:
- Gathering an ammo resource adds 50 to score
- Gathering a boost resource adds 150 to score
- Gathering a skill point resource adds 250 to score
- Gathering an attack resource adds 500 to score
- Killing a Rock adds 100 to score
- Killing a Shooter adds 150 to score
So, the way we'd go about doing rule 1 would be like this:
function Player:addAmmo(amount)
self.ammo = math.min(self.ammo + amount, self.max_ammo)
current_room.score = current_room.score + 50
end
We simply go to the most obvious place where the event happens (in this case in the addAmmo function), and then just add the code that changes the score there. Like we did for the finish function, we can access the Stage room through current_room here because the Stage room is the only one that could be active in this case.
Score Exercises
119. (CONTENT) Implement rules 2 through 6. They are very simple implementations and should be just like the one given as an example.
UI
Now for the UI. In the final game it looks like this:
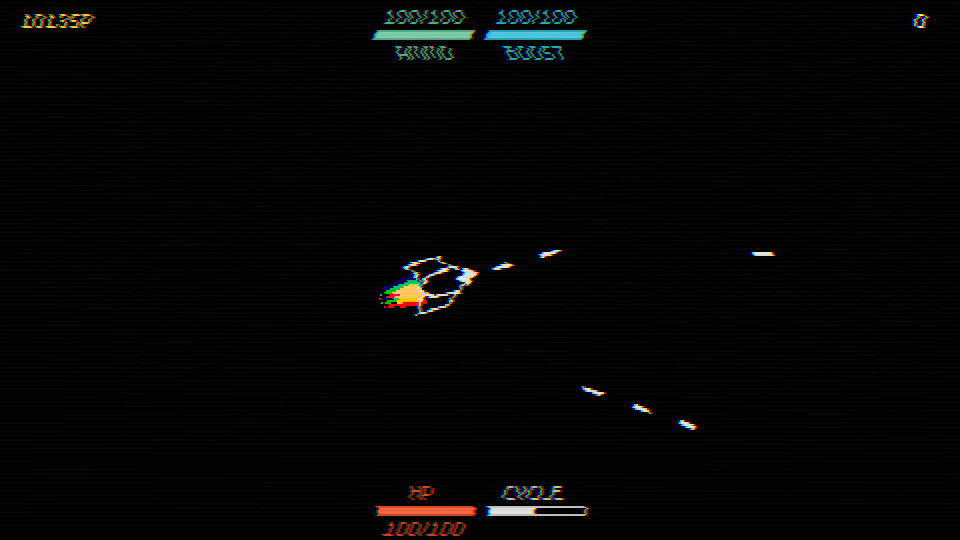
There's the number of skill points you have to the top-left, your score to the top-right, and then the fundamental player stats on the top and bottom middle of the screen. Let's start with the score. All we want to do here is print a number to the top-right of the screen. This could look like this:
function Stage:draw()
love.graphics.setCanvas(self.main_canvas)
love.graphics.clear()
...
love.graphics.setFont(self.font)
-- Score
love.graphics.setColor(default_color)
love.graphics.print(self.score, gw - 20, 10, 0, 1, 1,
math.floor(self.font:getWidth(self.score)/2), self.font:getHeight()/2)
love.graphics.setColor(255, 255, 255)
love.graphics.setCanvas()
...
end
We want to draw the UI above everything else and there are essentially two ways to do this. We can either create an object named UI or something and set its depth attribute so that it will be drawn on top of everything, or we can just draw everything directly on top of the Area on the main_canvas that the Stage room uses. I decided to go for the latter but either way works.
In the code above we're just using love.graphics.setFont to set this font:
function Stage:new()
...
self.font = fonts.m5x7_16
end
And then after that we're drawing the score at a reasonable position on the top-right of the screen. We offset it by half the width of the text so that the score is centered on that position, rather than starting in it, otherwise when numbers get too high (>10000) the text will go offscreen.
The skill point text follows a similarly simple setup so that will be left as an exercise.
Now for the other main part of the UI, which are the center elements. We'll start with the HP one. We want to draw 3 things: the word of the stat (in this case "HP"), a bar showing how filled the stat is, and then numbers showing that same information but more precisely.
First we'll start by drawing the bar:
function Stage:draw()
...
love.graphics.setCanvas(self.main_canvas)
love.graphics.clear()
...
-- HP
local r, g, b = unpack(hp_color)
local hp, max_hp = self.player.hp, self.player.max_hp
love.graphics.setColor(r, g, b)
love.graphics.rectangle('fill', gw/2 - 52, gh - 16, 48*(hp/max_hp), 4)
love.graphics.setColor(r - 32, g - 32, b - 32)
love.graphics.rectangle('line', gw/2 - 52, gh - 16, 48, 4)
love.graphics.setCanvas()
end
First, the position we'll draw this rectangle at is gw/2 - 52, gh - 16 and the width will be 48, which means that both bars will be drawn around the center of the screen with a small gap of around 8 pixels. From this we can also tell that the position of the bar to the right will be gw/2 + 4, gh - 16.
The way we draw this bar is that it will be a filled rectangle with hp_color as its color, and then an outline on that rectangle with hp_color - 32 as its color. Since we can't really subtract from a table, we have to separate the hp_color table into its separate components and subtract from each.
The only bar that will be changed in any way is the one that is filled, and it will be changed according to the ratio of hp/max_hp. For instance, if hp/max_hp is 1, it means that the HP is full. If it's 0.5, then it means hp is half the size of max_hp. If it's 0.25, then it means it's 1/4 the size. And so if we multiply this ratio by the width the bar is supposed to have, we'll have a decent visual on how filled the player's HP is or isn't. If you do that it should look like this:
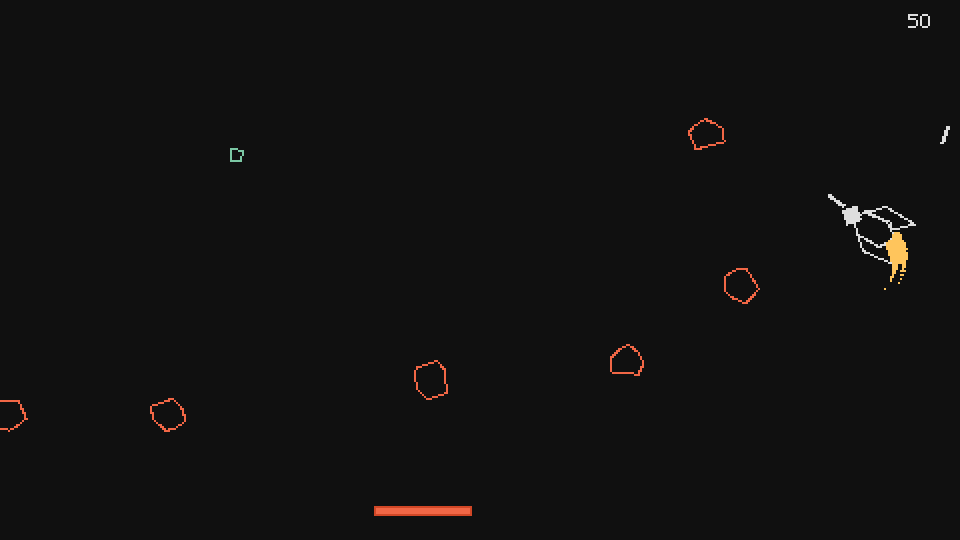
And you'll notice here that as the player gets his the bar responds accordingly.
Now similarly to how we drew the score number, we can the draw the HP text:
function Stage:draw()
...
love.graphics.setCanvas(self.main_canvas)
love.graphics.clear()
...
-- HP
...
love.graphics.print('HP', gw/2 - 52 + 24, gh - 24, 0, 1, 1,
math.floor(self.font:getWidth('HP')/2), math.floor(self.font:getHeight()/2))
love.graphics.setCanvas()
end
Again, similarly to how we did for the score, we want this text to be centered around gw/2 - 52 + 24, which is the center of the bar, and so we have to offset it by the width of this text while using this font (and we do that with the getWidth function).
Finally, we can also draw the HP numbers below the bar somewhat simply:
function Stage:draw()
...
love.graphics.setCanvas(self.main_canvas)
love.graphics.clear()
...
-- HP
...
love.graphics.print(hp .. '/' .. max_hp, gw/2 - 52 + 24, gh - 6, 0, 1, 1,
math.floor(self.font:getWidth(hp .. '/' .. max_hp)/2),
math.floor(self.font:getHeight()/2))
love.graphics.setCanvas()
end
And here the same principle applies. We want the text to be centered to we have to offset it by its width. Most of these positions were arrived at through trial and error so you can try different spacings if you want.
UI Exercises
120. (CONTENT) Implement the UI for the Ammo stat. The position of the bar is gw/2 - 52, 16.
121. (CONTENT) Implement the UI for the Boost stat. The position of the bar is gw/2 + 4, 16.
122. (CONTENT) Implement the UI for the Cycle stat. The position of the bar is gw/2 + 4, gh - 16.
END
And with that we finished the first main part of the game. This is the basic skeleton of the entire game with a minimal amount of content. The second part (the next 5 or so articles) will focus entirely on adding content to the game. The structure of the articles will also start to become more like this article where I show how to do something once and then the exercises are just implementing that same idea for multiple other things.
The next article though will be a small intermission where I'll go over some thoughts on coding practices and where I'll try to justify some of the choices I've made on how to architecture things and how I chose to lay all this code out. You can skip it if you only care about making the game, since it's going to be a more opinionated article and not as directly related to the game itself as others.
Coding Practices
Introduction
In this article I'll talk about some "best coding practices" and how they apply or not to what we're doing in this series. If you followed along until now and did most of the exercises (especially the ones marked as content) then you've probably encountered some possibly questionable decisions in terms of coding practices: huge if/elseif chains, global variables, huge functions, huge classes that do a lot of things, copypasting and repeating code around instead of properly abstracting it, and so on.
If you're a somewhat experienced programmer in another domain then that must have set off some red flags, so this article is meant to explain some of those decisions more clearly. In contrast to all other previous articles, this one is very opinionated and possibly wrong, so if you want to skip it there's no problem. We won't cover anything directly related to the game, even though I'll use examples from the game we're coding to give context to what I'm talking about. The article will talk about two main things: global variables and abstractions. The first will just be about when/how to use global variables, and the second will be a more general look at when/how to abstract/generalize things or not.
Also, if you've bought the tutorial then in the codebase for this article I've added some code that was previously marked as content in exercises, namely visuals for all the player ships, all attacks, as well as objects for all resources, since I'll use those as examples here.
Global Variables
The main advice people give each other when it comes to global variables is that you should generally avoid using them. There's lots of discussion about this and the reasoning behind this advice is generally fair. In a general sense, the main problem that comes with using global variables is that it makes things more unpredictable than they need to be. As the last link above states:
To elaborate, imagine you have a couple of objects that both use the same global variable. Assuming you're not using a source of randomness anywhere within either module, then the output of a particular method can be predicted (and therefore tested) if the state of the system is known before you execute the method.
However, if a method in one of the objects triggers a side effect which changes the value of the shared global state, then you no longer know what the starting state is when you execute a method in the other object. You can now no longer predict what output you'll get when you execute the method, and therefore you can't test it.
And this is all very good and reasonable. But one of the things that these discussions always forget is context. The advice given above is reasonable as a general guideline, but as you get more into the details of whatever situation you find yourself in you need to think clearly if it applies to what you're doing or not.
And this is something I'll repeat throughout this article because it's something I really believe in: advice that works for teams of people and for software that needs to be maintained for years/decades does not work as well for solo indie game development. When you're coding something mostly by yourself you can afford to cut corners that teams can't cut, and when you're coding video games you can afford to cut even more corners that other types of software can't because games need to be maintained for a lower amount of time.
The way this difference in context manifests itself when it comes to global variables is that, in my opinion, we can use global variables as much as we want as long as we're selective about when and how to use them. We want to gain most of the benefits we can gain from them, while avoiding the drawbacks that do exist. And in this sense we also want to take into account the advantages we have, namely, that we're coding by ourselves and that we're coding video games.
Types of Global Variables
In my view there are three types of global variables: those that are mostly read from, those are that are mostly written to, and those that are read from and written to a lot.
Type 1
The first type are global variables that are read from a lot and rarely written to. Variables like these are harmless because they don't really make the program any more unpredictable, as they're just values that are there and will be the same always or almost always. They can also be seen as constants.
An example of a variable like this in our game is the variable all_colors that holds the list of all colors. Those colors will never change and that table will never be written to, but it's read from various objects whenever we need to get a random color, for instance.
Type 2
The second type are global variables that are written to a lot and rarely read from. Variables like these are mostly harmless because they also don't really make the program any more unpredictable as they're just stores of values that will be used in very specific and manageable circumstances.
In our game so far we don't really have any variable that fits this definition, but an example would be some table that holds data about how the player plays the game and then sends all that data to a server whenever the game is exited. At all times and from many different places in our codebase we would be writing all sorts of information to this table, but it would only be read and changed slightly perhaps once we decide to send it to the server.
Type 3
The third type are global variables that are written to a lot and read from a lot. These are the real danger and they do in fact increase unpredictability and make things harder for us in a number of different ways. When people say "don't use global variables" they mean to not use this type of global variable.
In our game we have a few of these, but I guess the most prominent one would be current_room. Its name already implies some uncertainty, since the current room could be a Stage object, or a Console object, or a SkillTree object, or any other sort of Room object. For the purposes of our game I decided that this would be a reasonable hit in clarity to take over trying to fix this, but it's important to not overdo it.
The main point behind separating global variables into types like these is to go a bit deeper into the issue and to separate the wheat from the chaff, let's say. Our productivity would be harmed quite a bit if we tried to be extremely dogmatic about this and avoid global variables at all costs. While avoiding them at all costs works for teams and for people working on software that needs to be maintained for a long time, it's very unlikely that the all_colors variable will harm us in the long run. And as long as we keep an eye on variables like current_room and make sure that they aren't too numerous or too confusing (for instance, current_room is only changed whenever the gotoRoom function is called), we'll be able to keep most things under control.
Whenever you see or want to use a global variable, think about what type of global variable it is first. If it's a type 1 or 2 then it probably isn't a problem. If it's a type 3 then it's important to think about when and how frequently it gets written to and read from. If you're writing to it from random objects all over the codebase very frequently and reading it from random objects all over the codebase then it's probably not a good idea to make it a global. If you're writing to it from a very small set of objects very infrequently, and reading it from random objects all over the codebase, then it's still not good, but maybe it's manageable depending on the details. The point is to think critically about these issues and not just follow some dogmatic rule.
Abstracting vs. Copypasting
When talking about abstractions what I mean by it is a layer of code that is extracted out of repeated or similar code underneath it in order to be used and reused in a more constrained and well defined manner. So, for instance, in our game we have these lines:
local direction = table.random({-1, 1})
self.x = gw/2 + direction*(gw/2 + 48)
self.y = random(16, gh - 16)
And they are the same on all objects that need to be spawned from either left or right of the screen at a random y position. I think so far about 6-7 objects have these 3 lines at their start. The argument for abstraction here would say that since these lines are being repeated on multiple objects we should consider abstracting it up somehow and have those objects enjoy that abstraction instead of having to have those repeated lines of code all over. We could implement this abstraction either through inheritance, components, a function, or some other mechanism. For the purposes of this discussion all those different ways will be treated as the same thing because they show the same problems.
Now that we're on the same page as to what we're talking about, let's get into it. The main discussion in my view around these issues is one of adding new code against existing abstractions versus adding new code freely. What I mean by this is that whenever we have abstractions that help us in one way, they also have (often hidden) costs that slow us down in other ways.
Abstracting
In our example above we could create some function/component/parent class that would encapsulate those 3 lines and then we wouldn't have to repeat them everywhere. Since components are all the rage these days, let's go with that and call it SpawnerComponent (but again, remember that this applies to functions/inheritance/mixins and other similar methods of abstraction/reuse that we have available). We would initialize it like spawner_component = SpawnerComponent() and magically it would handle all the spawning logic for us. In this example it's just 3 lines but the same logic applies to more complex behaviors as well.
The benefits of doing this is that now everything that deals with the spawning logic of objects in our game is constrained to one place under one interface. This means that whenever we want to make some change to the spawning behavior, we have to change it in one place only and not go over multiple files changing everything manually. These are well defined benefits and I'm definitely not questioning them.
However, doing this also has costs, and these are largely ignored whenever people are "selling" you some solution. The costs here make themselves apparent whenever we want to add some new behavior that is kinda like the old behavior, but not exactly that. And in games this happens a lot.
So, for instance, say now that we want to add objects that will spawn exactly in the middle of the screen. We have two options here: either we change SpawnerComponent to accept this new behavior, or we make a new component that will implement this new behavior. In this case the obvious option is to change SpawnerComponent, but in more complex examples what you should do isn't that obvious. The point here being that now, because we have to add new code against the existing code (in this case the SpawnerComponent), it takes more mental effort to do it given that we have to consider where and how to add the functionality rather than just adding it freely.
Copypasting
The alternative option, which is what we have in our codebase now, is that these 3 lines are just copypasted everywhere we want the behavior to exist. The drawbacks of doing this is that whenever we want to change the spawning behavior we'll have to go over all files tediously and change them all. On top of that, the spawning behavior is not properly encapsulated in a separate environment, which means that as we add more and more behavior to the game, it could be harder to separate it from something else (it probably won't remain as just those 3 lines forever).
The benefits of doing this, however, also exist. In the case where we want to add objects that will spawn exactly in the middle of the screen, all we have to do is copypaste those 3 lines from a previous object and change the last one:
local direction = table.random({-1, 1})
self.x = gw/2 + direction*(gw/2 + 48)
self.y = gh/2
In this case, the addition of new behavior that was similar to previous behavior but not exactly the same is completely trivial and doesn't take any amount of mental effort at all (unlike with the SpawnerComponent solution).
So now the question becomes, as both methods have benefits and drawbacks, which method should we default to using? The answer that people generally talk about is that we should default to the first method. We shouldn't let code that is repeated stay like that for too long because it's a "bad smell". But in my opinion we should do the contrary. We should default to repeating code around and only abstract when it's absolutely necessary. The reason for that is...
Frequency and Types of Changes
One good way I've found of figuring out if some piece of code should be abstracted or not is to look at how frequently it changes and in what kind of way it changes. There are two main types of changes I've identified: unpredictable and predictable changes.
Unpredictable Changes
Unpredictable changes are changes that fundamentally modify the behavior in question in ways that go beyond simple small changes. In our spawning behavior example above, an unpredictable change would be to say that instead of enemies spawning from left and right of the screen randomly, they would be spawned based on a position given by a procedural generator algorithm. This is the kind of fundamental change that you can't really predict.
These changes are very common at the very early stages of development when we have some faint idea of what the game will be like but we're light on the details. The way to deal with those changes is to default to the copypasting method, since the more abstractions we have to deal with, the harder it will be to apply these overarching changes to our codebase.
Predictable Changes
Predictable changes are changes that modify the behavior in small and well defined ways. In our spawning behavior example above, a predictable change would be the example used where we'd have to spawn objects exactly in the middle y position. It's a change that actually changes the spawning behavior, but it's small enough that it doesn't completely break the fundamentals of how the spawning behavior works.
These changes become more and more common as the game matures, since by then we'll have most of the systems in place and it's just a matter of doing small variations or additions on the same fundamental thing. The way to deal with those changes is to analyze how often the code in question changes. If it changes often and those changes are predictable, then we should consider abstracting. If it doesn't change often then we should default to the copypasting idea.
The main point behind separating changes into these two different types is that it lets us analyze the situation more clearly and make more informed decisions. Our productivity would be harmed if all we did was default to abstracting things dogmatically and avoiding repeated code at all costs. While avoiding that at all costs works for teams and for people working on software that needs to be maintained for al ong time, it's not the case for indie games being written by one person.
Whenever you get the urge to generalize something, think really hard about if it's actually necessary to do that. If it's a piece of code that is not changing often then worrying about it at all is unnecessary. If it is changing often then is it changing in a predictable or unpredictable manner? If it's changing in an unpredictable manner then worrying about it too much and trying to encapsulate it in any way is probably a waste of effort, since that encapsulation will just get in the way whenever you have to change the whole thing in a big way. If it's changing in a predictable manner, though, then we have potential for real abstraction that will benefit us. The point is to think critically about these issues and not just follow some dogmatic rule.
Examples
We have a few more examples in the game that we can use to further discuss these issues:
Left/Right Movement
This is something that is very similar to the spawning code, which is the behavior of all entities that just move either left or right in a straight line. So this applies to a few enemies and most resources. The code that directs this behavior generally looks something like this and it's repeated across all these entities:
function Rock:new(area, x, y, opts)
...
self.w, self.h = 8, 8
self.collider = self.area.world:newPolygonCollider(createIrregularPolygon(8))
self.collider:setPosition(self.x, self.y)
self.collider:setObject(self)
self.collider:setCollisionClass('Enemy')
self.collider:setFixedRotation(false)
self.v = -direction*random(20, 40)
self.collider:setLinearVelocity(self.v, 0)
self.collider:applyAngularImpulse(random(-100, 100))
...
end
function Rock:update(dt)
...
self.collider:setLinearVelocity(self.v, 0)
end
Depending on the entity there are very small differences in the way the collider is set up, but it's really mostly the same. Like with the spawning code, we could make the argument that abstracting this into something else, like maybe a LineMovementComponent or something would be a good idea.
The analysis here is exactly as before. We need to think about how often this behavior is changed across all these entities. The answer to that is almost never. The behavior that some of those entities have to move left/right is already decided and won't change, so it doesn't make sense to worry about it at all, which means that it's alright to repeat it around the codebase.
Player Ship Visuals and Trails
If you did most of the exercises, there's a piece of code in the Player class that looks something like this:
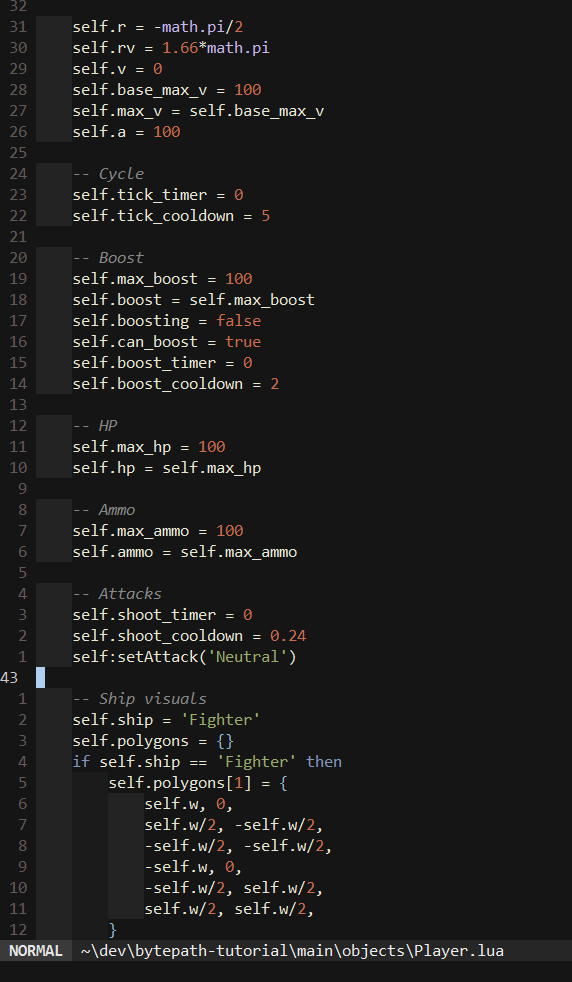
It's basically two huge if/elseifs, one to handle the visuals for all possible ships, and another to handle the trails for those ships as well. One of the things you might think when looking at something like this is that it needs to be PURIFIED. But again, is it necessary? Unlike our previous examples this is not code that is repeating itself over multiple places, it's just a lot of code being displayed in sequence.
One thing you might think to do is to abstract all those different ship types into different files, define their differences in those files and in the Player class we just read data from those files and it would be all clean and nice. And that's definitely something you could do, but in my opinion it falls under unnecessary abstraction. I personally prefer to just have straight code that shows itself clearly rather than have it spread over multiple layers of abstraction. If you're really bothered by this big piece of code right at the start of the Player class, you can put this into a function and place it at the bottom of the class. Or you can use folds, which is something your editor should support. Folds look like this in my editor, for instance:
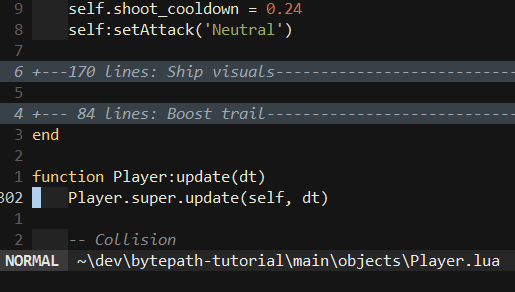
Player Class Size
Similarly, the Player class now has about 500 lines. In the next article where we'll add passives this will blow up to probably over 2000 lines. And when you look at it the natural reaction will be to want to make it neater and cleaner. And again, the question to be asked is if it's really necessary to do that. In most games the Player class is the one that has the most functionality and often times people go through great lengths to prevent it from becoming this huge class where everything happens.
But for the same reasons as why I decided to not abstract away the ship visuals and trails in the previous example, it wouldn't make sense to me to abstract away all the various different logical parts that make up the player class. So instead of having a different file for player movement, one for player collision, another for player attacks, and so on, I think it's better to just put it all in one file and end up with a 2000 Player class. The benefit-cost ratio that comes from having everything in one place and without layers of abstraction between things is higher than the benefit-cost ratio that comes from properly abstracting things away (in my opinion!).
Entity Component Systems
Finally, the biggest meme of all that I've seen take hold of solo indie developers in the last few years is the ECS one. I guess by now you can kind of guess my position on this, but I'll explain it anyway. The benefits of ECSs are very clear and I think everyone understands them. What people don't understand are the drawbacks.
By definition ECS are a more complicated system to start with in a game. The point is that as you add more functionality to your game you'll be able to reuse components and build new entities out of them. But the obvious cost (that people often ignore) is that at the start of development you're wasting way more time than needed building out your reusable components in the first place. And like I mentioned in the abstracting/copypasting section, when you build things out and your default behavior is to abstract, it becomes a lot more taxing to add code to the codebase, since you have to add it against the existing abstractions and structures. And this manifests itself massively in a game based around components.
Furthermore, I think that most indie games actually never get to the point where the ECS architecture actually starts paying off. If you take a look at this very scientific graph that I drew what I mean should become clear:

So the idea is that at the start, "yolo coding" (what I'm arguing for in this article) requires less effort to get things done when compared to ECS. As time passes and the project gets further along, the effort required for yolo coding increases while the effort required for ECS decreases, until a point is reached where ECS becomes more efficient than yolo coding. The point I wanna make is that most indie games, with very few exceptions (in my view at least) ever reach that intersection point between both lines.
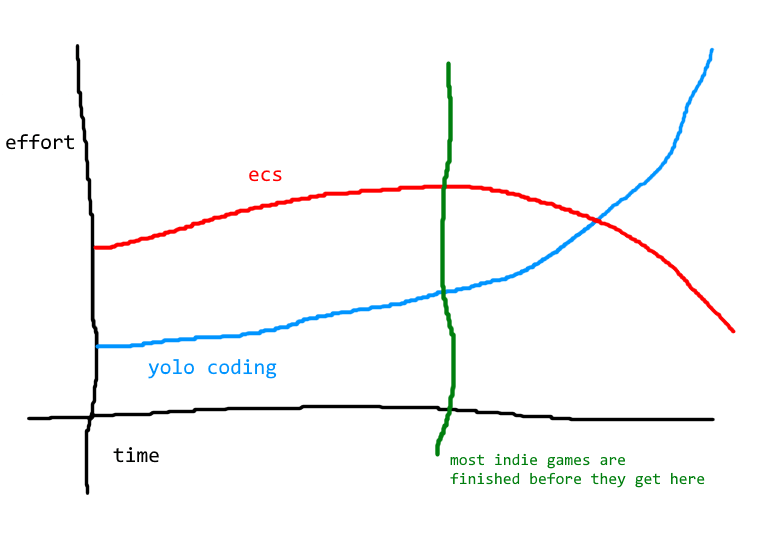
And so if this is the case, and in my view it is, then it makes no sense to use something like an ECS. This also applies to a number of other programming techniques and practices that you see people promote. This entire article has been about that, essentially. There are things that pay off in the long run that are not good for indie game development because the long run never actually manifests itself.
END
Anyway, I think I've given enough of my opinions on these issues. If you take anything away from this article just consider that most programming advice you'll find on the Internet is suited for teams of people working on software that needs to be maintained for a long time. Your context as a developer of indie video games is completely different, and so you should always think critically about if the advice given by other people suits you or not. Lots of times it will suit you, because there are things about programming that are of benefit in every context (like, say, naming variables properly), but sometimes it won't. And if you're not paying attention to the times when it doesn't you'll be slower and less productive than you otherwise could be.
At the same time, if at your day job you work in a big team on software that needs to be maintained for a long time and you've incorporated the practices and styles that come with that, if you can't come home and code your game with a different mindset then trying to do the things I'm outlining in this article would be disastrous. So you also need to consider what your "natural" coding environment is, how far away it is from what I'm saying is the natural coding environment of solo indie programmers, and how easily you can switch between the two on a daily basis. The point is, think critically about your programming practices, how well they're suited to your specific context and how comfortable you are with each one of them.
Passives
Introduction
In this article we'll go over the implementation of all passives in the game. There are a total of about 120 different things we will implement and those are enough to be turned into a very big skill tree (the tree I made has about 900 nodes, for instance).
This article will be filled with exercises tagged as content, and the way that will work is that I'll show you how to do something, and then give you a bunch of exercises to do that same thing but applying it to other stats. For instance, I will show you how to implement an HP multiplier, which is a stat that will multiply the HP of the player by a certain percentage, and then the exercises will ask for you to implement Ammo and Boost multipliers. In reality things will get a bit more complicated than that but this is the basic idea.
After we're done with the implementation of everything in this article we'll have pretty much have most of the game's content implemented and then it's a matter of finishing up small details, like building the huge skill tree out of the passives we implemented. :-D
Types of Stats
Before we start with the implementation of everything we need to first decide what kinds of passives our game will have. I already decided what I wanted to do so I'm going to just follow that, but you're free to deviate from this and come up with your own ideas.
The game will have three main types of passive values: resources, stat multipliers and chances.
- Resources are HP, Boost and Ammo. These are values that are described by a
max_valuevariable as well as acurrent_valuevariable. In the case of HP we have the maximum HP the player has, and then we also have the current amount. - Stat multipliers are multipliers that are applied to various values around the game. As the player goes around the tree picking up nodes, he'll be picking up stuff like "10% Increased Movement Speed", and so after he does that and starts a new match, we'll take all the nodes the player picked, pack them into those multiplier values, and then apply them in the game. So if the player picked nodes that amounted to 50% increased movement speed, then the movement speed multiplier will be applied to the
max_vvariable, so somemvspd_multipliervariable will be 1.5 and our maximum velocity will be multiplied by 1.5 (which is a 50% increase). - Chances are exactly that, chances for some event to happen. The player will also be able to pick up added chance for certain events to happen in different circumstances. For instance, "5% Added Chance to Barrage on Cycle", which means that whenever a cycle ends (the 5 second period we implemented), there's a 5% chance for the player to launch a barrage of projectiles. If the player picks up tons of those nodes then the chance gets higher and a barrage happens more frequently.
The game will have an additional type of node and an additional mechanic: notable nodes and temporary buffs.
- Notable nodes are nodes that change the logic of the game in some way (although not always). For instance, there's a node that replaces your HP for Energy Shield. And with ES you take double damage, your ES recharges after you don't take damage for a while, and you have halved invulnerability time. Nodes like these are not as numerous as others but they can be very powerful and combined in fun ways.
- Temporary buffs are temporary boosts to your stats. Sometimes you'll get a temporary buff that, say, increases your attack speed by 50% for 4 seconds.
Knowing all this we can get started. To recap, the current resource stats we have in our codebase should look like this:
function Player:new(...)
...
-- Boost
self.max_boost = 100
self.boost = self.max_boost
...
-- HP
self.max_hp = 100
self.hp = self.max_hp
-- Ammo
self.max_ammo = 100
self.ammo = self.max_ammo
...
end
The movement code values should look like this:
function Player:new(...)
...
-- Movement
self.r = -math.pi/2
self.rv = 1.66*math.pi
self.v = 0
self.base_max_v = 100
self.max_v = self.base_max_v
self.a = 100
...
end
And the cycle values should look like this (I renamed all previous references to the word "tick" to be "cycle" now for consistency):
function Player:new(...)
...
-- Cycle
self.cycle_timer = 0
self.cycle_cooldown = 5
...
end
HP multiplier
So let's start with the HP multiplier. In a basic way all we have to do is define a variable named hp_multiplier that starts as the value 1, and then we apply the increases from the tree to this variable and multiply it by max_hp at some point. So let's do the first thing:
function Player:new(...)
...
-- Multipliers
self.hp_multiplier = 1
end
Now the second thing is that we have to assume we're getting increases to HP from the tree. To do this we have to assume how these increases will be passed in and how they'll be defined. Here I have to cheat a little (since I already wrote the game once) and say that the tree nodes will be defined in the following format:
tree[2] = {'HP', {'6% Increased HP', 'hp_multiplier', 0.06}}
This means that node #2 is named HP, has as its description 6% Increased HP, and affects the variable hp_multiplier by 0.06 (6%). There is a function named treeToPlayer which takes all 900~ of those node definitions and then applies them to the player object. It's important to note that the variable name used in the node definition has to be the same name as the one defined in the player object, otherwise things won't work out. This is a very thinly linked and error-prone method of doing it I think, but as I said in the previous article it's the kind of thing you can get away with because you're coding by yourself.
Now the final question is: when do we multiply hp_multiplier by max_hp? The natural option here is to just do it on the constructor, since that's when a new player is created, and a new player is created whenever a new Stage room is created, which is also when a new match starts. However, we'll do this at the very end of the constructor, after all resources, multipliers and chances have been defined:
function Player:new(...)
...
-- treeToPlayer(self)
self:setStats()
end
And so in the setStats function we can do this:
function Player:setStats()
self.max_hp = self.max_hp*self.hp_multiplier
self.hp = self.max_hp
end
And so if you set hp_multiplier to 1.5 for instance and run the game, you'll notice that now the player will have 150 HP instead of its default 100.
Note that we also have to assume the existence of the treeToPlayer function here and pass the player object to that function. Eventually when we write the skill tree code and implement that function, what it will do is set the values of all multipliers based on the bonuses from the tree, and then after those values are set we can call setStats to use those to change the stats of the player.
123. (CONTENT) Implement the ammo_multiplier variable.
124. (CONTENT) Implement the boost_multiplier variable.
Flat HP
Now for a flat stat. Flat stats are direct increases to some stat instead of a percentage based one. The way we'll do it for HP is by defining a flat_hp variable which will get added to max_hp (before being multiplied by the multiplier):
function Player:new(...)
...
-- Flats
self.flat_hp = 0
end
function Player:setStats()
self.max_hp = (self.max_hp + self.flat_hp)*self.hp_multiplier
self.hp = self.max_hp
end
Like before, whenever we define a node in the tree we want to link it to the relevant variable, so, for instance, a node that adds flat HP could look like this:
tree[15] = {'Flat HP', {'+10 Max HP', 'flat_hp', 10}}
125. (CONTENT) Implement the flat_ammo variable.
126. (CONTENT) Implement the flat_boost variable.
127. (CONTENT) Implement the ammo_gain variable, which adds to the amount of ammo gained when the player picks one up. Change the calculations in the addAmmo function accordingly.
Homing Projectile
The next passive we'll implement is "Chance to Launch Homing Projectile on Ammo Pickup", but for now we'll focus on the homing projectile part. One of the attacks the player will have is a homing projectile so we'll just implement that as well now.
A projectile will have its homing function activated whenever the attack attribute is set to 'Homing'. The code that actually does the homing will be the same as the code we used for the Ammo resource:
function Projectile:update(dt)
...
self.collider:setLinearVelocity(self.v*math.cos(self.r), self.v*math.sin(self.r))
-- Homing
if self.attack == 'Homing' then
-- Move towards target
if self.target then
local projectile_heading = Vector(self.collider:getLinearVelocity()):normalized()
local angle = math.atan2(self.target.y - self.y, self.target.x - self.x)
local to_target_heading = Vector(math.cos(angle), math.sin(angle)):normalized()
local final_heading = (projectile_heading + 0.1*to_target_heading):normalized()
self.collider:setLinearVelocity(self.v*final_heading.x, self.v*final_heading.y)
end
end
end
The only thing we have to do differently is defining the target variable. For the Ammo object the target variable points to the player object, but in the case of a projectile it should point to a nearby enemy. To get a nearby enemy we can use the getAllGameObjectsThat function that is defined in the Area class, and use a filter that will only select objects that are enemies and that are close enough. To do this we must first define what objects are enemies and what objects aren't enemies, and the easiest way to do that is to just have a global table called enemies which will contain a list of strings with the name of the enemy classes. So in globals.lua we can add the following definition:
enemies = {'Rock', 'Shooter'}
And as we add more enemies into the game we also add their string to this table accordingly. Now that we know which object types are enemies we can easily select them:
local targets = self.area:getAllGameObjectsThat(function(e)
for _, enemy in ipairs(enemies) do
if e:is(_G[enemy]) then
return true
end
end
end)
We use the _G[enemy] line to access the class definition of the current string we're looping over. So _G['Rock'] will return the table that contains the class definition of the Rock class. We went over this in multiple articles so it should be clear by now why this works.
Now for the other condition we want to select only enemies that are within a certain radius of this projectile. Through trial and error I came to a radius of about 400 units, which is not small enough that the projectile will never have a proper target, but not big enough that the projectile will try to hit offscreen enemies too much:
local targets = self.area:getAllGameObjectsThat(function(e)
for _, enemy in ipairs(enemies) do
if e:is(_G[enemy]) and (distance(e.x, e.y, self.x, self.y) < 400) then
return true
end
end
end)
distance is a function we can define in utils.lua which returns the distance between two positions:
function distance(x1, y1, x2, y2)
return math.sqrt((x1 - x2)*(x1 - x2) + (y1 - y2)*(y1 - y2))
end
And so after this we should have our enemies in the targets list. After that all we want to do is get a random one of them and point that as the target that the projectile will move towards:
self.target = table.remove(targets, love.math.random(1, #targets))
And all that should look like this:
function Projectile:update(dt)
...
self.collider:setLinearVelocity(self.v*math.cos(self.r), self.v*math.sin(self.r))
-- Homing
if self.attack == 'Homing' then
-- Acquire new target
if not self.target then
local targets = self.area:getAllGameObjectsThat(function(e)
for _, enemy in ipairs(enemies) do
if e:is(_G[enemy]) and (distance(e.x, e.y, self.x, self.y) < 400) then
return true
end
end
end)
self.target = table.remove(targets, love.math.random(1, #targets))
end
if self.target and self.target.dead then self.target = nil end
-- Move towards target
if self.target then
local projectile_heading = Vector(self.collider:getLinearVelocity()):normalized()
local angle = math.atan2(self.target.y - self.y, self.target.x - self.x)
local to_target_heading = Vector(math.cos(angle), math.sin(angle)):normalized()
local final_heading = (projectile_heading + 0.1*to_target_heading):normalized()
self.collider:setLinearVelocity(self.v*final_heading.x, self.v*final_heading.y)
end
end
end
There's an additional line at the end of the block where we acquire a new target, where we set self.target to nil in case the target has been killed. This makes it so that whenever the target for this projectile stops existing, self.target will be set to nil and a new target will be acquired, since the condition not self.target will be met and then the whole process will repeat itself. It's also important to mention that once a target has been acquired we don't do any more calculations, so there's no big need to worry about the performance of getAllGameObjectsThat, which is a function that naively loops over all objects currently alive in the game.
One extra thing we have to do is change how the projectile object behaves whenever it's not homing or whenever there's no target. Intuitively using setLinearVelocity first to set the projectile's velocity once, and then using it again inside the if self.attack == 'Homing' loop would make sense, since the velocity would only be changed if the projectile is in fact homing and if a target exists. But for some reason doing that results in all sorts of problems, so we have to make sure we only call setLinearVelocity once, and that implies something like this:
-- Homing
if self.attack == 'Homing' then
...
-- Normal movement
else self.collider:setLinearVelocity(self.v*math.cos(self.r), self.v*math.sin(self.r)) end
This is a bit more confusing than the previous setup but it works. And if we test all this and create a projectile with the attack attribute set to 'Homing' it should look like this:

128. (CONTENT) Implement the Homing attack. Its definition on the attacks table looks like this:
attacks['Homing'] = {cooldown = 0.56, ammo = 4, abbreviation = 'H', color = skill_point_color}
And the attack itself looks like this:

Note that the projectile for this attack (as well as others that are to come) is slightly different. It's a rhombus half colored as white and half colored as the color of the attack (in this case skill_point_color), and it also has a trail that's the same as the player's.
Chance to Launch Homing Projectile on Ammo Pickup
Now we can move on to what we wanted to implement, which is this chance-type passive. This one is has a chance to be triggered whenever we pick the Ammo resource up. We'll hold this chance in the launch_homing_projectile_on_ammo_pickup_chance variable and then whenever an Ammo resource is picked up, we'll call a function that will handle rolling the chances for this event to happen.
But before we can do that we need to specify how we'll handle these chances. As I introduced in another article, here we'll also use the chanceList concept. If an event has 5% probability of happening, then we want to make sure that it will actually follow that 5% somewhat reasonably, and so it just makes sense to use chanceLists.
The way we'll do it is that after we call the setStats function on the Player's constructor, we'll also call a function called generateChances which will create all the chanceLists we'll use throughout the game. Since there will be lots and lots of different events that will need to be rolled we'll put all chanceLists into a table called chances, and organize things that so whenever we need to roll for a chance of something happening, we can do something like:
if self.chances.launch_homing_projectile_on_ammo_pickup_chance:next() then
-- launch homing projectile
end
We could set up the chances table manually, so that every time we add a new _chance type variable that will hold the chances for some event to happen, we also add and generate its chanceList in the generateChances function. But we can be a bit clever here and decide that every variable that deals with chances will end with _chance, and then we can use that to our advantage:
function Player:generateChances()
self.chances = {}
for k, v in pairs(self) do
if k:find('_chance') and type(v) == 'number' then
end
end
end
Here we're going through all key/value pairs inside the player object and returning true whenever we find an attribute that contains in its name the _chance substring, as well as being a number. If both those things are true then based on our own decision this is a variable that is dealing with chances of some event happening. So now all we have to do is then create the chanceList and add it to the chances table:
function Player:generateChances()
self.chances = {}
for k, v in pairs(self) do
if k:find('_chance') and type(v) == 'number' then
self.chances[k] = chanceList({true, math.ceil(v)}, {false, 100-math.ceil(v)})
end
end
end
And so this will create a chanceList of 100 values, with v of them being true, and 100-v of them being false. So if the only chance-type variable we had defined in our player object was the launch_homing_projectile_on_ammo_pickup_chance one, and this had the value 5 attached to it (meaning 5% probability of this event happening), then the chanceList would have 5 true values and 95 false ones, which gets us what we wanted.
And so if we call generateChances on the player's constructor:
function Player:new(...)
...
-- treeToPlayer(self)
self:setStats()
self:generateChances()
end
Then everything should work fine. We can now define the launch_homing_projectile_on_ammo_pickup_chance variable:
function Player:new(...)
...
-- Chances
self.launch_homing_projectile_on_ammo_pickup_chance = 0
end
And if you wanna test that the roll system works, you can set that to a value like 50 and then call :next() a few times to see what happens.
The implementation of the actual launching will happen through the onAmmoPickup function, which will be called whenever Ammo is picked up:
function Player:update(dt)
...
if self.collider:enter('Collectable') then
...
if object:is(Ammo) then
object:die()
self:addAmmo(5)
self:onAmmoPickup()
...
end
end
And that function then would look like this:
function Player:onAmmoPickup()
if self.chances.launch_homing_projectile_on_ammo_pickup_chance:next() then
local d = 1.2*self.w
self.area:addGameObject('Projectile',
self.x + d*math.cos(self.r), self.y + d*math.sin(self.r),
{r = self.r, attack = 'Homing'})
self.area:addGameObject('InfoText', self.x, self.y, {text = 'Homing Projectile!'})
end
end
And then all that would end up looking like this:
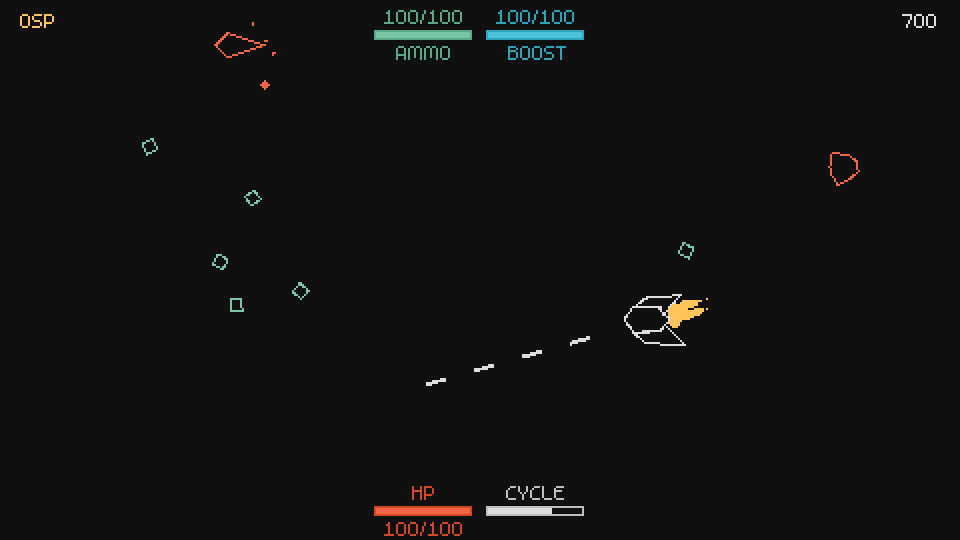
129. (CONTENT) Implement the regain_hp_on_ammo_pickup_chance passive. The amount of HP regained is 25 and should be added with the addHP function, which adds the given amount of HP to the hp value, making sure that it doesn't go above max_hp. Additionally, an InfoText object should be created with the text 'HP Regain!' in hp_color.
130. (CONTENT) Implement the regain_hp_on_sp_pickup_chance passive. he amount of HP regained is 25 and should be added with the addHP function. An InfoText object should be created with the text 'HP Regain!' in hp_color. Additionally, an onSPPickup function should be added to the Player class and in it all this work should be done (like we did with the onAmmoPickup function).
Haste Area
The next passives we want to implement are "Chance to Spawn Haste Area on HP Pickup" and "Chance to Spawn Haste Area on SP Pickup". We already know how to do the "on Resource Pickup" part, so now we'll focus on the "Haste Area". A haste area is simply a circle that boosts the player's attack speed whenever he is inside it. This boost in attack speed will be applied as a multiplier, so it makes sense for us to implement the attack speed multiplier first.
ASPD multiplier
We can define an ASPD multiplier simply as the aspd_multiplier variable and then multiply this variable by our shooting cooldown:
function Player:new(...)
...
-- Multipliers
self.aspd_multiplier = 1
end
function Player:update(dt)
...
-- Shoot
self.shoot_timer = self.shoot_timer + dt
if self.shoot_timer > self.shoot_cooldown*self.aspd_multiplier then
self.shoot_timer = 0
self:shoot()
end
end
The main difference that this one multiplier in particular will have is that lower values are better than higher values. In general, if a multiplier value is 0.5 then it's cutting whatever stat it's being applied to by half. So for HP, movement speed and pretty much everything else this is a bad thing. However, for attack speed lower values are better, and this can be simply explained by the code above. Since we're applying the multiplier to the shoot_cooldown variable, lower values means that this cooldown will be lower, which means that the player will shoot faster. We'll use this knowledge next when creating the HasteArea object.
Haste Area
And now that we have the ASPD multiplier we can get back to this. What we want to do here is to create a circular area that will decrease aspd_multiplier by some amount as long as the player is inside it. To achieve this we'll create a new object named HasteArea which will handle the logic of seeing if the player is inside it or not and setting the appropriate values in case he is. The basic structure of the object looks like this:
function HasteArea:new(...)
...
self.r = random(64, 96)
self.timer:after(4, function()
self.timer:tween(0.25, self, {r = 0}, 'in-out-cubic', function() self.dead = true end)
end)
end
function HasteArea:update(dt)
...
end
function HasteArea:draw()
love.graphics.setColor(ammo_color)
love.graphics.circle('line', self.x, self.y, self.r + random(-2, 2))
love.graphics.setColor(default_color)
end
For the logic behind applying the actual effect we have to keep track of when the player enters/leaves the area and then modify the aspd_multiplier value once that happens. The way to do this looks something like this:
function HasteArea:update(dt)
...
local player = current_room.player
if not player then return end
local d = distance(self.x, self.y, player.x, player.y)
if d < self.r and not player.inside_haste_area then -- Enter event
player:enterHasteArea()
elseif d >= self.r and player.inside_haste_area then -- Leave event
player:exitHasteArea()
end
end
We use a variable called inside_haste_area to keep track of whether the player is inside the area or not. This variable is set to true inside enterHasteArea and set to false inside exitHasteArea, meaning that those functions will only be called once when those events happen from the HasteArea object. In the Player class, both functions simply will apply the modifications necessary:
function Player:enterHasteArea()
self.inside_haste_area = true
self.pre_haste_aspd_multiplier = self.aspd_multiplier
self.aspd_multiplier = self.aspd_multiplier/2
end
function Player:exitHasteArea()
self.inside_haste_area = false
self.aspd_multiplier = self.pre_haste_aspd_multiplier
self.pre_haste_aspd_multiplier = nil
end
And so in this way whenever the player enters the area his attack speed will be doubled, and whenever he exits the area it will go back to normal. One big point that's easy to miss here is that it's tempting to put all this logic inside the HasteArea object instead of linking it back to the player via the inside_haste_area variable. The reason why we can't do this is because if we do, then problems will occur whenever the player enters/leaves multiple areas. As it is right now, the fact that the inside_haste_area variable exists means that we will only apply the buff once, even if the player is standing on top of 3 overlapping HasteArea objects.
131. (CONTENT) Implement the spawn_haste_area_on_hp_pickup_chance passive. An InfoText object should be created with the text 'Haste Area!'. Additionally, an onHPPickup function should be added to the Player class.
132. (CONTENT) Implement the spawn_haste_area_on_sp_pickup_chancepassive. An InfoText object should be created with the text 'Haste Area!'.
Chance to Spawn SP on Cycle
The next one we'll go for is spawn_sp_on_cycle_chance. For this one we kinda already know how to do it in its entirety. The "onCycle" part behaves quite similarly to "onResourcePickup", the only difference is that we'll call the onCycle function whenever a new cycle occurs instead of whenever a resource is picked. And the "spawn SP" part is simply creating a new SP resource, which we also already know how to do.
So for the first part, we need to go into the cycle function and call onCycle:
function Player:cycle()
...
self:onCycle()
end
Then we add the spawn_sp_on_cycle_chance variable to the Player:
function Player:new(...)
...
-- Chances
self.spawn_sp_on_cycle_chance = 0
end
And with that we also automatically add a new chanceList representing the chances of this variable. And because of that we can add the functionality needed to the onCycle function:
function Player:onCycle()
if self.chances.spawn_sp_on_cycle_chance:next() then
self.area:addGameObject('SkillPoint')
self.area:addGameObject('InfoText', self.x, self.y,
{text = 'SP Spawn!', color = skill_point_color})
end
end
And this should work out as expected:
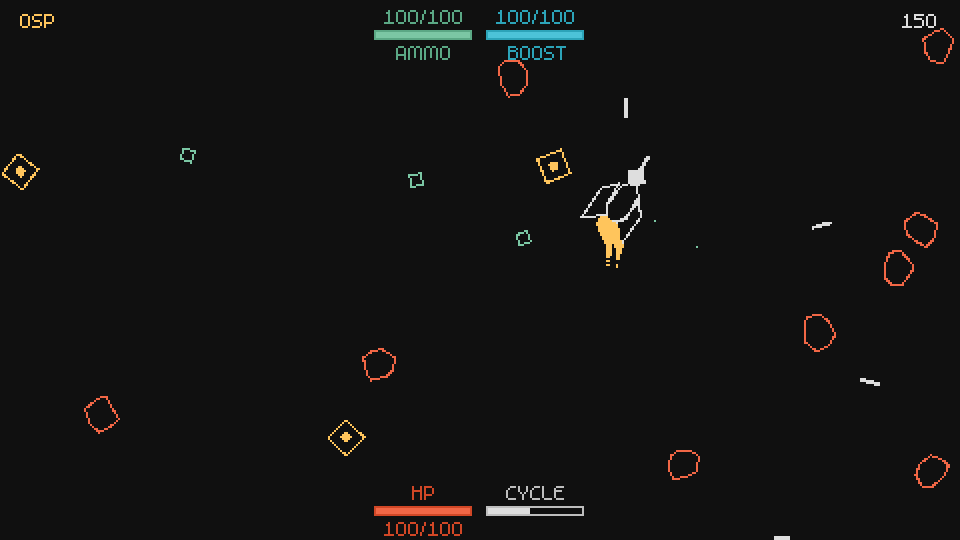
Chance to Barrage on Kill
The next one is barrage_on_kill_chance. The only thing we don't really know how to do here is the "Barrage" part. Triggering events on kill is similar to the previous one, except instead of whenever a cycle happens, we'll call the player's onKill function whenever an enemy dies.
So first we add the barrage_on_kill_chance variable to the Player:
function Player:new(...)
...
-- Chances
self.barrage_on_kill_chance = 0
end
Then we create the onKill function and call it whenever an enemy dies. There are two approaches to calling onKill whenever an enemy dies. The first is to just call it from every enemy's die or hit function. The problem with this is that as we add new enemies we'll need to add this same code calling onKill to all of them. The other option is to call onKill whenever a Projectile object collides with an enemy. The problem with this is that some projectiles can collide with enemies but not kill them (because the enemies have more HP or the projectile deals less damage), and so we need to figure out a way to tell if the enemy is actually dead or not. It turns out that figuring that out is pretty easy, so that's what I'm gonna go with:
function Projectile:update(dt)
...
if self.collider:enter('Enemy') then
...
if object then
object:hit(self.damage)
self:die()
if object.hp <= 0 then current_room.player:onKill() end
end
end
end
So all we have to do is after we call the enemy's hit function is to simply check if the enemy's HP is 0 or not. If it is it means he's dead and so we can call onKill.
Now for the barrage itself. The way we'll code is that by default, 8 projectiles will be shot within 0.05 seconds of each other, with an angle of between -math.pi/8 and +math.pi/8 of the angle the player is pointing towards. The barrage projectiles will also have the attack that the player has. So if the player has homing projectiles, then all barrage projectiles will also be homing. All that translates to this:
function Player:onKill()
if self.chances.barrage_on_kill_chance:next() then
for i = 1, 8 do
self.timer:after((i-1)*0.05, function()
local random_angle = random(-math.pi/8, math.pi/8)
local d = 2.2*self.w
self.area:addGameObject('Projectile',
self.x + d*math.cos(self.r + random_angle),
self.y + d*math.sin(self.r + random_angle),
{r = self.r + random_angle, attack = self.attack})
end)
end
self.area:addGameObject('InfoText', self.x, self.y, {text = 'Barrage!!!'})
end
end
Most of this should be pretty straightforward. The only notable thing is that we use after inside a for loop to separate the creation of projectiles by 0.05 seconds between each other. Other than that we simply create the projectile with the given constraints. All that should look like this:

For the next exercises (and every one that comes after them), don't forget to create InfoText objects with the appropriate colors so that the player can tell when something happened.
133. (CONTENT) Implement the spawn_hp_on_cycle_chance passive.
134. (CONTENT) Implement the regain_hp_on_cycle_chance passive. The amount of HP regained is 25.
135. (CONTENT) Implement the regain_full_ammo_on_cycle_chance passive.
136. (CONTENT) Implement the change_attack_on_cycle_chance passive. The new attack is chosen at random.
137. (CONTENT) Implement the spawn_haste_area_on_cycle_chance passive.
138. (CONTENT) Implement the barrage_on_cycle_chance passive.
139. (CONTENT) Implement the launch_homing_projectile_on_cycle_chance passive.
140. (CONTENT) Implement the regain_ammo_on_kill_chance passive. The amount of ammo regained is 20.
141. (CONTENT) Implement the launch_homing_projectile_on_kill_chance passive.
142. (CONTENT) Implement the regain_boost_on_kill_chance passive. The amount of boost regained is 40.
143. (CONTENT) Implement the spawn_boost_on_kill_chance passive.
Gain ASPD Boost on Kill
We already implemented an "ASPD Boost"-like passive before with the HasteArea object. Now we want to implement another where we have a chance to get an attack speed boost whenever we kill an enemy. However, if we try to implement this in the same way that we implement the previous ASPD boost we would soon encounter problems. To recap, this is how we implement the boost in HasteArea:
function HasteArea:update(dt)
HasteArea.super.update(self, dt)
local player = current_room.player
if not player then return end
local d = distance(self.x, self.y, player.x, player.y)
if d < self.r and not player.inside_haste_area then player:enterHasteArea()
elseif d >= self.r and player.inside_haste_area then player:exitHasteArea() end
end
And then enterHasteArea and exitHasteArea look like this:
function Player:enterHasteArea()
self.inside_haste_area = true
self.pre_haste_aspd_multiplier = self.aspd_multiplier
self.aspd_multiplier = self.aspd_multiplier/2
end
function Player:exitHasteArea()
self.inside_haste_area = false
self.aspd_multiplier = self.pre_haste_aspd_multiplier
self.pre_haste_aspd_multiplier = nil
end
If we tried to implement the aspd_boost_on_kill_chance passive in a similar way it would look something like this:
function Player:onKill()
...
if self.chances.aspd_boost_on_kill_chance:next() then
self.pre_boost_aspd_multiplier = self.aspd_multiplier
self.aspd_multiplier = self.aspd_multiplier/2
self.timer:after(4, function()
self.aspd_multiplier = self.pre_boost_aspd_multiplier
self.pre_boost_aspd_multiplier = nil
end)
end
end
Here we simply do what we did for the HasteArea boost. We store the current attack speed multiplier, halve it, and then after a set duration (in this case 4 seconds), we restore it back to its original value. The problem with doing things this way happens whenever we want to stack these boosts together.
Consider the situation where the player has entered a HasteArea and then gets an ASPD boost on kill. The problem here is that if the player exits the HasteArea before the 4 seconds for the boost duration are over then his aspd_multiplier variable will be restored to pre-ASPD boost levels, meaning that leaving the area will erase all other existing attack speed boosts.
And then also consider the situation where the player has an ASPD boost active and then enters a HasteArea. Whenever the boost duration ends the HasteArea effect will also be erased, since the pre_boost_aspd_multiplier will restore aspd_multiplier to a value that doesn't take into account the attack speed boost from the HasteArea. But even more worryingly, whenever the player exits the HasteArea he will now have permanently increased attack speed, since the save attack speed when he entered it was the one that was boosted from the ASPD boost.
So the main way we can fix this is by introducing a few variables:
function Player:new(...)
...
self.base_aspd_multiplier = 1
self.aspd_multiplier = 1
self.additional_aspd_multiplier = {}
end
Instead of only having the aspd_multiplier variable, now we'll have base_aspd_multiplier as well as additional_aspd_multiplier. aspd_multiplier will hold the current multiplier affected by all boosts. base_aspd_multiplier will hold the initial multiplier affected only by percentage increases. So if we have 50% increased attack speed from the tree, it will be applied on the constructor (in setStats) to base_aspd_multiplier. Then additional_aspd_multiplier will contain the added values of all boosts. So if we're inside a HasteArea, we would add the appropriate value to this table and then multiply its sum by the base every frame. So our update function for instance would look like this:
function Player:update(dt)
...
self.additional_aspd_multiplier = {}
if self.inside_haste_area then table.insert(self.additional_aspd_multiplier, -0.5) end
if self.aspd_boosting then table.insert(self.additional_aspd_multiplier, -0.5) end
local aspd_sum = 0
for _, aspd in ipairs(self.additional_aspd_multiplier) do
aspd_sum = aspd_sum + aspd
end
self.aspd_multiplier = self.base_aspd_multiplier/(1 - aspd_sum)
end
In this way, every frame we'd be recalculating the aspd_multiplier variable based on the base as well as the boosts. There are a few multipliers that will make use of functionality very similar to this, so I'll just create a general object for this, since repeating it every time and with different variable names would be tiresome.
The Stat object looks like this:
Stat = Object:extend()
function Stat:new(base)
self.base = base
self.additive = 0
self.additives = {}
self.value = self.base*(1 + self.additive)
end
function Stat:update(dt)
for _, additive in ipairs(self.additives) do self.additive = self.additive + additive end
if self.additive >= 0 then
self.value = self.base*(1 + self.additive)
else
self.value = self.base/(1 - self.additive)
end
self.additive = 0
self.additives = {}
end
function Stat:increase(percentage)
table.insert(self.additives, percentage*0.01)
end
function Stat:decrease(percentage)
table.insert(self.additives, -percentage*0.01)
end
And the way we'd use it for our attack speed problem is like this:
function Player:new(...)
...
self.aspd_multiplier = Stat(1)
end
function Player:update(dt)
...
if self.inside_haste_area then self.aspd_multiplier:decrease(100) end
if self.aspd_boosting then self.aspd_multiplier:decrease(100) end
self.aspd_multiplier:update(dt)
...
end
We would be able to access the attack speed multiplier at any point after aspd_multiplier:update is called by saying aspd_multiplier.value, and it would return us the correct result based on the base as well as the all possible boosts applied. Because of this we need to change how the aspd_multiplier variable is used:
function Player:update(dt)
...
-- Shoot
self.shoot_timer = self.shoot_timer + dt
if self.shoot_timer > self.shoot_cooldown*self.aspd_multiplier.value then
self.shoot_timer = 0
self:shoot()
end
end
Here we just change self.shoot_cooldown*self.aspd_multiplier to self.shoot_cooldown*self.aspd_multiplier.value, since things wouldn't work out otherwise. Additionally, we can also change something else here. The way our aspd_multiplier variable works now is contrary to how every other variable in the game works. When we say that we get increased 10% HP, we know that hp_multiplier is 1.1, but when we say that we get increased 10% ASPD, aspd_multiplier is 0.9 instead. We can change this very and make aspd_multiplier behave the same way as other variables by dividing instead of multiplying it to shoot_cooldown:
if self.shoot_timer > self.shoot_cooldown/self.aspd_multiplier.value then
In this way, if we get a 100% increase in ASPD, its value will be 2 and we will be halving the cooldown between shots, which is what we want. Additionally we need to change the way we apply our boosts and instead of calling decrease on them we will call increase:
function Player:update(dt)
...
if self.inside_haste_area then self.aspd_multiplier:increase(100) end
if self.aspd_boosting then self.aspd_multiplier:increase(100) end
self.aspd_multiplier:update(dt)
end
Another thing to keep in mind is that because aspd_multiplier is a Stat object and not just a number, whenever we implement the tree and import its values to the Player object we'll need to treat them differently. So the treeToPlayer function that I mentioned earlier will have to take this into account as well.
In any case, in this way we can easily implement "Gain ASPD Boost on Kill" correctly:
function Player:new(...)
...
-- Chances
self.gain_aspd_boost_on_kill_chance = 0
end
function Player:onKill()
...
if self.chances.gain_aspd_boost_on_kill_chance:next() then
self.aspd_boosting = true
self.timer:after(4, function() self.aspd_boosting = false end)
self.area:addGameObject('InfoText', self.x, self.y,
{text = 'ASPD Boost!', color = ammo_color})
end
end
We can also delete the enterHasteArea and exitHasteArea functions, as well as changing how the HasteArea object works slightly:
function HasteArea:update(dt)
HasteArea.super.update(self, dt)
local player = current_room.player
if not player then return end
local d = distance(self.x, self.y, player.x, player.y)
if d < self.r then player.inside_haste_area = true
elseif d >= self.r then player.inside_haste_area = false end
end
Instead of any complicated logic like we had before, we simply set the Player's inside_haste_area attribute to true or false based on if the player is inside the area or not, and then because of the way we implemented the Stat object, the application of the attack speed boost that comes from a HasteArea will be done automatically.
144. (CONTENT) Implement the mvspd_boost_on_cycle_chance passive. A "MVSPD Boost" gives the player 50% increased movement speed for 4 seconds. Also implement the mvspd_multiplier variable and multiply it in the appropriate location.
145. (CONTENT) Implement the pspd_boost_on_cycle_chance passive. A "PSPD Boost" gives projectiles created by the player 100% increased movement speed for 4 seconds. Also implement the pspd_multiplier variable and multiply it in the appropriate location.
146. (CONTENT) Implement the pspd_inhibit_on_cycle_chance passive. A "PSPD Inhibit" gives projectiles created by the player 50% decreased movement speed for 4 seconds.
While Boosting
These next passives we'll implement are the last ones of the "On Event Chance" type. So far all the ones we've focused on are chances of something happening on some event (on kill, on cycle, on resource pickup, ...) and these ones won't be different, since they will be chances for something to happen while boosting.
The first one we'll do is launch_homing_projectile_while_boosting_chance. The way this will work is that there will be a normal chance for the homing projectile to be launched, and this chance will be rolled on an interval of 0.2 seconds whenever we're boosting. This means that if we boost for 1 second, we'll roll this chance 5 times.
A good way of doing this is by defining two new functions: onBoostStart and onBoostEnd and then doing whatever it is we want to do to active the passive when the boost start, and then deactivate it when it ends. To add those two functions we need to change the boost code a little:
function Player:update(dt)
...
-- Boost
...
if self.boost_timer > self.boost_cooldown then self.can_boost = true end
...
if input:pressed('up') and self.boost > 1 and self.can_boost then self:onBoostStart() end
if input:released('up') then self:onBoostEnd() end
if input:down('up') and self.boost > 1 and self.can_boost then
...
if self.boost <= 1 then
self.boosting = false
self.can_boost = false
self.boost_timer = 0
self:onBoostEnd()
end
end
if input:pressed('down') and self.boost > 1 and self.can_boost then self:onBoostStart() end
if input:released('down') then self:onBoostEnd() end
if input:down('down') and self.boost > 1 and self.can_boost then
...
if self.boost <= 1 then
self.boosting = false
self.can_boost = false
self.boost_timer = 0
self:onBoostEnd()
end
end
...
end
Here we add input:pressed and input:released, which return true only whenever those events happen, and with that we can be sure that onBoostStart and onBoostEnd will only be called once when those events happen. We also add onBoostEnd to inside the input:down conditional in case the player doesn't release the button but the amount of boost available to him ends and therefore the boost ends as well.
Now for the launch_homing_projectile_while_boosting_chance part:
function Player:new(...)
...
-- Chances
self.launch_homing_projectile_while_boosting_chance = 0
end
function Player:onBoostStart()
self.timer:every('launch_homing_projectile_while_boosting_chance', 0.2, function()
if self.chances.launch_homing_projectile_while_boosting_chance:next() then
local d = 1.2*self.w
self.area:addGameObject('Projectile',
self.x + d*math.cos(self.r), self.y + d*math.sin(self.r),
{r = self.r, attack = 'Homing'})
self.area:addGameObject('InfoText', self.x, self.y, {text = 'Homing Projectile!'})
end
end)
end
function Player:onBoostEnd()
self.timer:cancel('launch_homing_projectile_while_boosting_chance')
end
Here whenever a boost starts we call timer:every to roll a chance for the homing projectile every 0.2 seconds, and then whenever a boost ends we cancel that timer. Here's what that looks like if the chance of this event happening was 100%:
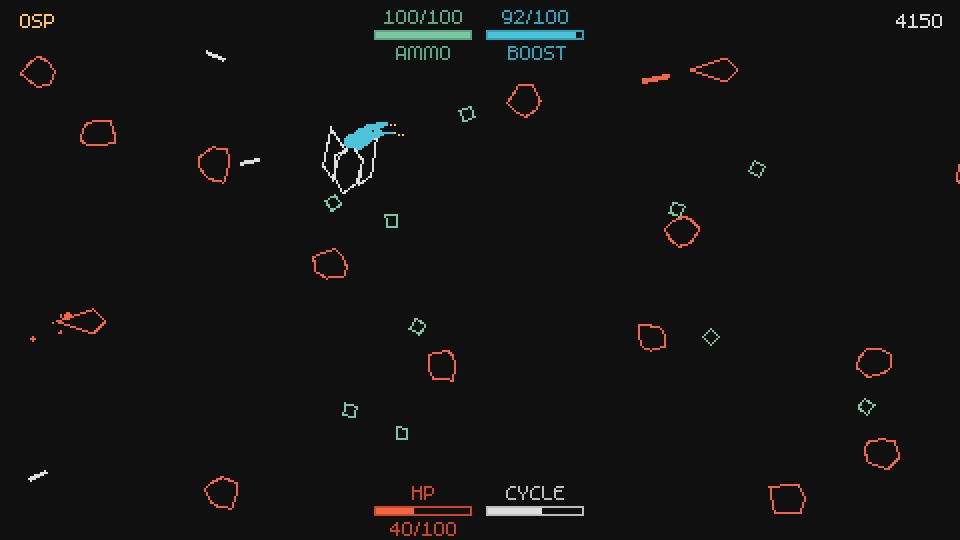
147. (CONTENT) Implement the cycle_speed_multiplier variable. This variable makes the cycle speed faster or slower based on its value. So, for instance, if cycle_speed_multiplier is 2 and our default cycle duration is 5 seconds, then applying it would turn our cycle duration to 2.5 instead.
148. (CONTENT) Implement the increased_cycle_speed_while_boosting passive. This variable should be a boolean that signals if the cycle speed should be increased or not whenever the player is boosting. The boost should be an increase of 200% to cycle speed multiplier.
149. (CONTENT) Implement the invulnerability_while_boosting passive. This variable should be a boolean that signals if the player should be invulnerable whenever he is boosting. Make use of the invincible attribute which already exists and serves the purpose of making the player invincible.
Increased Luck While Boosting
The final "While Boosting" type of passive we'll implement is "Increased Luck While Boosting". Before we can implement it though we need to implement the luck_multiplier stat. Luck is one of the main stats of the game and it works by increasing the chances of favorable events to happen. So, let's say you have 10% chance to launch a homing projectile on kill. If luck_multiplier is 2, then this chance becomes 20% instead.
The way to implement this turns out to be very very simple. All "chance" type passives go through the generateChances function, so we can just implement this there:
function Player:generateChances()
self.chances = {}
for k, v in pairs(self) do
if k:find('_chance') and type(v) == 'number' then
self.chances[k] = chanceList(
{true, math.ceil(v*self.luck_multiplier)},
{false, 100-math.ceil(v*self.luck_multiplier)})
end
end
end
And here we simply multiply v by our luck_multiplier and it should work as expected. With this we can go on to implement the increased_luck_while_boosting passive like this:
function Player:onBoostStart()
...
if self.increased_luck_while_boosting then
self.luck_boosting = true
self.luck_multiplier = self.luck_multiplier*2
self:generateChances()
end
end
function Player:onBoostEnd()
...
if self.increased_luck_while_boosting and self.luck_boosting then
self.luck_boosting = false
self.luck_multiplier = self.luck_multiplier/2
self:generateChances()
end
end
Here we implement it like we initially did for the HasteArea object. The reason we can do this now is because there will not be any other passives that will give the Player a luck boost, which means that we don't have to worry about multiple boosts possibly overriding each other. If we had multiple passives giving boosts to luck, then we'd need to make it a Stat object like we did for the aspd_multiplier.
Also importantly, whenever we change our luck multiplier we also call generateChances again, otherwise our luck boost will not really affect anything. There's a downside to this which is that all lists get reset, and so if some list randomly selected a bunch of unlucky rolls and then it gets reset here, it could select a bunch of unlucky rolls again instead of following the chanceList property where it would be less likely to select more unlucky rolls as time goes on. But this is a very minor problem that I personally don't really worry about.
HP Spawn Chance Multiplier
Now we'll go over hp_spawn_chance_multiplier, which increases the chance that whenever the Director spawns a new resource, that resource will be an HP one. This is a fairly straightforward implementation if we remember how the Director works:
function Player:new(...)
...
-- Multipliers
self.hp_spawn_chance_multiplier = 1
end
function Director:new(...)
...
self.resource_spawn_chances = chanceList({'Boost', 28},
{'HP', 14*current_room.player.hp_spawn_chance_multiplier}, {'SkillPoint', 58})
end
On article 9 we went over the creation of the chances for each resource to be spawned. The resource_spawn_chances chanceList holds those chances, and so all we have to do is make sure that we use hp_spawn_chance_multiplier to increase the chances that the HP resource will be spawned according to the multiplier.
It's also important here to initialize the Director after the Player in the Stage room, since the Director depends on variables the Player has while the Player doesn't depend on the Director at all.
150. (CONTENT) Implement the spawn_sp_chance_multiplier passive.
151. (CONTENT) Implement the spawn_boost_chance_multiplier passive.
Given everything we've implemented so far, these next exercises can be seen as challenges. I haven't gone over most aspects of their implementation, but they're pretty simple compared to everything we've done so far so they should be straightforward.
152. (CONTENT) Implement the drop_double_ammo_chance passive. Whenever an enemy dies there will be a chance that it will create two Ammo objects instead of one.
153. (CONTENT) Implement the attack_twice_chance passive. Whenever the player attacks there will be a chance to call the shoot function twice.
154. (CONTENT) Implement the spawn_double_hp_chance passive. Whenever an HP resource is spawned by the Director there will be a chance that it will create two HP objects instead of one.
155. (CONTENT) Implement the spawn_double_sp_chance passive. Whenever a SkillPoint resource is spawned by the Director there will be a chance that it will create two SkillPoint objects instead of one.
156. (CONTENT) Implement the gain_double_sp_chance passive. Whenever the player collects a SkillPoint resource there will be a chance that he will gain two skill points instead of one.
Enemy Spawn Rate
The enemy_spawn_rate_multiplier will control how fast the Director changes difficulties. By default this happens every 22 seconds, but if enemy_spawn_rate_multiplier is 2 then this will happen every 11 seconds instead. This is another rather straightforward implementation:
function Player:new(...)
...
-- Multipliers
self.enemy_spawn_rate_multiplier = 1
end
function Director:update(dt)
...
-- Difficulty
self.round_timer = self.round_timer + dt
if self.round_timer > self.round_duration/self.stage.player.enemy_spawn_rate_multiplier then
...
end
end
So here we just divide round_duration by enemy_spawn_rate_multiplier to get the target round duration.
157. (CONTENT) Implement the resource_spawn_rate_multiplier passive.
158. (CONTENT) Implement the attack_spawn_rate_multiplier passive.
And here are some more exercises for some more passives. These are mostly multipliers that couldn't fit into any of the classes of passives talked about before but should be easy to implement.
159. (CONTENT) Implement the turn_rate_multiplier passive. This is a passive that increases or decreases the speed with which the Player's ship turns.
160. (CONTENT) Implement the boost_effectiveness_multiplier passive. This is a passive that increases or decreases the effectiveness of boosts. This means that if this variable has the value of 2, a boost will go twice as fast or twice as slow as before.
161. (CONTENT) Implement the projectile_size_multiplier passive. This is a passive that increases or decreases the size of projectiles.
162. (CONTENT) Implement the boost_recharge_rate_multiplier passive. This is a passive that increases or decreases how fast boost is recharged.
163. (CONTENT) Implement the invulnerability_time_multiplier passive. This is a passive that increases or decreases the duration of the player's invulnerability after he's hit.
164. (CONTENT) Implement the ammo_consumption_multiplier passive. This is a passive that increases or decreases the amount of ammo consumed by all attacks.
165. (CONTENT) Implement the size_multiplier passive. This is a passive that increases or decreases the size of the player's ship. Note that that the positions of the trails for all ships, as well as the position of projectiles as they're fired need to be changed accordingly.
166. (CONTENT) Implement the stat_boost_duration_multiplier passive. This is a passive that increases of decreases the duration of temporary buffs given to the player.
Projectile Passives
Now we'll focus on a few projectile passives. These passives will change how our projectiles behave in some fundamental way. These same ideas can also be implemented in the EnemyProjectile object and then we can create enemies that use some of this as well. For instance, there's a passive that makes your projectiles orbit around you instead of just going straight. Later on we'll add an enemy that has tons of projectiles orbiting it as well and the technology behind it is the same for both situations.
90 Degree Change
We'll call this passive projectile_ninety_degree_change and what it will do is that the angle of the projectile will be changed by 90 degrees periodically. The way this looks is like this:
Notice that the projectile roughly moves in the same direction it was moving towards as it was shot, but its angle changes rapidly by 90 degrees each time. This means that the angle change isn't entirely randomly decided and we have to put some thought into it.
The basic way we can go about this is to say that projectile_ninety_degree_change will be a boolean and that the effect will apply whenever it is true. Because we're going to apply this effect in the Projectile class, we have two options in regards to how we'll read from it that the Player's projectile_ninety_degree_change variable is true or not: either pass that in in the opts table whenever we create a new projectile from the shoot function, or read that directly from the player by accessing it through current_room.player. I'll go with the second solution because it's easier and there are no real drawbacks to it, other than having to change current_room.player to something else whenever we move some of this code to EnemyProjectile. The way all this would look is something like this:
function Player:new(...)
...
-- Booleans
self.projectile_ninety_degree_change = false
end
function Projectile:new(...)
...
if current_room.player.projectile_ninety_degree_change then
end
end
Now what we have to do inside the conditional in the Projectile constructor is to change the projectile's angle each time by 90 degrees, but also respecting its original direction. What we can do is first change the angle by either 90 degrees or -90 degrees randomly. This would look like this:
function Projectile:new(...)
...
if current_room.player.projectile_ninety_degree_change then
self.timer:after(0.2, function()
self.ninety_degree_direction = table.random({-1, 1})
self.r = self.r + self.ninety_degree_direction*math.pi/2
end)
end
end

Now what we need to do is figure out how to turn the projectile in the other direction, and then turn it back in the other, and then again, and so on. It turns out that since this is a periodic thing that will happen forever, we can use timer:every:
function Projectile:new(...)
...
if current_room.player.projectile_ninety_degree_change then
self.timer:after(0.2, function()
self.ninety_degree_direction = table.random({-1, 1})
self.r = self.r + self.ninety_degree_direction*math.pi/2
self.timer:every('ninety_degree_first', 0.25, function()
self.r = self.r - self.ninety_degree_direction*math.pi/2
self.timer:after('ninety_degree_second', 0.1, function()
self.r = self.r - self.ninety_degree_direction*math.pi/2
self.ninety_degree_direction = -1*self.ninety_degree_direction
end)
end)
end)
end
end
At first we turn the projectile in the opposite direction that we turned it initially, which means that now it's facing its original angle. Then, after only 0.1 seconds, we turn it again in that same direction so that it's facing the opposite direction to when it first turned. So, if it was fired facing right, what happened is: after 0.2 seconds it turned up, after 0.25 it turned right again, after 0.1 seconds it turned down, and then after 0.25 seconds it will repeat by turning right then up, then right then down, and so on.
Importantly, at the end of each every loop we change the direction it should turn towards, otherwise it wouldn't oscillate between up/down and would keep going up/down instead of straight. Doing all that looks like this:

167. (CONTENT) Implement the projectile_random_degree_change passive, which changes the angle of the projectile randomly instead. Unlike the 90 degrees one, projectiles in this one don't need to retain their original direction.
168. (CONTENT) Implement the angle_change_frequency_multiplier passive. This is a passive that increases or decreases the speed with which angles change in the previous 2 passives. If angle_change_frequency_multiplier is 2, for instance, then instead of angles changing with 0.25 and 0.1 seconds, they will change with 0.125 and 0.05 seconds instead.
Wavy Projectiles
Instead of abruptly changing the angle of our projectile, we can do it softly using the timer:tween function, and in this way we can get a wavy projectile effect that looks like this:
The idea is almost the same as the previous examples but using timer:tween instead:
function Projectile:new(...)
...
if current_room.player.wavy_projectiles then
local direction = table.random({-1, 1})
self.timer:tween(0.25, self, {r = self.r + direction*math.pi/8}, 'linear', function()
self.timer:tween(0.25, self, {r = self.r - direction*math.pi/4}, 'linear')
end)
self.timer:every(0.75, function()
self.timer:tween(0.25, self, {r = self.r + direction*math.pi/4}, 'linear', function()
self.timer:tween(0.5, self, {r = self.r - direction*math.pi/4}, 'linear')
end)
end)
end
end
Because of the way timer:every works, in that it doesn't start performing its functions until after the initial duration, we first do one iteration of the loop manually, and then after that the every loop takes over. In the first iteration we also use an initial value of math.pi/8 instead of math.pi/4 because we only want the projectile to tween half of what it usually does, since it starts in the middle position (as it was just shot from the Player) instead of on either edge of the oscillation.
169. (CONTENT) Implement the projectile_waviness_multiplier passive. This is a passive that increases or decreases the target angle that the projectile should reach when tweening. If projectile_waviness_multiplier is 2, for instance, then the arc of its path will be twice as big as normal.
Acceleration and Deceleration
Now we'll go for a few passives that change the speed of the projectile. The first one is "Fast -> Slow" and the second is "Slow -> Fast", meaning, the projectile starts with either fast or slow velocity, and then transitions into either slow or fast velocity. This is what "Fast -> Slow" looks like:

The way we'll implement this is pretty straightforward. For the "Fast -> Slow" one we'll tween the velocity to double its initial value quickly, and then after a while tween it down to half its initial value. And for the other we'll simply do the opposite.
function Projectile:new(...)
...
if current_room.player.fast_slow then
local initial_v = self.v
self.timer:tween('fast_slow_first', 0.2, self, {v = 2*initial_v}, 'in-out-cubic', function()
self.timer:tween('fast_slow_second', 0.3, self, {v = initial_v/2}, 'linear')
end)
end
if current_room.player.slow_fast then
local initial_v = self.v
self.timer:tween('slow_fast_first', 0.2, self, {v = initial_v/2}, 'in-out-cubic', function()
self.timer:tween('slow_fast_second', 0.3, self, {v = 2*initial_v}, 'linear')
end)
end
end
170. (CONTENT) Implement the projectile_acceleration_multiplier passive. This is a passive that controls how fast or how slow a projectile accelerates whenever it changes to a higher velocity than its original value.
171. (CONTENT) Implement the projectile_deceleration_multiplier passive. This is a passive that controls how fast or how slow a projectile decelerates whenever it changes to a lower velocity than its original value.
Shield Projectiles
This one is a bit more involved than the others because it has more moving parts to it, but this is what the end result should look like. As you can see, the projectiles orbit around the player and also sort of inherit its movement direction. The way we can achieve this is by using a circle's parametric equation. In general, if we want A to orbit around B with some radius R then we can do something like this:
Ax = Bx + R*math.cos(time)
Ay = By + R*math.sin(time)
Where time is a variable that goes up as times passes. Before we get to implementing this let's set everything else up. shield_projectile_chance will be a chance-type variable instead of a boolean, meaning that every time a new projectile will be created there will be a chance it will orbit the player.
function Player:new(...)
...
-- Chances
self.shield_projectile_chance = 0
end
function Player:shoot()
...
local shield = self.chances.shield_projectile_chance:next()
if self.attack == 'Neutral' then
self.area:addGameObject('Projectile', self.x + 1.5*d*math.cos(self.r),
self.y + 1.5*d*math.sin(self.r), {r = self.r, attack = self.attack, shield = shield})
...
end
Here we define the shield variable with the roll of if this projectile should be orbitting the player or not, and then we pass that in the opts table of the addGameObject call. Here we have to repeat this step for every attack type we have. Since we'll have to make future changes like this one, we can just do something like this instead now:
function Player:shoot()
...
local mods = {
shield = self.chances.shield_projectile_chance:next()
}
if self.attack == 'Neutral' then
self.area:addGameObject('Projectile', self.x + 1.5*d*math.cos(self.r),
self.y + 1.5*d*math.sin(self.r), table.merge({r = self.r, attack = self.attack}, mods))
...
end
And so in this way, in the future we'll only have to add things to the mods table. The table.merge function hasn't been defined yet, but you can guess what it does based on how we're using it here.
function table.merge(t1, t2)
local new_table = {}
for k, v in pairs(t2) do new_table[k] = v end
for k, v in pairs(t1) do new_table[k] = v end
return new_table
end
It simply joins two tables together with all their values into a new one and then returns it.
Now we can start with the actual implementation of the shield functionality. At first we want to define a few variables, like the radius, the orbit speed and so on. For now I'll define them like this:
function Projectile:new(...)
...
if self.shield then
self.orbit_distance = random(32, 64)
self.orbit_speed = random(-6, 6)
self.orbit_offset = random(0, 2*math.pi)
end
end
orbit_distance represents the radius around the player. orbit_speed will be multiplied by time, which means that higher absolute values will make it go faster, while lower ones will make it go slower. Negative values will make the projectile turn in the other direction which adds some randomness to it. orbit_offset is the initial angle offset that each projectile will have. This also adds some randomness to it and prevents all projectiles from being started at roughly the same position. And now that we have all these defined we can apply the circle's parametric equation to the projectile's position:
function Projectile:update(dt)
...
-- Shield
if self.shield then
local player = current_room.player
self.collider:setPosition(
player.x + self.orbit_distance*math.cos(self.orbit_speed*time + self.orbit_offset),
player.y + self.orbit_distance*math.sin(self.orbit_speed*time + self.orbit_offset))
end
...
end
It's important to place this after any other calls we may make to setLinearVelocity otherwise things won't work out. We also shouldn't forget to add the global time variable and increase it by dt every frame. If we do that correctly then it should look like this:
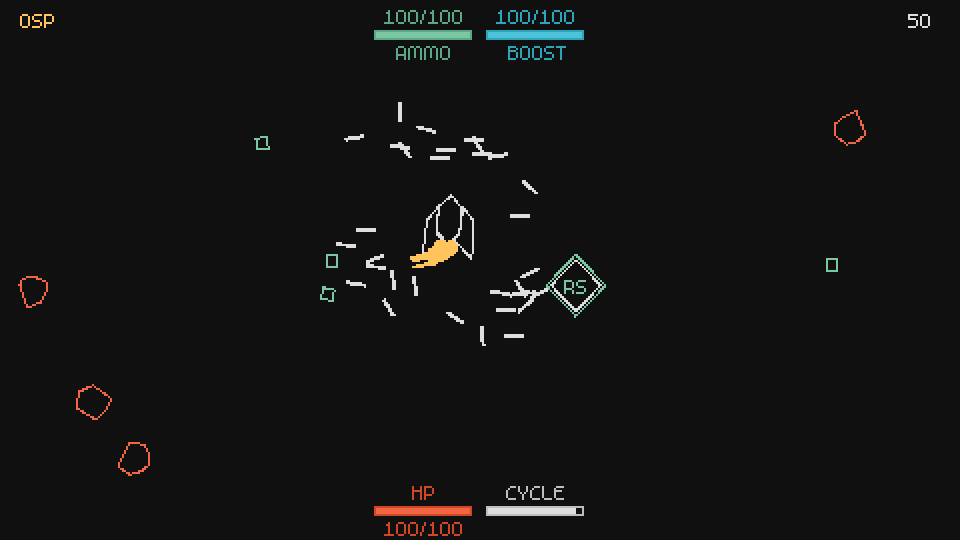
And this gets the job done but it looks wrong. The main thing wrong with it is that the projectile's angles are not taking into account the rotation around the player. One way to fix this is to store the projectile's position last frame and then get the angle of the vector that makes up the subtraction of the current position by the previous position. Code is worth a thousand words so that looks like this:
function Projectile:new(...)
...
self.previous_x, self.previous_y = self.collider:getPosition()
end
function Projectile:update(dt)
...
-- Shield
if self.shield then
...
local x, y = self.collider:getPosition()
local dx, dy = x - self.previous_x, y - self.previous_y
self.r = Vector(dx, dy):angle()
end
...
-- At the very end of the update function
self.previous_x, self.previous_y = self.collider:getPosition()
end
And in this way we're setting the r variable to contain the angle of the projectile while taking into account its rotation. Because we're using setLinearVelocity and using that angle, it means that when we draw the projectile in Projectile:draw and use Vector(self.collider:getLinearVelocity()):angle()) to get our direction, everything will be set according what we set the r variable to. And so all that looks like this:
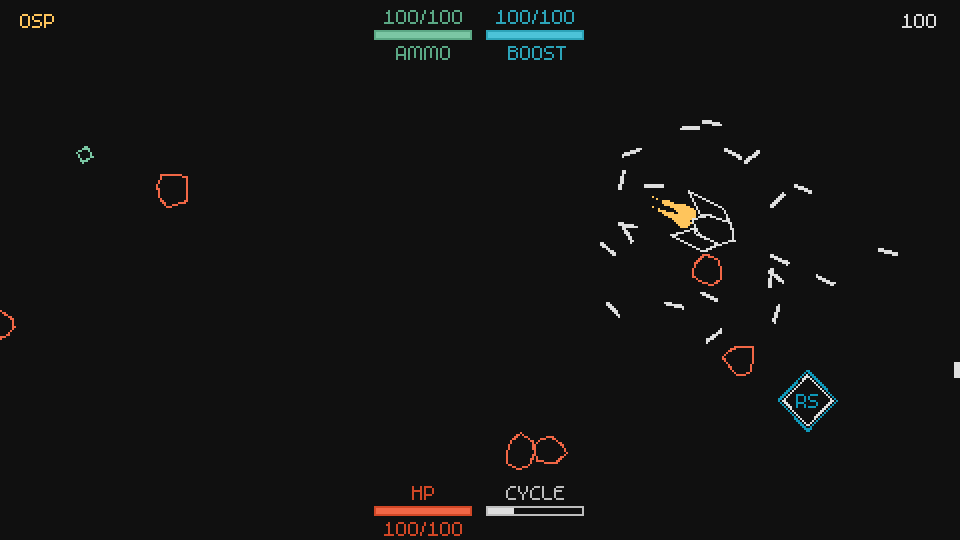
And this looks about right. One small problem that you can see in the gif above is that as projectiles are fired, if they turn into shield projectiles they don't do it instantly. There's a 1-2 frame delay where they look like normal projectiles and then they disappear and appear orbiting the player. One way to fix this is to just hide all shield projectiles for 1-2 frames and then unhide them:
function Projectile:new(...)
...
if self.shield then
...
self.invisible = true
self.timer:after(0.05, function() self.invisible = false end)
end
end
function Projectile:draw()
if self.invisible then return end
...
end
And finally, it would be pretty OP if shield projectiles could just stay there forever until they hit an enemy, so we need to add a projectile duration such that after that duration ends the projectile will be killed:
function Projectile:new(...)
...
if self.shield then
...
self.timer:after(6, function() self:die() end)
end
end
And in this way after 6 seconds of existence our shield projectiles will die.
END
I'm going to end it here because the editor I'm using to write this is starting to choke on the size of this article. In the next article we'll continue with the implementation of more passives, as well as adding all player attacks, enemies, and passives related to them. The next article also marks the end of implementation of all content in the game, and the ones coming after that will focus on how to present that content to the player (SkillTree and Console rooms).
More Passives
Blast
We'll start by implementing all attacks left. The first one is the Blast attack and it looks like this:

Multiples projectiles are fired like a shotgun with varying velocities and then they quickly disappear. All the colors are the ones negative_colors table and each projectile deals less damage than normal. This is what the attack table looks like:
attacks['Blast'] = {cooldown = 0.64, ammo = 6, abbreviation = 'W', color = default_color}
And this is what the projectile creation process looks like:
function Player:shoot()
...
elseif self.attack == 'Blast' then
self.ammo = self.ammo - attacks[self.attack].ammo
for i = 1, 12 do
local random_angle = random(-math.pi/6, math.pi/6)
self.area:addGameObject('Projectile',
self.x + 1.5*d*math.cos(self.r + random_angle),
self.y + 1.5*d*math.sin(self.r + random_angle),
table.merge({r = self.r + random_angle, attack = self.attack,
v = random(500, 600)}, mods))
end
camera:shake(4, 60, 0.4)
end
...
end
So here we just create 12 projectiles with a random angle between -30 and +30 degrees from the direction the player is moving towards. We also randomize the velocity between 500 and 600 (its normal value is 200), meaning the projectile is about 3 times as fast as normal.
Doing this alone though won't get the behavior we want, since we also want for the projectiles to disappear rather quickly. The way to do this is like this:
function Projectile:new(...)
...
if self.attack == 'Blast' then
self.damage = 75
self.color = table.random(negative_colors)
self.timer:tween(random(0.4, 0.6), self, {v = 0}, 'linear', function() self:die() end)
end
...
end
Three things are happening here. The first is that we're setting the damage to a value lower than 100. This means that to kill the normal enemy which has 100 HP we'll need two projectiles instead of one. This makes sense given that this attack shoots 12 of them at once. The second thing we're doing is setting the color of this projectile to a random one from the negative_colors table. This is also something we wanted to do and this is the proper place to do it. Finally, we're also saying that after a random amount between 0.4 and 0.6 seconds this projectile will die, which will give us the effect we wanted. We're also slowing the projectile's velocity down to 0 instead of just killing it, since that looks a little better.
And all this gets us all the behavior we wanted and on the surface this looks done. However, now that we've added tons of passives in the previous article we need to be careful and make sure that everything we add afterwards plays well with those passives. For instance, the last thing we did in the previous article was add the shield projectile effect. The problem with the Blast attack is that it doesn't play well with the shield projectile effect at all, since Blast projectiles will die after 0.4-0.6 seconds and this makes for a very poor shield projectile.
One of the ways we can fix this is by singling out the offending passive (in this case the shield one) and applying different logic for each situation. In the situation where shield is true for a projectile, then the projectile will last 6 seconds no matter what. And in all other situations then the duration set by whatever attack will take hold. This would look like this:
function Projectile:new(...)
...
if self.attack == 'Blast' then
self.damage = 75
self.color = table.random(negative_colors)
if not self.shield then
self.timer:tween(random(0.4, 0.6), self, {v = 0}, 'linear', function()
self:die()
end)
end
end
if self.shield then
...
self.timer:after(6, function() self:die() end)
end
...
end
This seems like a hacky solution, and you can easily imagine that it would get more complicated if more and more passives are added and we have to add more and more conditions delineating what happens if this or if not that. But from my experience doing this is by far the easiest and less error prone way of doing things. The alternative is trying to solve this problem in some kind of general way and generally those have unintended consequences. Maybe there's a better general solution for this problem specifically that I can't think of, but given that it hasn't occurred to me yet then the next best thing is to do the simplest thing, which is just a bunch of conditionals saying what should or should not happen. In any case, now for every attack we add that changes a projectile's duration, we'll have to preface it with if not self.shield.
172. (CONTENT) Implement the projectile_duration_multiplier passive. Remember to use it on any duration-based behavior on the Projectile class.
Spin
The next attack we'll implement is the Spin one. It looks like this:
These projectiles just have their angle constantly changed by a fixed amount instead of going straight. The way we can achieve this is by adding a rv variable, which represents the angle's rate of change, and then every frame add this amount to r:
function Projectile:new(...)
...
self.rv = table.random({random(-2*math.pi, -math.pi), random(math.pi, 2*math.pi)})
end
function Projectile:update(dt)
...
if self.attack == 'Spin' then
self.r = self.r + self.rv*dt
end
...
end
The reason we pick between -2*math.pi and -math.pi OR between math.pi and 2*math.pi is because we don't want any of the values that are lower than math.pi or higher than 2*math.pi in absolute terms. Low absolute values means that the circle the projectile makes is bigger, while higher absolute values means that the circle is smaller. We want a nice limit on the circle's size both ways so this makes sense. It should also be clear that the difference between negative or positive values is in the direction the circle spin towards.
We can also add a duration to Spin projectiles since we don't want them to stay around forever:
function Projectile:new(...)
...
if self.attack == 'Spin' then
self.timer:after(random(2.4, 3.2), function() self:die() end)
end
end
This is what the shoot function would look like:
function Player:shoot()
...
elseif self.attack == 'Spin' then
self.ammo = self.ammo - attacks[self.attack].ammo
self.area:addGameObject('Projectile',
self.x + 1.5*d*math.cos(self.r), self.y + 1.5*d*math.sin(self.r),
table.merge({r = self.r, attack = self.attack}, mods))
end
end
And this is what the attack table looks like:
attacks['Spin'] = {cooldown = 0.32, ammo = 2, abbreviation = 'Sp', color = hp_color}
And all this should get us the behavior we want. However, there's an additional thing to do which is the trail on the projectile. Unlike the Homing projectile which uses a trail like the one we used for the Player ships, this one follows the shape and color of the projectile but also slowly becomes invisible until it disappears completely. We can implement this in the same way we did for the other trail object, but taking into account those differences:
ProjectileTrail = GameObject:extend()
function ProjectileTrail:new(area, x, y, opts)
ProjectileTrail.super.new(self, area, x, y, opts)
self.alpha = 128
self.timer:tween(random(0.1, 0.3), self, {alpha = 0}, 'in-out-cubic', function()
self.dead = true
end)
end
function ProjectileTrail:update(dt)
ProjectileTrail.super.update(self, dt)
end
function ProjectileTrail:draw()
pushRotate(self.x, self.y, self.r)
local r, g, b = unpack(self.color)
love.graphics.setColor(r, g, b, self.alpha)
love.graphics.setLineWidth(2)
love.graphics.line(self.x - 2*self.s, self.y, self.x + 2*self.s, self.y)
love.graphics.setLineWidth(1)
love.graphics.setColor(255, 255, 255, 255)
love.graphics.pop()
end
function ProjectileTrail:destroy()
ProjectileTrail.super.destroy(self)
end
And so this looks pretty standard, the only notable thing being that we have an alpha variable which we tween to 0 so that the projectile slowly disappears over a random duration of between 0.1 and 0.3 seconds, and then we draw the trail just like we would draw a projectile. Importantly, we use the r, s and color variables from the parent projectile, which means that when creating it we need to pass all that down:
function Projectile:new(...)
...
if self.attack == 'Spin' then
self.rv = table.random({random(-2*math.pi, -math.pi), random(math.pi, 2*math.pi)})
self.timer:after(random(2.4, 3.2), function() self:die() end)
self.timer:every(0.05, function()
self.area:addGameObject('ProjectileTrail', self.x, self.y,
{r = Vector(self.collider:getLinearVelocity()):angle(),
color = self.color, s = self.s})
end)
end
...
end
And this should get us the results we want.
173. (CONTENT) Implement the Flame attack. This is what the attack table looks like:
attacks['Flame'] = {cooldown = 0.048, ammo = 0.4, abbreviation = 'F', color = skill_point_color}
And this is what the attack looks like:

The projectiles should remain alive for a random duration between 0.6 and 1 second, and like the Blast projectiles, their velocity should be tweened to 0 over that duration. The projectiles also make use of the ProjectileTrail object in the way that the Spin projectiles do. Flame projectiles also deal decreased damage at 50 each.
Bounce
Bounce projectiles will bounce off of walls instead of being destroyed by them. By default a Bounce projectile can bounce 4 times before being destroyed whenever it hits a wall again. The way we can define this is by setting it through the opts table in the shoot function:
function Player:shoot()
...
elseif self.attack == 'Bounce' then
self.ammo = self.ammo - attacks[self.attack].ammo
self.area:addGameObject('Projectile',
self.x + 1.5*d*math.cos(self.r), self.y + 1.5*d*math.sin(self.r),
table.merge({r = self.r, attack = self.attack, bounce = 4}, mods))
end
end
And so the bounce variable will contain the number of bounces left for this projectile. We can use this so that whenever we hit a wall we decrease this by 1:
function Projectile:update(dt)
...
-- Collision
if self.bounce and self.bounce > 0 then
if self.x < 0 then
self.r = math.pi - self.r
self.bounce = self.bounce - 1
end
if self.y < 0 then
self.r = 2*math.pi - self.r
self.bounce = self.bounce - 1
end
if self.x > gw then
self.r = math.pi - self.r
self.bounce = self.bounce - 1
end
if self.y > gh then
self.r = 2*math.pi - self.r
self.bounce = self.bounce - 1
end
else
if self.x < 0 then self:die() end
if self.y < 0 then self:die() end
if self.x > gw then self:die() end
if self.y > gh then self:die() end
end
...
end
Here on top of decreasing the number of bounces left, we also change the projectile's direction according to which wall it hit. Perhaps there's a general and better way to do this, but I could only think of this solution, which involves taking into account each wall separately and then doing the math necessary to reflect/mirror the projectile's angle properly. Note that when bounce is 0, the first conditional will fail and then we'll go down to the normal path that we had before, which ends up killing the projectile.
It's also important to place all this collision code before we call setLinearVelocity, otherwise our bounces won't work at all since we'll turn the projectile with a one frame delay and then simply reversing its angle won't make it come back. To be safe we could also use setPosition to forcefully set the position of the projectile to the border of the screen on top of turning its angle, but I didn't find that to be necessary.
Moving on, the colors of a bounce projectile are random like the Spread one, except going through the default_colors table. This means we need to take care of it separately in the Projectile:draw function:
function Projectile:draw()
...
if self.attack == 'Bounce' then love.graphics.setColor(table.random(default_colors)) end
...
end
And the attack table looks like this:
attacks['Bounce'] = {cooldown = 0.32, ammo = 4, abbreviation = 'Bn', color = default_color}
And all that should look like this:
174. (CONTENT) Implement the 2Split attack. This is what it looks like:
It looks exactly like the Homing projectile, except that it uses ammo_color instead.
Whenever it hits an enemy the projectile will split into two (two new projectiles are created) at +-45 degrees from the direction the projectile was moving towards. If the projectile hits a wall then 2 projectiles will be created either against the reflected angle of the wall (so if it hits the up wall 2 projectiles will be created pointing to math.pi/4 and 3*math.pi/4) or against the reflected angle of the projectile, this is entirely your choice. This is what the attacks table looks like:
attacks['2Split'] = {cooldown = 0.32, ammo = 3, abbreviation = '2S', color = ammo_color}
175. (CONTENT) Implement the 4Split attack. This is what it looks like:
It behaves exactly like the 2Split attack, except that it creates 4 projectiles instead of 2. The projectiles point at all 45 degrees angles from the center, meaning angles math.pi/4, 3*math.pi/4, -math.pi/4 and -3*math.pi/4. This is what the attack table looks like:
attacks['4Split'] = {cooldown = 0.4, ammo = 4, abbreviation = '4S', color = boost_color}
Lightning
This is what the Lightning attack looks like:
Whenever the player reaches a certain distance from an enemy, a lightning bolt will be created, dealing damage to the enemy. Most of the work here lies in creating the lightning bolt, so we'll focus on that first. We'll do it by creating an object called LightningLine, which will be the visual representation of our lightning bolt:
LightningLine = GameObject:extend()
function LightningLine:new(area, x, y, opts)
LightningLine.super.new(self, area, x, y, opts)
...
self:generate()
end
function LightningLine:update(dt)
LightningLine.super.update(self, dt)
end
-- Generates lines and populates the self.lines table with them
function LightningLine:generate()
end
function LightningLine:draw()
end
function LightningLine:destroy()
LightningLine.super.destroy(self)
end
I'll focus on the draw function and leave the entire generation of the lightning lines for you! This tutorial explains the generation method really really well and it would be redundant for me to repeat all that here. I'll assume that you have all the lines that compose the lightning bolt in a table called self.lines, and that each line is a table which contains the keys x1, y1, x2, y2. With that in mind we can draw the lightning bolt in a basic way like this:
function LightningLine:draw()
for i, line in ipairs(self.lines) do
love.graphics.line(line.x1, line.y1, line.x2, line.y2)
end
end
However, this looks too simple. So what we'll do is draw all those lines first with boost_color and with line width set to 2.5, and then on top of that we'll draw the same lines again but with default_color and line width set to 1.5. This should make the lightning bolt a bit thicker and also look somewhat more like lightning.
function LightningLine:draw()
for i, line in ipairs(self.lines) do
local r, g, b = unpack(boost_color)
love.graphics.setColor(r, g, b, self.alpha)
love.graphics.setLineWidth(2.5)
love.graphics.line(line.x1, line.y1, line.x2, line.y2)
local r, g, b = unpack(default_color)
love.graphics.setColor(r, g, b, self.alpha)
love.graphics.setLineWidth(1.5)
love.graphics.line(line.x1, line.y1, line.x2, line.y2)
end
love.graphics.setLineWidth(1)
love.graphics.setColor(255, 255, 255, 255)
end
I also use an alpha attribute here that starts at 255 and is tweened down to 0 over the duration of the line, which is about 0.15 seconds.
Now for when to actually create this LightningLine object. The way we want this attack to work is that whenever the player gets close enough to an enemy within his immediate line of sight, the attack will be triggered and we will damage that enemy. So first let's gets all enemies close to the player. We can do this in the same way we did for the homing projectile, which had to pick a target within a certain radius. The radius we want, however, can't be centered on the player because we don't want the player to be able to hit enemies behind him, so we'll offset the center of this circle a little forward in the direction the player is moving towards and then go from there.
function Player:shoot()
...
elseif self.attack == 'Lightning' then
local x1, y1 = self.x + d*math.cos(self.r), self.y + d*math.sin(self.r)
local cx, cy = x1 + 24*math.cos(self.r), y1 + 24*math.sin(self.r)
...
end
Here we're defining x1, y1, which is the position we generally shoot projectiles from (right in front of the tip of the ship), and then we're also defining cx, cy, which is the center of the radius we'll use to find a nearby enemy. We offset this circle by 24 units, which is a big enough number to prevent us from picking enemies that are behind the player.
The next thing we can do is just copypaste the code we used in the Projectile object when we wanted homing projectiles to find their target, but change it to fit our needs here by changing the circle position for our own cx, cy circle center:
function Player:shoot()
...
elseif self.attack == 'Lightning' then
...
-- Find closest enemy
local nearby_enemies = self.area:getAllGameObjectsThat(function(e)
for _, enemy in ipairs(enemies) do
if e:is(_G[enemy]) and (distance(e.x, e.y, cx, cy) < 64) then
return true
end
end
end)
...
end
After this we'll have a list of enemies within a 64 units radius of a circle 24 units in front of the player. What we can do here is either pick an enemy at random or find the closest one. I'll go with the latter and so to do that we need to sort the table based on each enemy's distance to the circle:
function Player:shoot()
...
elseif self.attack == 'Lightning' then
...
table.sort(nearby_enemies, function(a, b)
return distance(a.x, a.y, cx, cy) < distance(b.x, b.y, cx, cy)
end)
local closest_enemy = nearby_enemies[1]
...
end
table.sort can be used here to achieve that goal. Then it's a matter of taking the first element of the sorted table and attacking it:
function Player:shoot()
...
elseif self.attack == 'Lightning' then
...
-- Attack closest enemy
if closest_enemy then
self.ammo = self.ammo - attacks[self.attack].ammo
closest_enemy:hit()
local x2, y2 = closest_enemy.x, closest_enemy.y
self.area:addGameObject('LightningLine', 0, 0, {x1 = x1, y1 = y1, x2 = x2, y2 = y2})
for i = 1, love.math.random(4, 8) do
self.area:addGameObject('ExplodeParticle', x1, y1,
{color = table.random({default_color, boost_color})})
end
for i = 1, love.math.random(4, 8) do
self.area:addGameObject('ExplodeParticle', x2, y2,
{color = table.random({default_color, boost_color})})
end
end
end
end
First we make sure that closest_enemy isn't nil, because if it is then we shouldn't do anything, and most of the time it will be nil since no enemies will be around. If it isn't, then we remove ammo as we did for all other attacks, and call the hit function on that enemy object so that it takes damage. After that we spawn the LightningLine object with the x1, y1, x2, y2 variables representing the position right in front of the ship from where the bolt will come from and the center of the enemy. Finally, we spawn a bunch of ExplodeParticles to add something to the attack.
One last thing we need to set before this can all work is the attacks table:
attacks['Lightning'] = {cooldown = 0.2, ammo = 8, abbreviation = 'Li', color = default_color}
And all that should look like this:
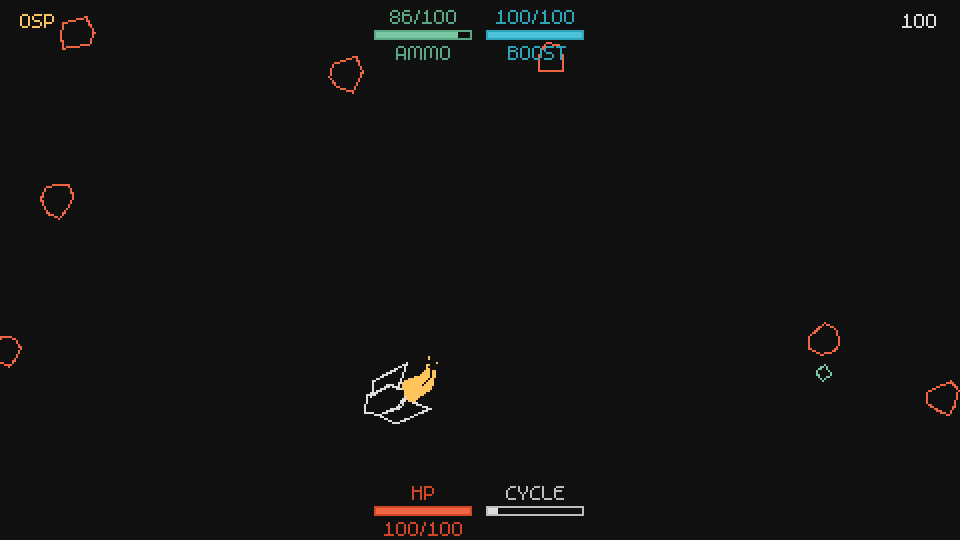
176. (CONTENT) Implement the Explode attack. This is what it looks like:
An explosion is created and it destroys all enemies in a certain radius around it. The projectile itself looks like the homing projectile except with hp_color and a bit bigger. The attack table looks like this:
attacks['Explode'] = {cooldown = 0.6, ammo = 4, abbreviation = 'E', color = hp_color}
177. (CONTENT) Implement the Laser attack. This is what it looks like:

A huge line is created and it destroys all enemies that cross it. This can be programmed literally as a line or as a rotated rectangle for collision detection purposes. If you choose to go with a line then it's better to use 3 or 5 lines instead that are a bit separated from each other, otherwise the player can sometimes miss enemies in a way that doesn't feel fair.
The effect of the attack itself is different from everything else but shouldn't be too much trouble. One huge white line in the middle that tweens its width down over time, and two red lines to the sides that start closer to the white lines but then spread out and disappear as the effect ends. The shooting effect is a bigger version of the original ShootEffect object and its also colored red. The attack table looks like this:
attacks['Laser'] = {cooldown = 0.8, ammo = 6, abbreviation = 'La', color = hp_color}
178. (CONTENT) Implement the additional_lightning_bolt passive. If this is set to true then the player will be able to attack with two lightning bolts at once. Programming wise this means that instead of looking for the only the closest enemy, we will look for two closest enemies and attack both if they exist. You may also want to separate each attack by a small duration like 0.5 seconds between each, since this makes it feel better.
179. (CONTENT) Implement the increased_lightning_angle passive. This passive increases the angle with which the lightning attack can be triggered, meaning that it will also hit enemies to the sides and sometimes behind the player. In programming terms this means that if increased_lightning_angle is true, then we won't offset the lightning circle by 24 units like we did and we will use the center of the player as the center position for our calculations instead.
180. (CONTENT) Implement the area_multiplier passive. This is a passive that increases the area of all area based attacks and effects. The most recent examples would be the lightning circle of the Lightning attack as well as the explosion area of the Explode attack. But it would also apply to explosions in general and anything that is area based (where a circle is used to get information or apply effects).
181. (CONTENT) Implement the laser_width_multiplier passive. This is a passive that increases or decreases the width of the Laser attack.
182. (CONTENT) Implement the additional_bounce_projectiles passive. This is a passive that increases the amount of bounces a Bounce projectile has. By default, Bounce attack projectiles can bounce 4 times. If additional_bounce_projectiles is 4, then Bounce attack projectiles should be able to bounce a total of 8 times.
183. (CONTENT) Implement the fixed_spin_attack_direction passive. This is a boolean passive that makes it so that all Spin attack projectiles spin in a fixed direction, meaning, all of them will either spin only left or only right.
184. (CONTENT) Implement the split_projectiles_split_chance passive. This is a projectile that adds a chance for projectiles that were split from a 2Split or 4Split attack to also be able to split. For instance, if this chance ever became 100, then split projectiles would split recursively indefinitely (however we'll never allow this to happen on the tree).
185. (CONTENT) Implement the [attack]_spawn_chance_multiplier passives, where [attack] is the name of each attack. These passives will increase the chance that a particular attack will be spawned. Right now whenever we spawn an Attack resource, the attack is picked randomly. However, now we want them to be picked from a chanceList that initially has equal chances for all attacks, but will get changed by the [attack]_spawn_chance_multiplier passives.
186. (CONTENT) Implement the start_with_[attack] passives, where [attack] is the name of each attack. These passives will make it so that the player starts with that attack. So for instance, if start_with_bounce is true, then the player will start every round with the Bounce attack. If multiple start_with_[attack] passives are true, then one must be picked at random.
Additional Homing Projectiles
The additional_homing_projectiles passive will add additional projectiles to "Launch Homing Projectile"-type passives. In general the way we're launching homing projectiles looks like this:
function Player:onAmmoPickup()
if self.chances.launch_homing_projectile_on_ammo_pickup_chance:next() then
local d = 1.2*self.w
self.area:addGameObject('Projectile',
self.x + d*math.cos(self.r), self.y + d*math.sin(self.r),
{r = self.r, attack = 'Homing'})
self.area:addGameObject('InfoText', self.x, self.y, {text = 'Homing Projectile!'})
end
end
additional_homing_projectiles is a number that will tell us how many extra projectiles should be used. So to make this work we can just do something like this:
function Player:onAmmoPickup()
if self.chances.launch_homing_projectile_on_ammo_pickup_chance:next() then
local d = 1.2*self.w
for i = 1, 1+self.additional_homing_projectiles do
self.area:addGameObject('Projectile',
self.x + d*math.cos(self.r), self.y + d*math.sin(self.r),
{r = self.r, attack = 'Homing'})
end
self.area:addGameObject('InfoText', self.x, self.y, {text = 'Homing Projectile!'})
end
end
And then all we have left to do is apply this to every instance where a launch_homing_projectile passive of some kind appears.
187. (CONTENT) Implement the additional_barrage_projectiles passive.
188. (CONTENT) Implement the barrage_nova passive. This is a boolean that when set to true will make it so that barrage projectiles fire in a circle rather than in the general direction the player is looking towards. This is what it looks like:
Mine Projectile
A mine projectile is a projectile that stays around the location it was created at and eventually explodes. This is what it looks like:

As you can see, it just rotates like a Spin attack projectile but at a much faster rate. To implement this all we'll do is say that whenever the mine attribute is true for a projectile, it will behave like Spin projectiles do but with an increased spin velocity.
function Projectile:new(...)
...
if self.mine then
self.rv = table.random({random(-12*math.pi, -10*math.pi),
random(10*math.pi, 12*math.pi)})
self.timer:after(random(8, 12), function()
-- Explosion
end)
end
...
end
function Projectile:update(dt)
...
-- Spin or Mine
if self.attack == 'Spin' or self.mine then self.r = self.r + self.rv*dt end
...
end
Here instead of confining our spin velocities to between absolute math.pi and 2*math.pi, we do it for absolute 10*math.pi and 12*math.pi. This results in the projectile spinning much faster and covering a smaller area, which is perfect for the kind of behavior we want.
Additionally, after a random duration of between 8 and 12 seconds the projectile will explode. This explosion should be handled in the same way that explosions were handled for the Explode projectile. In my case I created an Explosion object, but there are many different ways of doing it and as long as it works it's OK. I'll leave that as an exercise since the Explode attack was also an exercise.
189. (CONTENT) Implement the drop_mines_chance passive, which adds a chance for the player to drop a mine projectile behind him every 0.5 seconds. Programming wise this works via a timer that will run every 0.5 seconds and on each of those runs we'll roll our drop_mines_chance:next() function.
190. (CONTENT) Implement the projectiles_explode_on_expiration passive, which makes it so that whenever projectiles die because their duration ended, they will also explode. This should only apply to when their duration ends. If a projectile comes into contact with an enemy or a wall it shouldn't explode as a result of this passive being set to true.
191. (CONTENT) Implement the self_explode_on_cycle_chance passive. This passive adds a chance for the player to create explosions around himself on each cycle. This is what it looks like:
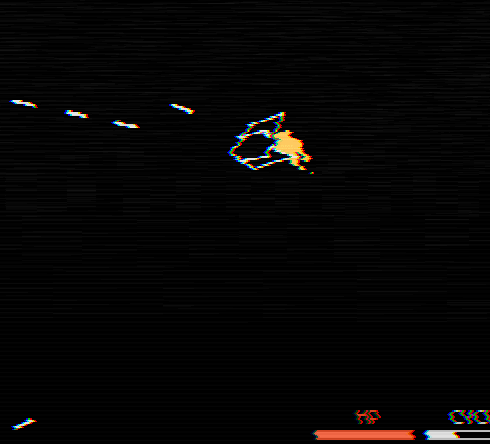
The explosions used are the same ones as for the Explode attack. The number, placement and size of the explosions created will be left for you to decide based on what you feel is best.
192. (CONTENT) Implement the projectiles_explosions passive. If this is set to true then all explosions that happen from a projectile created by the player will create multiple projectiles instead in similar fashion to how the barrage_nova passive works. The number of projectiles created initially is 5 and this number is affected by the additional_barrage_projectiles passive.
Energy Shield
When the energy_shield passive is set to true, the player's HP will become energy shield instead (called ES from now). ES works differently than HP in the following ways:
- The player will take double damage
- The player's ES will recharge after a certain duration without taking damage
- The player will have halved invulnerability time
We can implement all of this mostly in the hit function:
function Player:new(...)
...
-- ES
self.energy_shield_recharge_cooldown = 2
self.energy_shield_recharge_amount = 1
-- Booleans
self.energy_shield = true
...
end
function Player:hit(damage)
...
if self.energy_shield then
damage = damage*2
self.timer:after('es_cooldown', self.energy_shield_recharge_cooldown, function()
self.timer:every('es_amount', 0.25, function()
self:addHP(self.energy_shield_recharge_amount)
end)
end)
end
...
end
We're defining that our cooldown for when ES starts recharging after a hit is 2 seconds, and that the recharge rate is 4 ES per second (1 per 0.25 seconds in the every call). We're also placing this conditional at the top of the hit function and doubling the damage variable, which will be used further down to actually deal damage to the player.
The only thing left now is making sure that we halve the invulnerability time. We can either do this on the hit function or on the setStats function. I'll go with the latter since we haven't messed with that function in a while.
function Player:setStats()
...
if self.energy_shield then
self.invulnerability_time_multiplier = self.invulnerability_time_multiplier/2
end
end
Since setStats is called at the end of the constructor and after the treeToPlayer function is called (meaning that it's called after we've loaded in all passives from the tree), we can be sure that energy_shield being true or not is representative of the passives the player picked up in the tree, and we can also be sure that we're only halving the invulnerability timer after all increases/decreases to this multiplier have been applied from the tree. This last assurance isn't really necessary for this passive, since the order here doesn't really matter, but for other passives it might and that would be a case where applying changes in setStats makes sense. Generally if a chance to a stat comes from a boolean and it's a change that is permanent throughout the game, then placing it in setStats makes the most sense.
193. (CONTENT) Change the HP UI so that whenever energy_shield is set to true is looks like this instead:
194. (CONTENT) Implement the energy_shield_recharge_amount_multiplier passive, which increases or decreases the amount of ES recharged per second.
195. (CONTENT) Implement the energy_shield_recharge_cooldown_multiplier passive, which increases or decreases the cooldown duration before ES starts recharging after a hit.
Added Chance to All 'On Kill' Events
If added_chance_to_all_on_kill_events is 5, for instance, then all 'On Kill' passives will have their chances increased by 5%. This means that if originally the player got passives that accumulated his launch_homing_projectile_on_kill_chance to 8, then instead of having 8% final probability he will have 13% instead. This is a pretty OP passive but implementation wise it's also interesting to look at.
We can implement this by changing the way the generateChances function generates its chanceLists. Since that function goes through all passives that end with _chance, it stands to reason that we can also parse out all passives that have _on_kill on them, which means that once we do that our only job is to add added_chance_to_all_on_kill_events to the appropriate place in the chanceList generation.
So first let separate normal passives from ones that have on_kill on them:
function Player:generateChances()
self.chances = {}
for k, v in pairs(self) do
if k:find('_chance') and type(v) == 'number' then
if k:find('_on_kill') and v > 0 then
else
self.chances[k] = chanceList({true, math.ceil(v)}, {false, 100-math.ceil(v)})
end
end
end
end
We use the same method as we did to find passives with _chance in them, except changing that for _on_kill. Additionally, we also need to make sure that this passive has an above 0% probability of generating its event. We don't want our new passive to add its chance to all 'On Kill' events even when the player invested no points whatsoever in that event, so we only do it for events where the player already has some chance invested in it.
Now what we can do is simply create the chanceList, but instead of using v by itself we'll use v+added_chance_to_all_on_kill_events:
function Player:generateChances()
self.chances = {}
for k, v in pairs(self) do
if k:find('_chance') and type(v) == 'number' then
if k:find('_on_kill') and v > 0 then
self.chances[k] = chanceList(
{true, math.ceil(v+self.added_chance_to_all_on_kill_events)},
{false, 100-math.ceil(v+self.added_chance_to_all_on_kill_events)})
else
self.chances[k] = chanceList({true, math.ceil(v)}, {false, 100-math.ceil(v)})
end
end
end
end
Increases in Ammo Added as ASPD
This one is a conversion of part of one stat to another. In this case we're taking all increases to the Ammo resource and adding them as extra attack speed. The precise way we'll do it is following this formula:
local ammo_increases = self.max_ammo - 100
local ammo_to_aspd = 30
aspd_multiplier:increase((ammo_to_aspd/100)*ammo_increases)
This means that if we have, let's say, 130 max ammo, and our ammo_to_aspd conversion is 30%, then we'll end up increasing our attack speed by 0.3*30 = 9%. If we have 250 max ammo and the same conversion percentage, then we'll end up with 1.5*30 = 45%.
To get this working we can define the attribute first:
function Player:new(...)
...
-- Conversions
self.ammo_to_aspd = 0
end
And then we can apply the conversion to the aspd_multiplier variable. Because this variable is a Stat, we need to do it in the update function. If this variable was a normal variable we'd do it in the setStats function instead.
function Player:update(dt)
...
-- Conversions
if self.ammo_to_aspd > 0 then
self.aspd_multiplier:increase((self.ammo_to_aspd/100)*(self.max_ammo - 100))
end
self.aspd_multiplier:update(dt)
...
end
And this should work out how we expect it to.
Final Passives
There are only about 20 more passives left to implement and most of them are somewhat trivial and so will be left as exercises. They don't really have any close relation to most of the passives we went through so far, so even though they may be trivial you can think of them as challenges to see if you really have a grasp on the codebase and on what's actually going on.
196. (CONTENT) Implement the change_attack_periodically passive, which changes the player's attack every 10 seconds. The new attack is chosen randomly.
197. (CONTENT) Implement the gain_sp_on_death passive, which gives the player 20SP whenever he dies.
198. (CONTENT) Implement the convert_hp_to_sp_if_hp_full passive, which gives the player 3SP whenever he gathers an HP resource and his HP is already full.
199. (CONTENT) Implement the mvspd_to_aspd passive, which adds the increases in movement speed to attack speed. The increases should be added using the same formula used for ammo_to_aspd, meaning that if the player has 30% increases to MVSPD and mvspd_to_aspd is 30 (meaning 30% conversion), then his ASPD should be increased by 9%.
200. (CONTENT) Implement the mvspd_to_hp passive, which adds the decreases in movement speed to the player's HP. As an example, if the player has 30% decreases to MVSPD and mvspd_to_hp is 30 (meaning 30% conversion), then the added HP should be 21.
201. (CONTENT) Implement the mvspd_to_pspd passive, which adds the increases in movement speed to a projectile's speed. This one works in the same way as the mvspd_to_aspd one.
202. (CONTENT) Implement the no_boost passive, which makes the player have no boost (max_boost = 0).
203. (CONTENT) Implement the half_ammo passive, which makes the player have halved ammo.
204. (CONTENT) Implement the half_hp passive, which makes the player have halved HP.
205. (CONTENT) Implement the deals_damage_while_invulnerable passive, which makes the player deal damage on contact with enemies whenever he is invulnerable (when the invincible attribute is set to true when the player gets hit, for example).
206. (CONTENT) Implement the refill_ammo_if_hp_full passive, which refills the player's ammo completely if the player picks up an HP resource and his HP is already full.
207. (CONTENT) Implement the refill_boost_if_hp_full passive, which refills the player's boost completely if the player picks up an HP resource and his HP is already full.
208. (CONTENT) Implement the only_spawn_boost passive, which makes it so that the only resources that can be spawned are Boost ones.
209. (CONTENT) Implement the only_spawn_attack passive, which makes it so that no resources are spawned on their set cooldown, but only Attacks are. This means that attacks are spawned both on the resource cooldown as well as on their own attack cooldown (so every 16 seconds as well as every 30 seconds).
210. (CONTENT) Implement the no_ammo_drop passive, which makes it so that enemies never drop ammo.
211. (CONTENT) Implement the infinite_ammo passive, which makes it so that no attack the player uses consumes ammo.
And with that we've gone over all passives. In total we went over around 150 different passives, which will be extended to about 900 or so nodes in the skill tree, since many of those passives are just stat upgrades and stat upgrades can be spread over the tree of concentrated in one place.
But before we get to tree (which we'll go over in the next article), now that we have pretty much all this implemented we can build on top of it and implement all enemies and all player ships as well. You are free to deviate from the examples I'll give on each of those exercises and create your own enemies/ships.
Enemies
212. (CONTENT) Implement the BigRock enemy. This enemy behaves just like the Rock one, except it's bigger and splits into 4 Rock objects when killed. It has 300 HP by default.

213. (CONTENT) Implement the Waver enemy. This enemy behaves like a wavy projectile and occasionally shoots projectiles out of its front and back (like the Back attack). It has 70 HP by default.
214. (CONTENT) Implement the Seeker enemy. This enemy behaves like the Ammo object and moves slowly towards the player. At a fixed interval this enemy will also release mines that behave in the same way as mine projectiles. It has 200 HP by default.

215. (CONTENT) Implement the Orbitter enemy. This enemy behaves like the Rock or BigRock enemies, but has a field of projectiles surrounding him. Those projectiles behave just like shield projectiles we implemented in the last article. If the Orbitter dies before his projectiles, the leftover projectiles will start homing towards the player for a short duration. It has 450 HP by default.
Ships
We already went over visuals for all the ships in article 5 or 6 I think and if I remember correctly those were exercises as well. So I'll assume you have those already made and hidden somewhere and that they have names and all that. The next exercises will assume the ones I created, but since it's mostly usage of passives we implemented in the last and this article, you can create your own ships based on what you feel is best. These are just the ones I personally came up with.
216. (CONTENT) Implement the Crusader ship:
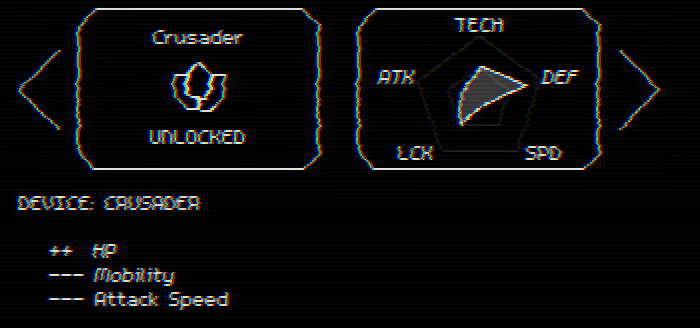
Its stats are as follows:
- Boost = 80
- Boost Effectiveness Multiplier = 2
- Movement Speed Multiplier = 0.6
- Turn Rate Multiplier = 0.5
- Attack Speed Multiplier = 0.66
- Projectile Speed Multiplier = 1.5
- HP = 150
- Size Multiplier = 1.5
217. (CONTENT) Implement the Rogue ship:
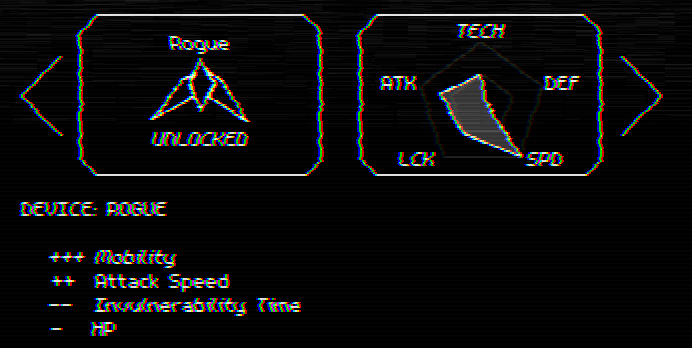
Its stats are as follows:
- Boost = 120
- Boost Recharge Multiplier = 1.5
- Movement Speed Multiplier = 1.3
- Ammo = 120
- Attack Speed Multiplier = 1.25
- HP = 80
- Invulnerability Multiplier = 0.5
- Size Multiplier = 0.9
218. (CONTENT) Implement the Bit Hunter ship:
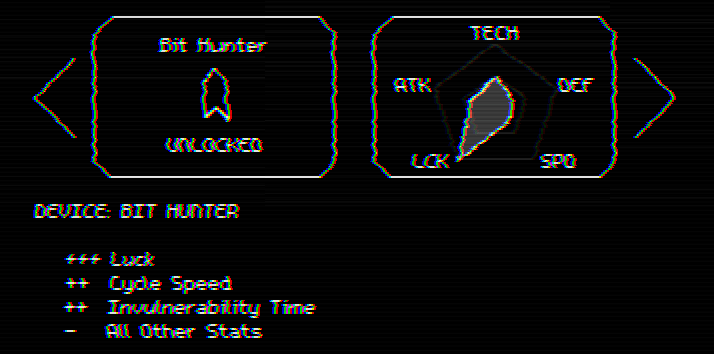
Its stats are as follows:
- Movement Speed Multiplier = 0.9
- Turn Rate Multiplier = 0.9
- Ammo = 80
- Attack Speed Multiplier = 0.8
- Projectile Speed Multiplier = 0.9
- Invulnerability Multiplier = 1.5
- Size Multiplier = 1.1
- Luck Multiplier = 1.5
- Resource Spawn Rate Multiplier = 1.5
- Enemy Spawn Rate Multiplier = 1.5
- Cycle Speed Multiplier = 1.25
219. (CONTENT) Implement the Sentinel ship:
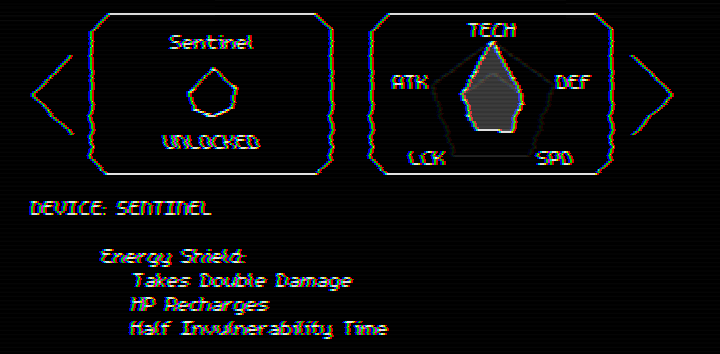
Its stats are as follows:
- Energy Shield = true
220. (CONTENT) Implement the Striker ship:

Its stats are as follows:
- Ammo = 120
- Attack Speed Multiplier = 2
- Projectile Speed Multiplier = 1.25
- HP = 50
- Additional Barrage Projectiles = 8
- Barrage on Kill Chance = 10%
- Barrage on Cycle Chance = 10%
- Barrage Nova = true
221. (CONTENT) Implement the Nuclear ship:

Its stats are as follows:
- Boost = 80
- Turn Rate Multiplier = 0.8
- Ammo = 80
- Attack Speed Multiplier = 0.85
- HP = 80
- Invulnerability Multiplier = 2
- Luck Multiplier = 1.5
- Resource Spawn Rate Multiplier = 1.5
- Enemy Spawn Rate Multiplier = 1.5
- Cycle Speed Multiplier = 1.5
- Self Explode on Cycle Chance = 10%
222. (CONTENT) Implement the Cycler ship:
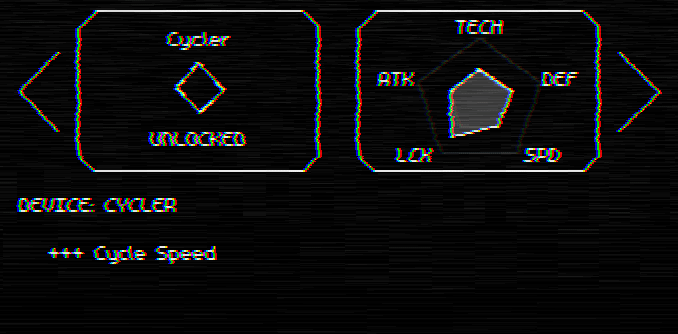
Its stats are as follows:
- Cycle Speed Multiplier = 2
223. (CONTENT) Implement the Wisp ship:
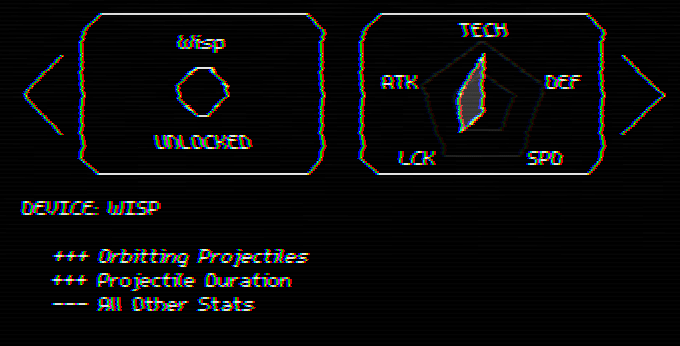
Its stats are as follows:
- Boost = 50
- Movement Speed Multiplier = 0.5
- Turn Rate Multiplier = 0.5
- Attack Speed Multiplier = 0.66
- Projectile Speed Multiplier = 0.5
- HP = 50
- Size Multiplier = 0.75
- Resource Spawn Rate Multiplier = 1.5
- Enemy Spawn Rate Multiplier = 1.5
- Shield Projectile Chance = 100%
- Projectile Duration Multiplier = 1.5
END
And now we've finished implementing all content in the game. These last two articles were filled with exercises that are mostly about manually adding all this content. To some people that might be extremely boring, so it's a good gauge of if you like implementing this kind of content or not. A lot of game development is just straight up stuff like this, so if you really really don't like it it's better to learn about it sooner rather than later.
The next article will focus on the skill tree, which is how we're going to present all these passives to the player. We'll focus on building everything necessary to make the skill tree work, but the building of the tree itself (like placing and linking nodes together) will be entirely up to you. This is another one of those things where we're just manually adding content to the game and not doing anything too complicated.
Skill Tree
Introduction
In this article we'll focus on the creation of the skill tree. This is what the skill tree looks like right now. We'll not place each node hand by hand or anything like that (that will be left as an exercise), but we will go over everything needed to make the skill tree happen and work as one would expect.
First we'll focus on how each node will be defined, then on how we can read those definitions, create the necessary objects and apply the appropriate passives to the player. Then we'll move on to the main objects (Nodes and Links), and after that we'll go over saving and loading the tree. And finally the last thing we'll do is implement the functionality needed so that the player can spend his skill points on it.
Skill Tree
There are many different ways we can go about defining a skill tree, each with their advantages and disadvantages. There are roughly three options we can go for:
- Create a skill tree editor to place, link and define the stats for each node visually;
- Create a skill tree editor to place and link nodes visually, but define stats for each node in a text file;
- Define everything in a text file.
I'm someone who likes to keep the implementation of things simple and who has no problem with doing lots of manual and boring work, which means that I'll solve problems in this way generally. When it comes to the options above it means I'll pick the third one.
The first two options require us to build a visual skill tree editor. To understand what this entails exactly we should try to list the high level features that a visual skill tree editor would have:
- Placing new nodes
- Linking nodes together
- Deleting nodes
- Moving nodes
- Text input for defining each node's stats
These are pretty much the only high level features I can think of initially, and they imply a few more things:
- Nodes will probably have to be aligned in relation to each other in some way, which means we'll need some sort of alignment system in place. Maybe nodes can only be placed according to some sort of grid system.
- Linking, deleting and moving nodes around implies that we need an ability to select certain nodes to which we want to apply each of those actions. This means node selection is another feature we'd have to implement.
- If we go for the option where we also define stats visually, then text input is necessary. There are many ways we can get a proper TextInput element working in LÖVE for little work (keharriso/love-nuklear), so we just need to add the logic for when a text input element appears, and how we read information from it once its been written to.
As you can see, adding a skill tree editor doesn't seem like a lot of work compared to what we've done so far. So if you want to go for that option it's totally viable and may make the process of building the skill tree better for you. But like I said, I generally have no problem with doing lots of manual and boring work, which means that I have no problem with defining everything in a text file. So for this article we will not do any of those skill tree editor things and we will define the entirety of the skill tree in a text file.
Tree Definition
So to get started with the tree's definition we need to think about what kinds of things make up a node:
- Passive's text:
- Name
- Stats it changes (6% Increased HP, +10 Max Ammo, etc)
- Position
- Linked nodes
- Type of node (normal, medium or big)
So, for instance, the "4% Increased HP" node shown in the gif below:
Could have a definition like this:
tree[10] = {
name = 'HP',
stats = {
{'4% Increased HP', 'hp_multiplier' = 0.04}
}
x = 150, y = 150,
links = {4, 6, 8},
type = 'Small',
}
We're assuming that (150, 150) is a reasonable position, and that the position on the tree table of the nodes linked to it are 4, 6 and 8 (its own position is 10, since its being defined in tree[10]). In this way, we can easily define all the hundreds of nodes in the tree, pass this huge table to some function which will read all this, create Node objects and link those accordingly, and then we can apply whatever logic we want to the tree from there.
Nodes and Camera
Now that we have an idea of what the tree file will look like we can start building from it. The first thing we have to do is create a new SkillTree room and then use gotoRoom to go to it at the start of the game (since that's where we'll be working for now). The basics of this room should be exactly the same as the Stage room, so I'll assume you're capable of doing that with no guidance.
We'll define two nodes in the tree.lua file but we'll do it only by their position for now. Our goal will be to read those nodes from that file and create them in the SkillTree room. We could define them like this:
tree = {}
tree[1] = {x = 0, y = 0}
tree[2] = {x = 32, y = 0}
And we could read them like this:
function SkillTree:new()
...
self.nodes = {}
for _, node in ipairs(tree) do table.insert(self.nodes, Node(node.x, node.y)) end
end
Here we assume that all objects for our SkillTree will not be inside an Area, which means we don't have to use addGameObject to add a new game object to the environment, and it also means we need to keep track of existing objects ourselves. In this case we're doing that in the nodes table. The Node object could look like this:
Node = Object:extend()
function Node:new(x, y)
self.x, self.y = x, y
end
function Node:update(dt)
end
function Node:draw()
love.graphics.setColor(default_color)
love.graphics.circle('line', self.x, self.y, 12)
end
So it's a simple object that doesn't extend from GameObject at all. And for now we'll just draw it at its position as a circle. If we go through the nodes list and call update/draw on each node we have in it, assuming we're locking the camera at position 0, 0 (unlike in Stage where we locked it at gw/2, gh/2) then it should look like this:
And as expected, both the nodes we defined in the tree file are shown here.
Camera
To make the skill tree work properly we have to change the way the camera works a bit. Right now we should have the same behavior we have from the Stage room, which means that the camera is simply locked to a position but doesn't do anything interesting. But on the SkillTree we want the camera to be able to be moved around with the mouse and for the player to be able to zoom out (and also back in) so he can see more of the tree at once.
To move it around, we want to make it so that whenever the player is holding down the left mouse button and dragging the screen around, it moves in the opposite direction. So if the player is holding the button and moves the mouse up, then we want to move the camera down. The basic way to achieve this is to keep track of the mouse's position on the previous frame as well as on this frame, and then move the camera in the opposite direction of the current_frame_position - previous_frame_position vector. All that looks like this:
function SkillTree:update(dt)
...
if input:down('left_click') then
local mx, my = camera:getMousePosition(sx, sy, 0, 0, sx*gw, sy*gh)
local dx, dy = mx - self.previous_mx, my - self.previous_my
camera:move(-dx, -dy)
end
self.previous_mx, self.previous_my = camera:getMousePosition(sx, sy, 0, 0, sx*gw, sy*gh)
end
And if you try this out it should behave as expected. Note that the camera:getMousePosition has been slightly changed from the default because of the way we're handling our canvases, which is different than what the library expected. I changed this a long long time ago so I don't remember why it is like this exactly, so I'll just go with it. But if you're curious you should look into this more clearly and examine if it needs to be this way, or if there's a way to use the default camera module without any changes that I just didn't figure it out properly.
As for the zooming in/out, we can simply change the camera's scale properly whenever the user presses wheel up/down:
function SKillTree:update(dt)
...
if input:pressed('zoom_in') then
self.timer:tween('zoom', 0.2, camera, {scale = camera.scale + 0.4}, 'in-out-cubic')
end
if input:pressed('zoom_out') then
self.timer:tween('zoom', 0.2, camera, {scale = camera.scale - 0.4}, 'in-out-cubic')
end
end
We're using a timer here so that the zooms are a bit gentle and look better. We're also sharing both timers under the same 'zoom' id, since we want the other tween to stop whenever we start another one. The only thing left to do in this piece of code is to add limits to how low or high the scale can go, since we don't want it to go below 0, for instance.
Links and Stats
With the previous code we should be able to add nodes and move around the tree. Now we'll focus on linking nodes together and displaying their stats.
To link nodes together we'll create a Line object, and this Line object will receive in its constructors the id of two nodes that it's linking together. The id represents the index of a certain node on the tree object. So the node created from tree[2] will have id = 2. We can change the Node object like this:
function Node:new(id, x, y)
self.id = id
self.x, self.y = x, y
end
And we can create the Line object like this:
Line = Object:extend()
function Line:new(node_1_id, node_2_id)
self.node_1_id, self.node_2_id = node_1_id, node_2_id
self.node_1, self.node_2 = tree[node_1_id], tree[node_2_id]
end
function Line:update(dt)
end
function Line:draw()
love.graphics.setColor(default_color)
love.graphics.line(self.node_1.x, self.node_1.y, self.node_2.x, self.node_2.y)
end
Here we use our passed in ids to get the relevant nodes and store then in node_1 and node_2. Then we simply draw a line between the position of those nodes.
Back in the SkillTree room, we need to now create our Line objects based on the links table of each node in the tree. Suppose we now have a tree that looks like this:
tree = {}
tree[1] = {x = 0, y = 0, links = {2}}
tree[2] = {x = 32, y = 0, links = {1, 3}}
tree[3] = {x = 32, y = 32, links = {2}}
We want node 1 to be linked to node 2, node 2 to be linked to 1 and 3, and node 3 to be linked to node 2. Implementation wise we want to over each node and over each of its links and then create Line objects based on those links.
function SkillTree:new()
...
self.nodes = {}
self.lines = {}
for id, node in ipairs(tree) do table.insert(self.nodes, Node(id, node.x, node.y)) end
for id, node in ipairs(tree) do
for _, linked_node_id in ipairs(node.links) do
table.insert(self.lines, Line(id, linked_node_id))
end
end
end
One last thing we can do is draw the nodes using the 'fill' mode, otherwise our lines will go over them and it will look off:
function Node:draw()
love.graphics.setColor(background_color)
love.graphics.circle('fill', self.x, self.y, self.r)
love.graphics.setColor(default_color)
love.graphics.circle('line', self.x, self.y, self.r)
end
And after doing all that it should look like this:
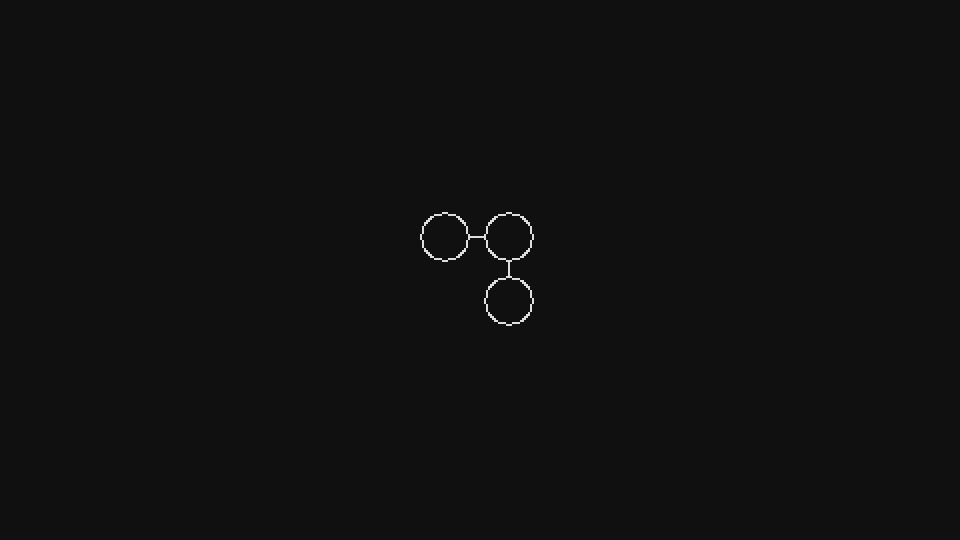
As for the stats, supposing we have a tree like this:
tree[1] = {
x = 0, y = 0, stats = {
'4% Increased HP', 'hp_multiplier', 0.04,
'4% Increased Ammo', 'ammo_multiplier', 0.04
}, links = {2}
}
tree[2] = {x = 32, y = 0, stats = {'6% Increased HP', 'hp_multiplier', 0.04}, links = {1, 3}}
tree[3] = {x = 32, y = 32, stats = {'4% Increased HP', 'hp_multiplier', 0.04}, links = {2}}
We want to achieve this:
No matter how zoomed in or zoomed out, whenever the user mouses over a node we want to display its stats in a small rectangle.
The first thing we can focus on is figuring out if the player is hovering over a node or not. The simplest way to do this is to just check is the mouse's position is inside the rectangle that defines each node:
function Node:update(dt)
local mx, my = camera:getMousePosition(sx*camera.scale, sy*camera.scale, 0, 0, sx*gw, sy*gh)
if mx >= self.x - self.w/2 and mx <= self.x + self.w/2 and
my >= self.y - self.h/2 and my <= self.y + self.h/2 then
self.hot = true
else self.hot = false end
end
We have a width and height defined for each node and then we check if the mouse position mx, my is inside the rectangle defined by this width and height. If it is, then we set hot to true, otherwise it will be set to false. hot then is just a boolean that tells us if the node is being hovered over or not.
Now for drawing the rectangle. We want to draw the rectangle above everything else on the screen, so doing this inside the Node class doesn't work, since each node is drawn sequentially, which means that our rectangle would end up behind one or another node sometimes. So we'll do it directly in the SkillTree room. And perhaps even more importantly, we'll do it outside the camera:attach and camera:detach block, since we want the size of this rectangle to remain the same no matter how zoomed in or out we are.
The basics of it looks like this:
function SkillTree:draw()
love.graphics.setCanvas(self.main_canvas)
love.graphics.clear()
...
camera:detach()
-- Stats rectangle
local font = fonts.m5x7_16
love.graphics.setFont(font)
for _, node in ipairs(self.nodes) do
if node.hot then
-- Draw rectangle and stats here
end
end
love.graphics.setColor(default_color)
love.graphics.setCanvas()
...
end
Before drawing the rectangle we need to figure out its width and height. The width is based on the size of the longest stat, since the rectangle has to be bigger than it by definition. To do that we can try something like this:
function SkillTree:draw()
...
for _, node in ipairs(self.nodes) do
if node.hot then
local stats = tree[node.id].stats
-- Figure out max_text_width to be able to set the proper rectangle width
local max_text_width = 0
for i = 1, #stats, 3 do
if font:getWidth(stats[i]) > max_text_width then
max_text_width = font:getWidth(stats[i])
end
end
end
end
...
end
The stats variable will hold the list of stats for the current node. So if we're going through the node tree[2], stats would be {'4% Increased HP', 'hp_multiplier', 0.04, '4% Increased Ammo', 'ammo_multiplier', 0.04}. The stats table is divided in 3 elements always. First there's the visual description of the stat, then what variable it will change on the Player object, and then the amount of that effect. We want the visual description only, which means that we should go over this table in increments of 3, which is what we're doing in the for loop above.
Once we do that we want to find the width of that string given the font we're using, and for that we'll use font:getWidth. The maximum width of all our stats will be stored in the max_text_width variable and then we can start drawing our rectangle from there:
function SkillTree:draw()
...
for _, node in ipairs(self.nodes) do
if node.hot then
...
-- Draw rectangle
local mx, my = love.mouse.getPosition()
mx, my = mx/sx, my/sy
love.graphics.setColor(0, 0, 0, 222)
love.graphics.rectangle('fill', mx, my, 16 + max_text_width,
font:getHeight() + (#stats/3)*font:getHeight())
end
end
...
end
We want to draw the rectangle at the mouse position, except that now we don't have to use camera:getMousePosition because we're not drawing with the camera transformations. However, we can't simply use love.mouse.getPosition directly either because our canvas is being scaled by sx, sy, which means that the mouse position as returned by LÖVE's function isn't correct once we change the game's scale from 1. So we have to divide that position by the scale to get the appropriate value.
After we have the proper position we can draw the rectangle with width 16 + max_text_width, which gives us about 8 pixels on each side as a border, and then with height font:getHeight() + (#stats/3)*font:getHeight(). The first element of this calculation (font:getHeight()) serves the same purpose as 16 in the width calculation, which is to be just some value for a border. In this case the rectangle will have font:getHeight()/2 as a top and bottom border. The second part of is simply the amount of height each stat line takes. Since stats are grouped in threes, it makes sense to count each stat as #stats/3 and then multiply that by the line height.
Finally, the last thing to do is to draw the text. We know that the x position of all texts will be 8 + mx, because we decided we wanted 8 pixels of border on each side. And we also know that the y position of the first text will be my + font:getHeight()/2, because we decided we want font:getHeight()/2 as border on top and bottom. The only thing left to figure out is how to draw multiple lines, but we also already know this since we decided that the height of the rectangle would be (#stats/3)*font:getHeight(). This means that each line is drawn 1*font:getHeight(), 2*font:getHeight(), and so on. All that looks like this:
function SkillTree:draw()
...
for _, node in ipairs(self.nodes) do
if node.hot then
...
-- Draw text
love.graphics.setColor(default_color)
for i = 1, #stats, 3 do
love.graphics.print(stats[i], math.floor(mx + 8),
math.floor(my + font:getHeight()/2 + math.floor(i/3)*font:getHeight()))
end
end
end
...
end
And this should get us the result we want. As a small note on this, if you look at this code as a whole it looks like this:
function SkillTree:draw()
love.graphics.setCanvas(self.main_canvas)
love.graphics.clear()
...
-- Stats rectangle
local font = fonts.m5x7_16
love.graphics.setFont(font)
for _, node in ipairs(self.nodes) do
if node.hot then
local stats = tree[node.id].stats
-- Figure out max_text_width to be able to set the proper rectangle width
local max_text_width = 0
for i = 1, #stats, 3 do
if font:getWidth(stats[i]) > max_text_width then
max_text_width = font:getWidth(stats[i])
end
end
-- Draw rectangle
local mx, my = love.mouse.getPosition()
mx, my = mx/sx, my/sy
love.graphics.setColor(0, 0, 0, 222)
love.graphics.rectangle('fill', mx, my,
16 + max_text_width, font:getHeight() + (#stats/3)*font:getHeight())
-- Draw text
love.graphics.setColor(default_color)
for i = 1, #stats, 3 do
love.graphics.print(stats[i], math.floor(mx + 8),
math.floor(my + font:getHeight()/2 + math.floor(i/3)*font:getHeight()))
end
end
end
love.graphics.setColor(default_color)
love.graphics.setCanvas()
...
end
And I know that if I looked at code like this a few years ago I'd be really bothered by it. It looks ugly and unorganized and perhaps confusing, but in my experience this is the stereotypical game development drawing code. Lots of small and seemingly random numbers everywhere, pixel adjustments, lots of different concerns instead of the whole thing feeling cohesive, and so on. I'm very used to this type of code by now so it doesn't bother me anymore, and I'd advise you to get used to it too because trying to make it "cleaner", in my experience, only leads to things that are even more confusing and less intuitive to work with.
Gameplay
Now that we can place nodes and link them together we have to code in the logic behind buying nodes. The tree will have one or multiple "entry points" from which the player can start buying nodes, and then from there he can only buy nodes that adjacent to one he already bought. For instance, in the way I set my own tree up, there's a central starting node that provides no bonuses and then from it 4 additional ones connect out to start the tree:

Suppose now that we have a tree that looks like this initially:
tree = {}
tree[1] = {x = 0, y = 0, links = {2}}
tree[2] = {x = 48, y = 0, stats = {'4% Increased HP', 'hp_multiplier', 0.04}, links = {3}}
tree[3] = {x = 96, y = 0, stats = {'6% Increased HP', 'hp_multiplier', 0.06}, links = {4}}
tree[4] = {x = 144, y = 0, stats = {'4% Increased HP', 'hp_multiplier', 0.04}}
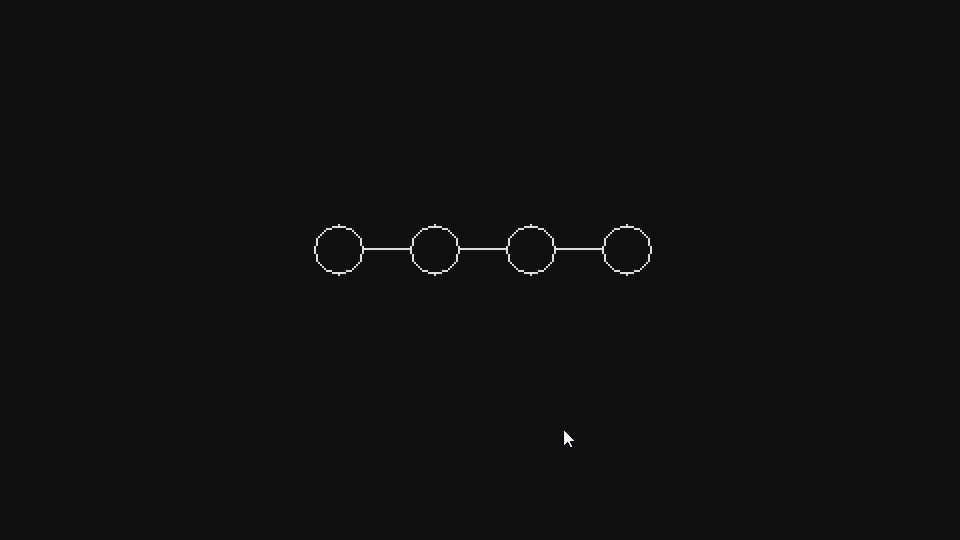
The first thing we wanna do is make it so that node #1 is already activated while the others are not. What I mean by a node being activated is that it has been bought by the player and so its effects will be applied in gameplay. Since node #1 has no effects, in this way we can create an "initial node" from where the tree will expand.
The way we'll do this is through a global table called bought_node_indexes, which will just contain a bunch of numbers pointing to which nodes of the tree have already been bought. In this case we can just add 1 to it, which means that tree[1] will be active. We also need to change the nodes and links visually a bit so we can more easily see which ones are active or not. For now we'll simply show locked nodes as grey (with alpha = 32 instead of 255) instead of white:
function Node:update(dt)
...
if fn.any(bought_node_indexes, self.id) then self.bought = true
else self.bought = false end
end
function Node:draw()
local r, g, b = unpack(default_color)
love.graphics.setColor(background_color)
love.graphics.circle('fill', self.x, self.y, self.w)
if self.bought then love.graphics.setColor(r, g, b, 255)
else love.graphics.setColor(r, g, b, 32) end
love.graphics.circle('line', self.x, self.y, self.w)
love.graphics.setColor(r, g, b, 255)
end
And for the links:
function Line:update(dt)
if fn.any(bought_node_indexes, self.node_1_id) and
fn.any(bought_node_indexes, self.node_2_id) then
self.active = true
else self.active = false end
end
function Line:draw()
local r, g, b = unpack(default_color)
if self.active then love.graphics.setColor(r, g, b, 255)
else love.graphics.setColor(r, g, b, 32) end
love.graphics.line(self.node_1.x, self.node_1.y, self.node_2.x, self.node_2.y)
love.graphics.setColor(r, g, b, 255)
end
We only activate a line if both of its nodes have been bought, which makes sense. If we say that bought_node_indexes = {1} in the SkillTree room constructor, now we'd get something like this:
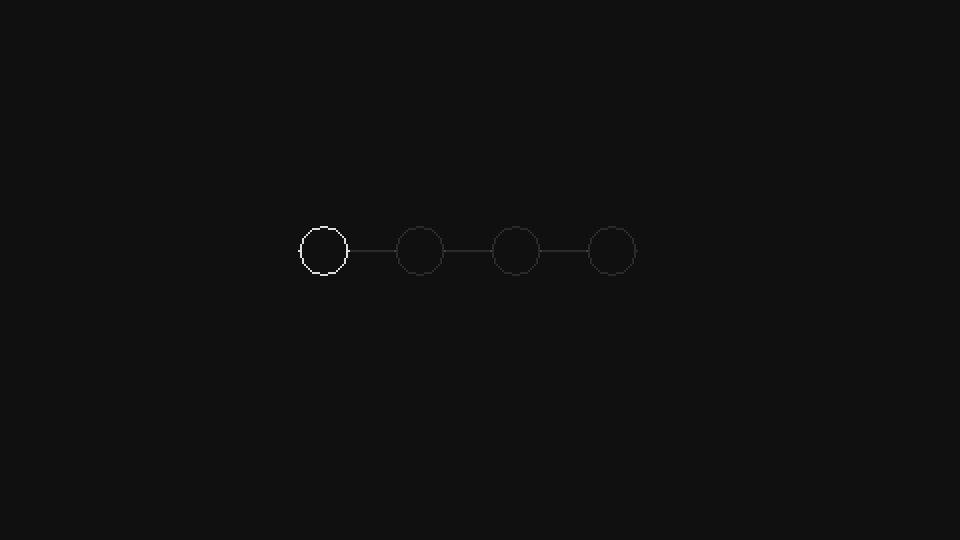
And if we say that bought_node_indexes = {1, 2}, then we'd get this:

And this is working as we expected. Now what we want to do is add the logic necessary so that whenever we click on a node it will be bought if its connected to another node that has been bought. Figuring out if we have enough skill points to buy a certain node, or to add a confirmation step before fully committing to buying the node will be left as an exercise.
Before we make it so that only nodes connected to other bought nodes can be bought, we first must fix a small problem with the way we're defining our tree. This is the definition we have now:
tree = {}
tree[1] = {x = 0, y = 0, links = {2}}
tree[2] = {x = 48, y = 0, stats = {'4% Increased HP', 'hp_multiplier', 0.04}, links = {3}}
tree[3] = {x = 96, y = 0, stats = {'6% Increased HP', 'hp_multiplier', 0.06}, links = {4}}
tree[4] = {x = 144, y = 0, stats = {'4% Increased HP', 'hp_multiplier', 0.04}}
One of the problems with this definition is that it's unidirectional. And this is a reasonable thing to expect, since if it were unidirectional we'd have to define connections multiple times across multiple nodes like this:
tree = {}
tree[1] = {x = 0, y = 0, links = {2}}
tree[2] = {x = 48, y = 0, stats = {'4% Increased HP', 'hp_multiplier', 0.04}, links = {1, 3}}
tree[3] = {x = 96, y = 0, stats = {'6% Increased HP', 'hp_multiplier', 0.06}, links = {2, 4}}
tree[4] = {x = 144, y = 0, stats = {'4% Increased HP', 'hp_multiplier', 0.04, links = {3}}}
And while there's no big problem in having to do this, we can make it so that we only have to define connections once (in either direction) and then we can apply an operation that will automatically make connections also be defined in the opposing direction.
The way we can do this is by going over the list of all nodes, and then for each node going over its links. For each link we find, we go over to that node and add the current node to its links. So, for instance, if we're on node 1 and we see that it's linked to 2, then we move over to node 2 and add 1 to its links list. In this way we'll make sure that whenever we have a definition going one way it will also go the other. In code this looks like this:
function SkillTree:new()
...
self.tree = table.copy(tree)
for id, node in ipairs(self.tree) do
for _, linked_node_id in ipairs(node.links or {}) do
table.insert(self.tree[linked_node_id], id)
end
end
...
end
The first thing to notice here is that instead of using the global tree variable now, we're copying it locally to the self.tree attribute and then using that attribute instead. Everywhere on the SkillTree, Node and Line objects we should change references to the global tree to the local SkillTree tree attribute instead. We need to do this because we're going to change the tree's definition by adding numbers to the links table of some nodes, and generally (because of what I outlined in article 10) we don't want to be changing global variables in that way. This means that every time we enter the SkillTree room, we'll copy the global definition over to a local one and use the local one instead.
Given this, we now go over all nodes in the tree and back-link nodes to each other like we said we would. It's important to use node.links or {} inside the ipairs call because some nodes might not have their links table defined. It's also important to note that we do this before creating Node and Line objects, even though it's not really necessary to do that.
An additional thing we can do here is to note that sometimes a links table will have repeated values. Depending on how we define the tree table sometimes we'll place nodes bi-directionally, which means that they'll already be everywhere they should be. This isn't really a problem, except that it might result in the creation of multiple Line objects. So to prevent that, we can go over the tree again and make it so that all links tables only contain unique values:
function SkillTree:new()
...
for id, node in ipairs(self.tree) do
if node.links then
node.links = fn.unique(node.links)
end
end
...
end
Now the only thing left to do is making it so that whenever we click a node, we check to see if its linked to an already bought node:
function Node:update(dt)
...
if self.hot and input:pressed('left_click') then
if current_room:canNodeBeBought(self.id) then
if not fn.any(bought_node_indexes, self.id) then
table.insert(bought_node_indexes, self.id)
end
end
end
...
end
And so this means that if a node is being hovered over and the player presses the left click button, we'll check to see if this node can be bought through SkillTree's canNodeBeBought function (which we still have to implement), and then if it can be bought we'll add it to the global bought_node_indexes table. Here we also take care to not add a node twice to that table. Although if we add it more than once it won't really change anything or cause any bugs.
The canNodeBeBought function will work by going over the linked nodes to the node that was passed in and seeing if any of them are inside the bought_node_indexes table. If that's true then it means this node is connected to an already bought node which means that it can be bought:
function SkillTree:canNodeBeBought(id)
for _, linked_node_id in ipairs(self.tree[id]) do
if fn.any(bought_node_indexes, linked_node_id) then return true end
end
end
And this should work as expected:

The very last idea we'll go over is how to apply our selected nodes to the player. This is simpler than it seems because of how we decided to structure everything in articles 11 and 12. The tree definition looks like this now:
tree = {}
tree[1] = {x = 0, y = 0, links = {2}}
tree[2] = {x = 48, y = 0, stats = {'4% Increased HP', 'hp_multiplier', 0.04}, links = {3}}
tree[3] = {x = 96, y = 0, stats = {'6% Increased HP', 'hp_multiplier', 0.06}, links = {4}}
tree[4] = {x = 144, y = 0, stats = {'4% Increased HP', 'hp_multiplier', 0.04}}
And if you notice, we have the second stat value being a string that should point to a variable defined in the Player object. In this case the variable is hp_multiplier. If we go back to the Player object and look for where hp_multiplier is used we'll find this:
function Player:setStats()
self.max_hp = (self.max_hp + self.flat_hp)*self.hp_multiplier
self.hp = self.max_hp
...
end
It's used in the setStats function as a multiplier for our base HP added by some flat HP value, which is what we expected. The behavior we want out of the tree is that for all nodes inside bought_node_indexes, we'll apply their stat to the appropriate player variable. So if we have nodes 2, 3 and 4 inside that table, then the player should have an hp_multiplier that is equal to 1.14 (0.04+0.06+0.04 + the base which is 1). We can do this fairly simply like this:
function treeToPlayer(player)
for _, index in ipairs(bought_node_indexes) do
local stats = tree[index].stats
for i = 1, #stats, 3 do
local attribute, value = stats[i+1], stats[i+2]
player[attribute] = player[attribute] + value
end
end
end
We define this function in tree.lua. As expected, we're going over all bought nodes and then going over all their stats. For each stat we're taking the attribute ('hp_multiplier') and the value (0.04, 0.06) and applying it to the player. In the example we talked the player[attribute] = player[attribute] + value line is parsed to player.hp_multiplier = player.hp_multiplier + 0.04 or player.hp_multiplier = player.hp_multiplier + 0.06, depending on which node we're currently looping over. This means that by the end of the outer for, we'll have applied all passives we bought to the player's variables.
It's important to note that different passives will need to be handled slightly differently. Some passives are booleans, others should be applied to variables which are Stat objects, and so on. All those differences need to be handled inside this function.
224. (CONTENT) Implement skill points. We have a global skill_points variable which holds how many skill points the player has. This variable should be decreased by 1 whenever the player buys a new node in the skill tree. The player should not be allowed to buy more nodes if he has no skill points. The player can buy a maximum of 100 nodes. You may also want to change these numbers around a bit if you feel like it's necessary. For instance, in my game the cost of each node increases based on how many nodes the player has already bought.
225. (CONTENT) Implement a step before buying nodes where the player can cancel his choices. This means that the player can click on nodes as if they were being bought, but to confirm the purchase he has to hit the "Apply Points" button. All selected nodes can be cancelled if he clicks the "Cancel" button instead. This is what it looks like:
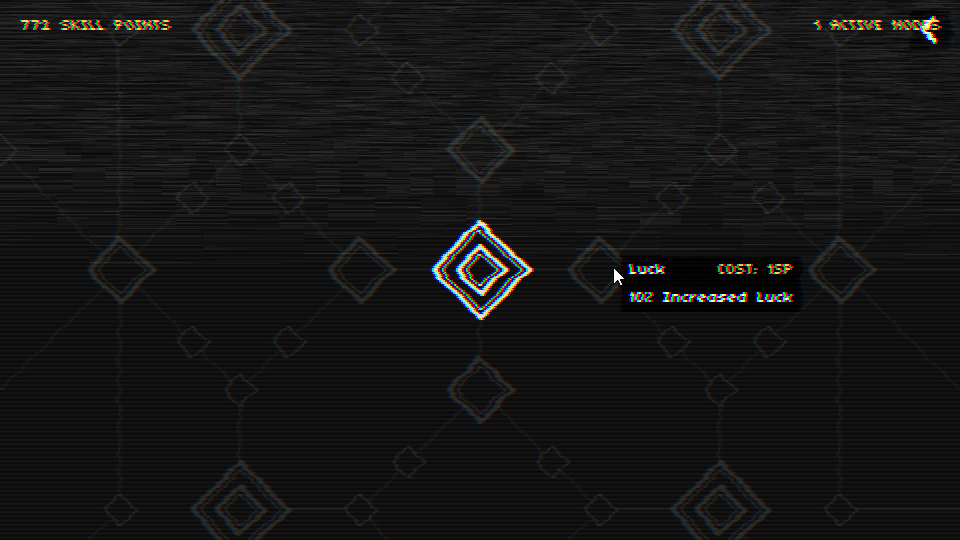
226. (CONTENT) Implement the skill tree. You can implement this skill tree to whatever size you see fit, but obviously the bigger it is the more possible interactions there will be and the more interesting it will be as well. This is what my tree looks like for reference:
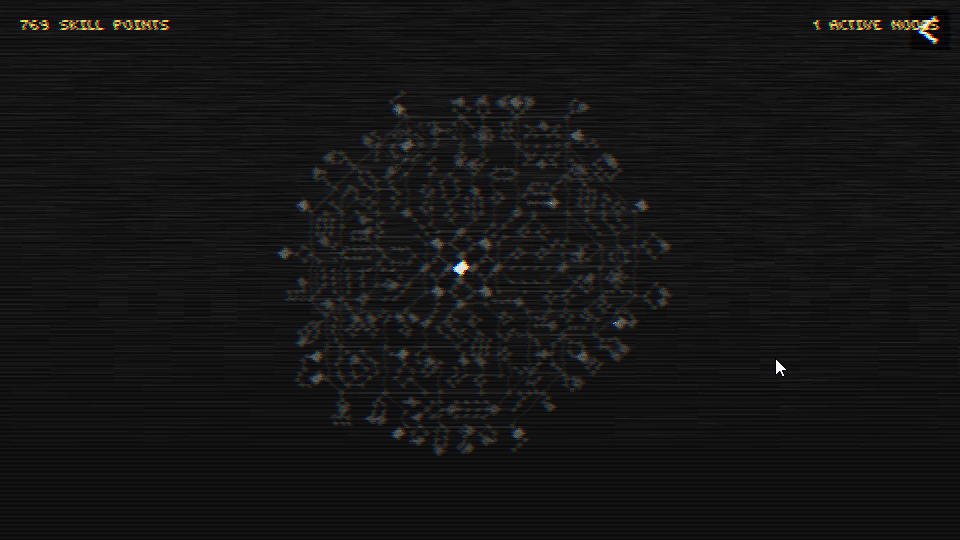
Don't forget to add the appropriate behaviors for each different type of passive in the treeToPlayer function!
END
And with that we end this article. The next article will focus on the Console room and the one after that will be the final one. In the final article we'll go over a few things, one of them being saving and loading things. One aspect of the skill tree that we didn't talk about was saving the player's bought nodes. We want those nodes to remain bought through playthroughs as well as after the player closes the game, so in the final article we'll go over this in more detail.
And like I said multiple times before, if you don't feel like it you don't need to implement a skill tree. If you've followed along so far then you already have all the passives implemented from articles 11 and 12 and you can present them to the player in whatever way you see fit. I chose a tree, but you can choose something else if you don't feel like doing a big tree like this manually is a good idea.
Console
Introduction
In this article we'll go over the Console room. The Console is considerably easier to implement than everything else we've been doing so far because in the end it boils down to printing some text on the screen.
The Console room will be composed of 3 different types of objects: lines, input lines and modules. Lines are just normal colored text lines that appear on the screen. In the example above, for instance, ":: running BYTEPATH..." would be a line. As a data structure this will just be a table holding the position of the line as well as its text and colors.
Input lines are lines where the player can type things into. In the example above they are the ones that have "arch" in them. Typing certain commands in an input line will trigger those commands and usually they will either create more lines and modules. As a data structure this will be just like a line, except there's some additional logic needed to read input whenever the last line added to the room was an input one.
Finally, a module is a special object allows the user to do things that are a bit more complex than just typing commands. The whole set of things that appear when the player has to pick a ship, for instance, is one of those modules. A lot of commands will spawn these objects, so, for instance, if the player wants to change the volume of the game he will type "volume" and then the Volume module will appear and will let the player choose whatever level of sound he wants. These modules will all be objects of their own and the Console room will handle creating and deleting them when appropriate.
Lines
So let's start with lines. The basic way in which we can define a line is like this:
{
x = x, y = y,
text = love.graphics.newText(font, {boost_color, 'blue text', default_color, 'white text'}
}
So it has a x, y position as well as a text attribute. This text attribute is a Text object. We'll use LÖVE's Text objects because they let us define colored text easily. But before we can add lines to our Console room we have to create it, so go ahead and do that. The basics of it should be the same as the SkillTree one.
We'll add a lines table to hold all the text lines, and then in the draw function we'll go over this table and draw each line. We'll also add a function named addLine which will add a new text line to the lines table:
function Console:new()
...
self.lines = {}
self.line_y = 8
camera:lookAt(gw/2, gh/2)
self:addLine(1, {'test', boost_color, ' test'})
end
function Console:draw()
...
for _, line in ipairs(self.lines) do love.graphics.draw(line.text, line.x, line.y) end
...
end
function Console:addLine(delay, text)
self.timer:after(delay, function()
table.insert(self.lines, {x = 8, y = self.line_y,
text = love.graphics.newText(self.font, text)})
self.line_y = self.line_y + 12
end)
end
There are a few additional things happening here. First there's the line_y attribute which will keep track of the y position where we should add a new line next. This is incremented by 12 every time we call addLine, since we want new lines to be added below the previous one, like it happens in a normal terminal.
Additionally the addLine function has a delay. This delay is useful because whenever we're adding multiple lines to the console, we don't want them to be added all the same time. We want a small delay between each addition because it makes everything feel better. One extra thing we could do here is make it so that on top of each line being added with a delay, its added character by character. So that instead of the whole line going in at once, each character is added with a small delay, which would give it an even nicer effect. I'm not doing this for the sake of time but it's a nice challenge (and we already have part of the logic for this in the InfoText object).
All that should look like this:
And if we add multiple lines it also looks like expected:
Input Lines
Input lines are a bit more complicated but not by much. The first thing we wanna do is add an addInputLine function, which will act just like the addLine function, except it will add the default input line text and enable text input from the player. The default input line text we'll use is [root]arch~ , which is just some flavor text to be placed before our input, like in a normal terminal.
function Console:addInputLine(delay)
self.timer:after(delay, function()
table.insert(self.lines, {x = 8, y = self.line_y,
text = love.graphics.newText(self.font, self.base_input_text)})
self.line_y = self.line_y + 12
self.inputting = true
end)
end
And base_input_text looks like this:
function Console:new()
...
self.base_input_text = {'[', skill_point_color, 'root', default_color, ']arch~ '}
...
end
We also set inputting to true whenever we add a new input line. This boolean will be used to tell us when we should be picking up input from the keyboard or not. If we are, then we'll simply add all characters that the player types to a list, put this list together as a string, and then add that string to our Text object. This looks like this:
function Console:textinput(t)
if self.inputting then
table.insert(self.input_text, t)
self:updateText()
end
end
function Console:updateText()
local base_input_text = table.copy(self.base_input_text)
local input_text = ''
for _, character in ipairs(self.input_text) do input_text = input_text .. character end
table.insert(base_input_text, input_text)
self.lines[#self.lines].text:set(base_input_text)
end
And Console:textinput will get called whenever love.textinput gets called, which happens whenever the player presses a key:
-- in main.lua
function love.textinput(t)
if current_room.textinput then current_room:textinput(t) end
end
One last thing we should do is making sure that the enter and backspace keys work. The enter key will turn inputting to false and also take the contents of the input_text table and do something with them. So if the player typed "help" and then pressed enter, we'll run the help command. And the backspace key should just remove the last element of the input_text table:
function Console:update(dt)
...
if self.inputting then
if input:pressed('return') then
self.inputting = false
-- Run command based on the contents of input_text here
self.input_text = {}
end
if input:pressRepeat('backspace', 0.02, 0.2) then
table.remove(self.input_text, #self.input_text)
self:updateText()
end
end
end
Finally, we can also simulate a blinking cursor for some extra points. The basic way to do this is to just draw a blinking rectangle at the position after the width of base_input_text concatenated with the contents of input_text.
function Console:new()
...
self.cursor_visible = true
self.timer:every('cursor', 0.5, function()
self.cursor_visible = not self.cursor_visible
end)
end
In this way we get the blinking working, so we'll only draw the rectangle whenever cursor_visible is true. Next for the drawing the rectangle:
function Console:draw()
...
if self.inputting and self.cursor_visible then
local r, g, b = unpack(default_color)
love.graphics.setColor(r, g, b, 96)
local input_text = ''
for _, character in ipairs(self.input_text) do input_text = input_text .. character end
local x = 8 + self.font:getWidth('[root]arch~ ' .. input_text)
love.graphics.rectangle('fill', x, self.lines[#self.lines].y,
self.font:getWidth('w'), self.font:getHeight())
love.graphics.setColor(r, g, b, 255)
end
...
end
In here the variable x will hold the position of our cursor. We add 8 to it because every line is being drawn by default starting at position 8, so if we don't take this into account the cursor's position will be wrong. We also consider that the cursor rectangle's width is the width of the 'w' letter with the current font. Generally w is the widest letter to use so we'll go with that. But this could also be any other fixed number like 10 or 8 or whatever else.
And all that should look like this:
Modules
Modules are objects that contain certain logic to let the player do something in the console. For instance, the ResolutionModule that we'll implement will let the player change the resolution of the game. We'll separate modules from the rest of the Console room code because they can get a bit too involved with their logic, so having them as separate objects is a good idea. We'll implement a module that looks like this:

This module in particular gets created and added whenever the player has pressed enter after typing "resolution" on an input line. Once it's activated it takes control away from the console and adds a few lines with Console:addLine to it. It then also has some selection logic on top of those added lines so we can pick our target resolution. Once the resolution is picked and the player presses enter, the window is changed to reflect that new resolution, we add a new input line with Console:addInputLine and disable selection on this ResolutionModule object, giving control back to the console.
All modules will work somewhat similarly to this. They get created/added, they do what they're supposed to do by taking control away from the Console room, and then when their behavior is done they give it control back. We can implement the basics of this on the Console object like this:
function Console:new()
...
self.modules = {}
...
end
function Console:update(dt)
self.timer:update(dt)
for _, module in ipairs(self.modules) do module:update(dt) end
if self.inputting then
...
end
function Console:draw()
...
for _, module in ipairs(self.modules) do module:draw() end
camera:detach()
...
end
Because we're mostly coding this by ourselves we can skip some formalities here. Even though I just said we'll have this sort of rule/interface between Console object and Module objects where they exchange control of the player's input with each other, in reality all we have to do is simply add modules to the self.modules table, update and draw them. Each module will take care of activating/deactivating itself whenever appropriate, which means that on the Console side of things we don't really have to do much.
Now for the creation of the ResolutionModule:
function Console:update(dt)
...
if self.inputting then
if input:pressed('return') then
self.line_y = self.line_y + 12
local input_text = ''
for _, character in ipairs(self.input_text) do
input_text = input_text .. character
end
self.input_text = {}
if input_text == 'resolution' then
table.insert(self.modules, ResolutionModule(self, self.line_y))
end
end
...
end
end
In here we make it so that the input_text variable will hold what the player typed into the input line, and then if this text is equal to "resolution" we create a new ResolutionModule object and add it to the modules list. Most modules will need a reference to the console as well as the current y position where lines are added to, since the module will be placed below the lines that exist currently in the console. So to achieve that we pass both self and self.line_y when we create a new module object.
The ResolutionModule itself is rather straightforward. For this one in particular all we'll have to do is add a bunch of lines as well as some small amount of logic to select between each line. To add the lines we can simply do this:
function ResolutionModule:new(console, y)
self.console = console
self.y = y
self.console:addLine(0.02, 'Available resolutions: ')
self.console:addLine(0.04, ' 480x270')
self.console:addLine(0.06, ' 960x540')
self.console:addLine(0.08, ' 1440x810')
self.console:addLine(0.10, ' 1920x1080')
end
To make things easy for now all the resolutions we'll concern ourselves with are the ones that are multiples of the base resolution, so all we have to do is add those 4 lines.
After this is done all we have to do is add the selection logic. The selection logic feels like a hack but it works well: we'll just place a rectangle on top of the current selection and move this rectangle around as the player presses up or down. We'll need a variable to keep track of which number we're in now (1 through 4), and then we'll draw this rectangle at the appropriate y position based on this variable. All this looks like this:
function ResolutionModule:new(console, y)
...
self.selection_index = sx
self.selection_widths = {
self.console.font:getWidth('480x270'), self.console.font:getWidth('960x540'),
self.console.font:getWidth('1440x810'), self.console.font:getWidth('1920x1080')
}
end
The selection_index variable will keep track of our current selection and we start it at sx. sx is either 1, 2, 3 or 4 based on the size we chose in main.lua when we called the resize function. selection_widths holds the widths for the rectangle on each selection. Since the rectangle will end up covering each resolution, we need to figure out its size based on the size of the characters that make up the string for that resolution.
function ResolutionModule:update(dt)
...
if input:pressed('up') then
self.selection_index = self.selection_index - 1
if self.selection_index < 1 then self.selection_index = #self.selection_widths end
end
if input:pressed('down') then
self.selection_index = self.selection_index + 1
if self.selection_index > #self.selection_widths then self.selection_index = 1 end
end
...
end
In the update function we'll handle the logic for when the player presses up or down. We just need to increase or decrease selection_index and take care to not go below 1 or above 4.
function ResolutionModule:draw()
...
local width = self.selection_widths[self.selection_index]
local r, g, b = unpack(default_color)
love.graphics.setColor(r, g, b, 96)
local x_offset = self.console.font:getWidth(' ')
love.graphics.rectangle('fill', 8 + x_offset - 2, self.y + self.selection_index*12,
width + 4, self.console.font:getHeight())
love.graphics.setColor(r, g, b, 255)
end
And in the draw function we just draw the rectangle at the appropriate position. Again, this looks terrible and full of weird numbers all over but we need to place the rectangle in the appropriate location, and there's no "clean" way of doing it.
The only thing left to do now is to make sure that this object is only reading input whenever it's active, and that it's active only right after it has been created and before the player has pressed enter to select a resolution. After the player presses enter it should be inactive and not reading input anymore. A simple way to do this is like this:
function ResolutionModule:new(console, y)
...
self.console.timer:after(0.02 + self.selection_index*0.02, function()
self.active = true
end)
end
function ResolutionModule:update(dt)
if not self.active then return end
...
if input:pressed('return') then
self.active = false
resize(self.selection_index)
self.console:addLine(0.02, '')
self.console:addInputLine(0.04)
end
end
function ResolutionModule:draw()
if not self.active then return end
...
end
The active variable will be set to true a few frames after the module is created. This is to avoid having the rectangle drawn before the lines are added, since the lines are added with a small delay between each other. If this active variable is not active then the update nor the draw function won't run, which means we won't be reading input for this object nor drawing the selection rectangle. Additionally, whenever we press enter we set active to false, call the resize function and then give control back to the Console by adding a new input line. All this gives us the appropriate behavior and everything should work as expected now.
Exercises
227. (CONTENT) Make it so that whenever there are more lines than the screen can cover in the Console room, the camera scrolls down as lines and modules are added.
228. (CONTENT) Implement the AchievementsModule module. This displays all achievements and what's needed to unlock them. Achievements will be covered in the next article, so you can come back to this exercise later!
229. (CONTENT) Implement the ClearModule module. This module allows for clearing of all saved data or the clearing of the skill tree. Saving/loading data will be covered in the next article as well, so you can come back to this exercise later too.
230. (CONTENT) Implement the ChooseShipModule module. This modules allows the player to choose and unlocks ships with which to play the game. This is what it looks like:
231. (CONTENT) Implement the HelpModule module. This displays all available commands and lets the player choose a command without having to type anything. The game also has to support gamepad only players so forcing the player to type things is not good.
232. (CONTENT) Implement the VolumeModule module. This lets the player change the volume of sound effects and music.
233. (CONTENT) Implement the mute, skills, start ,exit and device commands. mute mutes all sound. skills changes to the SkillTree room. start spawns a ChooseShipModule and then starts the game after the player chooses a ship. exit exits the game.
END
And this is it for the console. With only these three ideas (lines, input lines and modules) we can do a lot and use this to add a lot of flavor to the game. The next article is the last one and in it we'll cover a bunch of random things that didn't fit in any other articles before.
Final
Introduction
In this final article we'll talk about a few subjects that didn't fit into any of the previous ones but that are somewhat necessary for a complete game. In order, what we'll cover will be: saving and loading data, achievements, shaders and audio.
Saving and Loading
Because this game doesn't require us to save level data of any kind, saving and loading becomes very very easy. We'll use a library called bitser to do it and two of its functions: dumpLoveFile and loadLoveFile. These functions will save and load whatever data we pass it to a file using love.filesystem. As the link states, the files are saved to different directories based on your operating system. If you're on Windows then the file will be saved in C:\Users\user\AppData\Roaming\LOVE. We can use love.filesystem.setIdentity to change the save location. If we set the identity to BYTEPATH instead, then the save file will be saved in C:\Users\user\AppData\Roaming\BYTEPATH.
In any case, we'll only need two functions: save and load. They will be defined in main.lua. Let's start with the save function:
function save()
local save_data = {}
-- Set all save data here
bitser.dumpLoveFile('save', save_data)
end
The save function is pretty straightforward. We'll create a new save_data table and in it we'll place all the data we want to save. For instance, if we want to save how many skill points the player has, then we'll just say save_data.skill_points = skill_points, which means that save_data.skill_points will contain the value that our skill_points global contains. The same goes for all other types of data. It's important though to keep ourselves to saving values and tables of values. Saving full objects, images, and other types of more complicated data likely won't work.
In any case, after we add everything we want to save to save_data then we simply call bitser.dumpLoveFile and save all that data to the 'save' file. This will create a file called save in C:\Users\user\AppData\Roaming\BYTEPATH and once that file exists all the information we care about being saved is saved. We can call this function once the game is closed or whenever a round ends. It's really up to you. The only problem I can think of in calling it only when the game ends is that if the game crashes then the player's progress will likely not be saved, so that might be a problem.
Now for the load function:
function load()
if love.filesystem.exists('save') then
local save_data = bitser.loadLoveFile('save')
-- Load all saved data here
else
first_run_ever = true
end
end
The load function works very similarly except backwards. We call bitser.loadLoveFile using the name of our saved file (save) and then put all that data inside a local save_data table. Once we have all the saved data in this table then we can assign it to the appropriate variables. So, for instance, if now we want to load the player's skill points we'll do skill_points = save_data.skill_points, which means we're assigning the saved skill points to our global skill points variable.
Additionally, the load function needs a bit of additional logic to work properly. If it's the first time the player has run the game then the save file will not exist, which means that when try to load it we'll crash. To prevent this we check to see if it exists with love.filesystem.exists and only load it if it does. If it doesn't then we just set a global variable first_run_ever to true. This variable is useful because generally we want to do a few things differently if it's the first time the player has run the game, like maybe running a tutorial of some kind or showing some message of some kind that only first timers need. The load function will be called once in love.load whenever the game is loaded. It's important that this function is called after the globals.lua file is loaded, since we'll be overwriting global variables in it.
And that's it for saving/loading. What actually needs to be saved and loaded will be left as an exercise since it depends on what you decided to implement or not. For instance, if you implement the skill tree exactly like in article 13, then you probably want to save and load the bought_node_indexes table, since it contains all the nodes that the player bought.
Achievements
Because of the simplicity of the game achievements are also very easy to implement (at least compared to everything else xD). What we'll do is simply have a global table called achievements. And this table will be populated by keys that represent the achievement's name, and values that represent if that achievement is unlocked or not. So, for instance, if we have an achievement called '50K', which unlocks whenever the player reaches 50.000 score in a round, then achievements['50K'] will be true if this achievements has been unlocked and false otherwise.
To exemplify how this works let's create the 10K Fighter achievement, which unlocks whenever the player reaches 10.000 score using the Fighter ship. All we have to do to achieve this is set achievements['10K Fighter'] to true whenever we finish a round, the score is above 10K and the ship currently being used by the player is 'Fighter'. This looks like this:
function Stage:finish()
timer:after(1, function()
gotoRoom('Stage')
if not achievements['10K Fighter'] and score >= 10000 and device = 'Fighter' then
achievements['10K Fighter'] = true
-- Do whatever else that should be done when an achievement is unlocked
end
end)
end
As you can see it's a very small amount of code. The only thing we have to make sure is that each achievement only gets triggered once, and we do that by checking to see if that achievement has already been unlocked or not first. If it hasn't then we proceed.
I don't know how Steam's achievement system work yet but I'm assuming that we can call some function or set of functions to unlock an achievement for the player. If this is the case then we would call this function here as we set achievements['10K Fighter'] to true. One last thing to remember is that achievements need to be saved and loaded, so it's important to add the appropriate code back in the save and load functions.
Shaders
In the game so far I've been using about 3 shaders and we'll cover only one. However since the others use the same "framework" they can be applied to the screen in a similar way, even though the contents of each shader varies a lot. Also, I'm not a shaderlord so certainly I'm doing lots of very dumb things and there are better ways of doing all that I'm about to say. Learning shaders was probably the hardest part of game development for me and I'm still not comfortable enough with them to the extend that I am with the rest of my codebase.
With all that said, we'll implement a simple RGB shift shader and apply it only to a few select entities in the game. The basic way in which pixel shaders work is that we'll write some code and this code will be applied to all pixels in the texture passed into the shader. You can read more about the basics here.
One of the problems that I found when trying to apply this pixel shader to different objects in the game is that you can't apply it directly in that object's code. For whatever reason (and someone who knows more would be able to give you the exact reason here), pixel shaders aren't applied properly whenever we use basic primitives like lines, rectangles and so on. And even if we were using sprites instead of basic shapes, the RGB shift shader wouldn't be applied in the way we want either because the effect requires us to go outside the sprite boundaries. But because the pixel shader is only applied to pixels in the texture, when we try to apply it it will only read pixels inside the sprite's boundary so our effect doesn't work.
To solve this I've defaulted to drawing the objects that I want to apply effect X to to a new canvas, and then applying the pixel shader to that entire canvas. In a game like this where the order of drawing doesn't really matter this has almost no drawbacks. However in a game where the order of drawing matters more (like a 2.5D top-downish game) doing this gets a bit more complicated, so it's not a general solution for anything.
rgb_shift.frag
Before we get into coding all this let's get the actual pixel shader out of the way, since it's very simple:
extern vec2 amount;
vec4 effect(vec4 color, Image texture, vec2 tc, vec2 pc) {
return color*vec4(Texel(texture, tc - amount).r, Texel(texture, tc).g,
Texel(texture, tc + amount).b, Texel(texture, tc).a);
}
I place this in a file called rgb_shift.frag in resources/shaders and loaded it in the Stage room using love.graphics.newShader. The entry point for all pixel shaders is the effect function. This function receives a color vector, which is the one set with love.graphics.setColor, except that instead of being in 0-255 range, it's in 0-1 range. So if the current color is set to 255, 255, 255, 255, then this vec4 will have values 1.0, 1.0, 1.0, 1.0. The second thing it receives is a texture to apply the shader to. This texture can be a canvas, a sprite, or essentially any object in LÖVE that is drawable. The pixel shader will automatically go over all pixels in this texture and apply the code inside the effect function to each pixel, substituting its pixel value for the value returned. Pixel values are always vec4 objects, for the 4 red, green, blue and alpha components.
The third argument tc represents the texture coordinate. Texture coordinates range from 0 to 1 and represent the position of the current pixel inside the pixel. The top-left corner is 0, 0 while the bottom-right corner is 1, 1. We'll use this along with the texture2D function (which in LÖVE is called Texel) to get the contents of the current pixel. The fourth argument pc represents the pixel coordinate in screen space. We won't use this for this shader.
Finally, the last thing we need to know before getting into the effect function is that we can pass values to the shader to manipulate it in some way. In this case we're passing a vec2 called amount which will control the size of the RGB shift effect. Values can be passed in with the send function.
Now, the single line that makes up the entire effect looks like this:
return color*vec4(
Texel(texture, tc - amount).r,
Texel(texture, tc).g,
Texel(texture, tc + amount).b,
Texel(texture, tc).a);
What we're doing here is using the Texel function to look up pixels. But we don't wanna look up the pixel in the current position only, we also want to look for pixels in neighboring positions so that we can actually to the RGB shifting. This effect works by shifting different channels (in this case red and blue) in different directions, which gives everything a glitchy look. So what we're doing is essentially looking up the pixel in position tc - amount and tc + amount, and then taking and red and blue value of that pixel, along with the green value of the original pixel and outputting it. We could have a slight optimization here since we're grabbing the same position twice (on the green and alpha components) but for something this simple it doesn't matter.
Selective drawing
Since we want to apply this pixel shader only to a few specific entities, we need to figure out a way to only draw specific entities. The easiest way to do this is to mark each entity with a tag, and then create an alternate draw function in the Area object that will only draw objects with that tag. Defining a tag looks like this:
function TrailParticle:new(area, x, y, opts)
TrailParticle.super.new(self, area, x, y, opts)
self.graphics_types = {'rgb_shift'}
...
end
And then creating a new draw function that will only draw objects with certain tags in them looks like this:
function Area:drawOnly(types)
table.sort(self.game_objects, function(a, b)
if a.depth == b.depth then return a.creation_time < b.creation_time
else return a.depth < b.depth end
end)
for _, game_object in ipairs(self.game_objects) do
if game_object.graphics_types then
if #fn.intersection(types, game_object.graphics_types) > 0 then
game_object:draw()
end
end
end
end
So this is exactly like that the normal Area:draw function except with some additional logic. We're using the intersection to figure out if there are any common elements between the objects graphics_types table and the types table that we pass in. For instance, if we decide we only wanna draw rgb_shift type objects, then we'll call area:drawOnly({'rgb_shift'}), and so this table we passed in will be checked against each object's graphics_types. If they have any similar elements between them then #fn.intersection will be bigger than 0, which means we can draw the object.
Similarly, we will want to implement an Area:drawExcept function, since whenever we draw an object to one canvas we don't wanna draw it again in another, which means we'll need to exclude certain types of objects from drawing at some point. That looks like this:
function Area:drawExcept(types)
table.sort(self.game_objects, function(a, b)
if a.depth == b.depth then return a.creation_time < b.creation_time
else return a.depth < b.depth end
end)
for _, game_object in ipairs(self.game_objects) do
if not game_object.graphics_types then game_object:draw()
else
if #fn.intersection(types, game_object.graphics_types) == 0 then
game_object:draw()
end
end
end
end
So here we draw the object if it doesn't have graphics_types defined, as well as if its intersection with the types table is 0, which means that its graphics type isn't one of the ones specified by the caller.
Canvases + shaders
With all this in mind now we can actually implement the effect. For now we'll just implement this on the TrailParticle object, which means that the trail that the player and projectiles creates will be RGB shifted. The main way in which we can apply the RGB shift only to objects like TrailParticle looks like this:
function Stage:draw()
...
love.graphics.setCanvas(self.rgb_shift_canvas)
love.graphics.clear()
camera:attach(0, 0, gw, gh)
self.area:drawOnly({'rgb_shift'})
camera:detach()
love.graphics.setCanvas()
...
end
This looks similar to how we draw things normally, except that now instead of drawing to main_canvas, we're drawing to the newly created rgb_shift_canvas. And more importantly we're only drawing objects that have the 'rgb_shift' tag. In this way this canvas will contain all the objects we need so that we can apply our pixel shaders to later. I use a similar idea for drawing Shockwave and Downwell effects.
Once we're done with drawing to all our individual effect canvases, we can draw the main game to main_canvas with the exception of the things we already drew in other canvases. So that would look like this:
function Stage:draw()
...
love.graphics.setCanvas(self.main_canvas)
love.graphics.clear()
camera:attach(0, 0, gw, gh)
self.area:drawExcept({'rgb_shift'})
camera:detach()
love.graphics.setCanvas()
...
end
And then finally we can apply the effects we want. We'll do this by drawing the rgb_shift_canvas to another canvas called final_canvas, but this time applying the RGB shift pixel shader. This looks like this:
function Stage:draw()
...
love.graphics.setCanvas(self.final_canvas)
love.graphics.clear()
love.graphics.setColor(255, 255, 255)
love.graphics.setBlendMode("alpha", "premultiplied")
self.rgb_shift:send('amount', {
random(-self.rgb_shift_mag, self.rgb_shift_mag)/gw,
random(-self.rgb_shift_mag, self.rgb_shift_mag)/gh})
love.graphics.setShader(self.rgb_shift)
love.graphics.draw(self.rgb_shift_canvas, 0, 0, 0, 1, 1)
love.graphics.setShader()
love.graphics.draw(self.main_canvas, 0, 0, 0, 1, 1)
love.graphics.setBlendMode("alpha")
love.graphics.setCanvas()
...
end
Using the send function we can change the value of the amount variable to correspond to the amount of shifting we want the shader to apply. Because the texture coordinates inside the pixel shader are between values 0 and 1, we want to divide the amounts we pass in by gw and gh. So, for instance, if we want a shift of 2 pixels then rgb_shift_mag will be 2, but the value passed in will be 2/gw and 2/gh, since inside the pixel shader, 2 pixels to the left/right is represented by that small value instead of actually 2. We also draw the main canvas to the final canvas, since the final canvas should contain everything that we want to draw.
Finally outside this we can draw this final canvas to the screen:
function Stage:draw()
...
love.graphics.setColor(255, 255, 255)
love.graphics.setBlendMode("alpha", "premultiplied")
love.graphics.draw(self.final_canvas, 0, 0, 0, sx, sy)
love.graphics.setBlendMode("alpha")
love.graphics.setShader()
end
We could have drawn everything directly to the screen instead of to the final_canvas first, but if we wanted to apply another screen-wide shader to the final screen, like for instance the distortion, then it's easier to do that if everything is contained in a canvas properly.
And so all that would end up looking like this:

And as expected, the trail alone is being RGB shifted and looks kinda glitchly like we wanted.
Audio
I'm not really big on audio so while there are lots of very interesting and complicated things one could do, I'm going to stick to what I know, which is just playing sounds whenever appropriate. We can do this by using ripple.
This library has a pretty simple API and essentially it boils down to loading sounds using ripple.newSound and playing those sounds by calling :play on the returned object. For instance, if we want to play a shooting sound whenever the player shoots, we could do something like this:
-- in globals.lua
shoot_sound = ripple.newSound('resources/sounds/shoot.ogg')
function Player:shoot()
local d = 1.2*self.w
self.area:addGameObject('ShootEffect', ...
shoot_sound:play()
...
end
And so in this very simple way we can just call :play whenever we want a sound to happen. The library also has additional goodies like changing the pitch of the sound, playing sounds in a loop, creating tags so that you can change properties of all sounds with a certain tag, and so on. In the actual game I ended up doing some additional stuff on top of this, but I'm not going to go over all that here. If you've bought the tutorial you can see all that in the sound.lua file.
END
And this is the end of this tutorial. By no means have we covered literally everything that we could have covered about this game but we went over the most important parts. If you followed along until now you should have a good grasp on the codebase so that you can understand most of it, and if you bought the tutorial then you should be able to read the full source code with a much better understanding of what's actually happening there.
Hopefully this tutorial has been helpful so that you can get some idea of what making a game actually entails and how to go from zero to the final result. Ideally now that you have all this done you should use what you learned from this to make your own game instead of just changing this one, since that's a much better exercise that will test your "starting from zero" abilities. Usually when I start a new project I pretty much copypaste a bunch of code that I know has been useful between multiple projects, generally that's a lot of the "engine" code that we went over in articles 1 through 5.
Anyway, I don't know how to end this so... bye!