Player Stats and Attacks
Introduction
In this tutorial we'll focus on getting more basics of gameplay down on the Player side of things. First we'll add the most fundamental stats: ammo, boost, HP and skill points. These stats will be used throughout the entire game and they're the main resources the player will use to do everything he can do. After that we'll focus on the creation of Resource objects, which are objects that the player can gather that contain the stats just mentioned. And finally after that we'll add the attack system as well as a few different attacks to the Player.
Draw Order
Before we go over to the main parts of this article, setting the game's draw order is something important that I forgot to mention in the previous article so we'll go over it now.
The draw order decides which objects will be drawn on top and which will be drawn behind which. For instance, right now we have a bunch of effects that are drawn when something happens. If the effects are drawn behind other objects like the Player then they either won't be visible or they will look wrong. Because of this we need to make sure that they are always drawn on top of everything and for that we need to define some sort of drawing order between objects.
The way we'll set this up is somewhat straight forward. In the GameObject class we'll define a depth attribute which will start at 50 for all entities. Then, in the definition of each class' constructors, we will be able to define the depth attribute ourselves for that class of objects if we want to. The idea is that objects with a higher depth will be drawn in front, while objects with a lower depth will be drawn behind. So, for instance, if we want to make sure that all effects are drawn in front of everything else, we can just set their depth attribute to something like 75.
function TickEffect:new(area, x, y, opts)
    TickEffect.super.new(self, area, x, y, opts)
    self.depth = 75

    ...
end
Now, the way that this works internally is that every frame we'll be sorting the game_objects list according to the depth attribute of each object:
function Area:draw()
    table.sort(self.game_objects, function(a, b)
        return a.depth < b.depth
    end)

    for _, game_object in ipairs(self.game_objects) do game_object:draw() end
end
Here, before drawing we simply use table.sort to sort the entities based on their depth attribute. Entities that have lower depth will be sorted to the front of the table and so will be drawn first (behind everything), and entities that have a higher depth will be sorted to the back of the table and so they will be drawn last (in front of everything). If you try setting different depth values to different types of objects you should see that this works out well.
One small problem that this approach has though is that some objects will have the same depth, and when this happens, depending on how the game_objects table is being sorted over time, flickering can occur. Flickering occurs because if objects have the same depth, in one frame one object might be sorted to be in front of another, but in another frame it might be sorted to be behind another. It's unlikely to happen but it can happen and we should take precautions against that.
One way to solve it is to define another sorting parameter in case objects have the same depth. In this case the other parameter I chose was the object's time of creation:
function Area:draw()
    table.sort(self.game_objects, function(a, b)
        if a.depth == b.depth then return a.creation_time < b.creation_time
        else return a.depth < b.depth end
    end)

    for _, game_object in ipairs(self.game_objects) do game_object:draw() end
end
So if the depths are equal then objects that were created earlier will be drawn earlier, and objects that were created later will be drawn later. This is a reasonable solution and if you test it out you'll see that it also works!
Draw Order Exercises
93. Order objects so that ones with higher depth are drawn behind and ones with lower depth are drawn in front of others. In case the objects have the same depth, they should be ordered by their creation time. Objects that were created earlier should be drawn last, and objects that were created later should be drawn first.
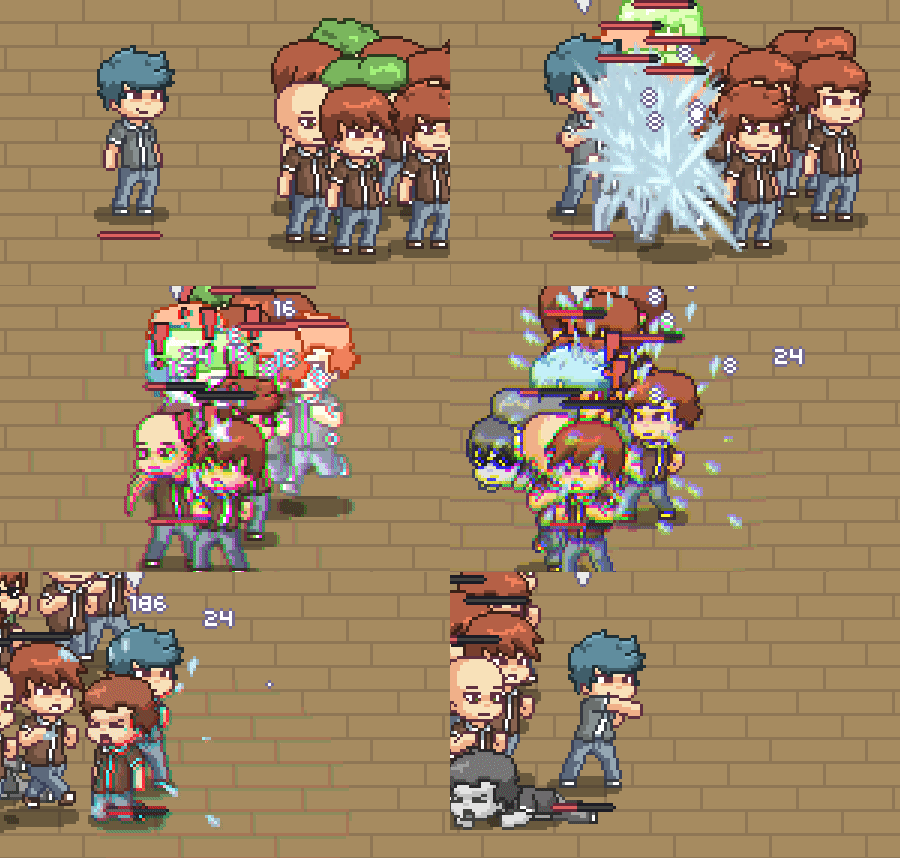
94. In a top-downish 2.5D game like in the gif below, one of the things you have to do to make sure that the entities are drawn in the appropriate order is sort them by their y position. Entities that have a higher y position (meaning that they are closer to the bottom of the screen) should be drawn last, while entities that have a lower y position should be drawn first. What would the sorting function look like in that case?
Basic Stats
Now we'll start with stat building. The first stat we'll focus on is the boost one. The way it works now is that whenever the player presses up or down the ship will take a different speed based on the key pressed. The way it should work is that on top of this basic functionality, it should also be a resource that depletes with use and regenerates over time when not being used. The specific numbers and rules that will be used are these:
- The player will have 100 boost initially
- Whenever the player is boosting 50 boost will be removed per second
- At all times 10 boost is generated per second
- Whenever boost reaches 0 a 2 second cooldown is applied before it can be used again
- Boosts can only happen when the cooldown is off and when the boost resource is above 0
These sound a little complicated but they're not. The first three are just number specifications, and the last two are to prevent boosts from never ending. When the resource reaches 0 it will regenerate to 1 pretty consistently and this can lead to a scenario where you can essentially use the boost forever, so a cooldown has to be added to prevent this from happening.
Now to add this as code:
function Player:new(...)
    ...
    self.max_boost = 100
    self.boost = self.max_boost
end

function Player:update(dt)
    ...
    self.boost = math.min(self.boost + 10*dt, self.max_boost)
    ...
end
So with this we take care of rules 1 and 3. We start boost with max_boost, which is 100, and then we add 10 per second to boost while making sure that it doesn't go over max_boost. We can easily also get rule 2 done by simply decreasing 50 boost per second whenever the player is boosting:
function Player:update(dt)
    ...
    if input:down('up') then
    self.boosting = true
    self.max_v = 1.5*self.base_max_v
    self.boost = self.boost - 50*dt
    end
  if input:down('down') then
    self.boosting = true
    self.max_v = 0.5*self.base_max_v
    self.boost = self.boost - 50*dt
    end
    ...
end
Part of this code was already here from before, so the only lines we really added were the self.boost -= 50*dt ones. Now to check rule 4 we need to make sure that whenever boost reaches 0 a 2 second cooldown is started before the player can boost again. This is a bit more complicated because if involves more moving parts, but it looks like this:
function Player:new(...)
    ...
    self.can_boost = true
    self.boost_timer = 0
    self.boost_cooldown = 2
end
At first we'll introduce 3 variables. can_boost will be used to tell when a boost can happen. By default it's set to true because the player should be able to boost at the start. It will be set to false once boost reaches 0 and then it will be set to true again boost_cooldown seconds after. The boost_timer variable will take care of tracking how much time it has been since boost reached 0, and if this variable goes above boost_cooldown then we will set can_boost to true.
function Player:update(dt)
    ...
    self.boost = math.min(self.boost + 10*dt, self.max_boost)
    self.boost_timer = self.boost_timer + dt
    if self.boost_timer > self.boost_cooldown then self.can_boost = true end
    self.max_v = self.base_max_v
    self.boosting = false
    if input:down('up') and self.boost > 1 and self.can_boost then
        self.boosting = true
        self.max_v = 1.5*self.base_max_v
        self.boost = self.boost - 50*dt
        if self.boost <= 1 then
            self.boosting = false
            self.can_boost = false
            self.boost_timer = 0
        end
    end
    if input:down('down') and self.boost > 1 and self.can_boost then
        self.boosting = true
        self.max_v = 0.5*self.base_max_v
        self.boost = self.boost - 50*dt
        if self.boost <= 1 then
            self.boosting = false
            self.can_boost = false
            self.boost_timer = 0
        end
    end
    self.trail_color = skill_point_color
    if self.boosting then self.trail_color = boost_color end
end
This looks complicated but it just follows from what we wanted to achieve. Instead of just checking to see if a key is being pressed with input:down, we additionally also make sure that boost is above 1 (rule 5) and that can_boost is true (rule 5). Whenever boost reaches 0 we set boosting and can_boost to false, and then we reset boost_timer to 0. Since boost_timer is being added dt every frame, after 2 seconds it will set can_boost to true and we'll be able to boost again (rule 4).
The code above is also the way the boost mechanism should look like now in its complete state. One thing to note is that you might think that this looks ugly or unorganized or any number of combination of bad things. But this is just what a lot of code that takes care of certain aspects of gameplay looks like. It's multiple rules that are being followed and they sort of have to be followed all in the same place. It's important to get used to code like this, in my opinion.
In any case, out of the basic stats, boost was the only one that had some more involved logic to it. There are two more important stats: ammo and HP, but both are way simpler. Ammo will just get depleted whenever the player attacks and regained whenever a resource is collected in gameplay, and HP will get depleted whenever the player is hit and also regained whenever a resource is collected in gameplay. For now, we can just add them as basic stats like we did for the boost:
function Player:new(...)
    ...
    self.max_hp = 100
    self.hp = self.max_hp

    self.max_ammo = 100
    self.ammo = self.max_ammo
end
Resources
What I call resources are small objects that affect one of the main basic stats that we just went over. The game will have a total of 5 of these types of objects and they'll work like this:
- Ammo resource restores 5 ammo to the player and is spawned on enemy death
- Boost resource restores 25 boost to the player and is spawned randomly by the Director
- HP resource restores 25 HP to the player and is spawned randomly by the Director
- SkillPoint resource adds 1 skill point to the player and is spawned randomly by the Director
- Attack resource changes the current player attack and is spawned randomly by the Director
The Director is a piece of code that handles the spawning of enemies as well as resources. I called it that because other games (like L4D) call it that and it just seems to fit. Because we're not going to work on that piece of code yet, for now we'll bind the creation of each resource to a key just to test that it works.
Ammo Resource
So let's get started on the ammo. The final result should be like this:

The little green rectangles are the ammo resource. When the player hits one of them with its body the resource is destroyed and the player gets 5 ammo. We can create a new class named Ammo and start with some definitions:
function Ammo:new(...)
    ...
    self.w, self.h = 8, 8
    self.collider = self.area.world:newRectangleCollider(self.x, self.y, self.w, self.h)
    self.collider:setObject(self)
    self.collider:setFixedRotation(false)
    self.r = random(0, 2*math.pi)
    self.v = random(10, 20)
    self.collider:setLinearVelocity(self.v*math.cos(self.r), self.v*math.sin(self.r))
    self.collider:applyAngularImpulse(random(-24, 24))
end

function Ammo:draw()
    love.graphics.setColor(ammo_color)
    pushRotate(self.x, self.y, self.collider:getAngle())
    draft:rhombus(self.x, self.y, self.w, self.h, 'line')
    love.graphics.pop()
    love.graphics.setColor(default_color)
end
Ammo resources will be physics rectangles that start with some random and small velocity and rotation, set initially by setLinearVelocity and applyAngularImpulse. This object is also drawn using the draft library. This is a small library that lets you draw all sorts of shapes more easily than if you had to do it yourself. For this case you can just draw the resource as a rectangle if you want, but I'll choose to go with this. I'll also assume that you can already install the library yourself and read the documentation to figure out what it can and can't do. Additionally, we're also taking into account the rotation of the physics object by using the result from getAngle in pushRotate.
To test this all out, we can bind the creation of one of these objects to a key like this:
function Stage:new()
    ...
    input:bind('p', function()
        self.area:addGameObject('Ammo', random(0, gw), random(0, gh))
    end)
end
And if you run the game now and press p a bunch of times you should see these objects spawning and moving/rotating around.
The next thing we should do is create the collision interaction between player and resource. This interaction will hold true for all resources and will be mostly the same always. The first thing we want to do is make sure that we can capture an event when the player physics object collides with the ammo physics object. The easiest way to do this is through the use of collision classes. To start with we can define 3 collision classes for objects that are already exist: the Player, the projectiles and the resources.
function Stage:new()
    ...
    self.area = Area(self)
    self.area:addPhysicsWorld()
    self.area.world:addCollisionClass('Player')
    self.area.world:addCollisionClass('Projectile')
    self.area.world:addCollisionClass('Collectable')
    ...
end
And then in each one of those files (Player, Projectile and Ammo) we can set the collider's collision class using setCollisionClass (repeat the code below for the other files):
function Player:new(...)
    ...
    self.collider:setCollisionClass('Player')
    ...
end
By itself this doesn't change anything, but it gives us a base to work with and to capture collision events between physics objects. For instance, if we change the Collectable collision class to ignore the Player like this:
self.area.world:addCollisionClass('Collectable', {ignores = {'Player'}})
Then if you run the game again you'll notice that the player is now physically ignoring the ammo resource objects. This isn't what we want to do in the end but it serves as a nice example of what we can do with collision classes. The rules we actually want these 3 collision classes to follow are the following:
- Projectile will ignore Projectile
- Collectable will ignore Collectable
- Collectable will ignore Projectile
- Player will generate collision events with Collectable
Rules 1, 2 and 3 can be satisfied by making small changes to the addCollisionClass calls:
function Stage:new()
    ...
    self.area.world:addCollisionClass('Player')
    self.area.world:addCollisionClass('Projectile', {ignores = {'Projectile'}})
    self.area.world:addCollisionClass('Collectable', {ignores = {'Collectable', 'Projectile'}})
    ...
end
It's important to note that the order of the declaration of collision classes matters. For instance, if we swapped the order of the Projectile and Collectable declarations a bug would happen because the Collectable collision class makes reference to the Projectile collision class, but since the Projectile collision class isn't yet defined it bugs out.
The fourth rule can be satisfied by using the enter call:
function Player:update(dt)
    ...
    if self.collider:enter('Collectable') then
        print(1)
    end
end
And if you run this you'll see that 1 will be printed to the console every time the player collides with an ammo resource.
Another piece of behavior we need to add to the Ammo class is that it needs to move towards the player slightly. An easy way to do this is to add the Seek Behavior to it. My version of the seek behavior was based on the book Programming Game AI by Example which has a very nice section on steering behaviors in general. I'm not going to explain it in detail because I honestly don't remember how it works, so I'll just assume if you're curious about it you'll figure it out :D
function Ammo:update(dt)
    ...
    local target = current_room.player
    if target then
        local projectile_heading = Vector(self.collider:getLinearVelocity()):normalized()
        local angle = math.atan2(target.y - self.y, target.x - self.x)
        local to_target_heading = Vector(math.cos(angle), math.sin(angle)):normalized()
        local final_heading = (projectile_heading + 0.1*to_target_heading):normalized()
        self.collider:setLinearVelocity(self.v*final_heading.x, self.v*final_heading.y)
    else self.collider:setLinearVelocity(self.v*math.cos(self.r), self.v*math.sin(self.r)) end
end
So here the ammo resource will head towards the target if it exists, otherwise it will just move towards the direction it was initially set to move towards. target contains a reference to the player, which was set in Stage like this:
function Stage:new()
    ...
    self.player = self.area:addGameObject('Player', gw/2, gh/2)
end
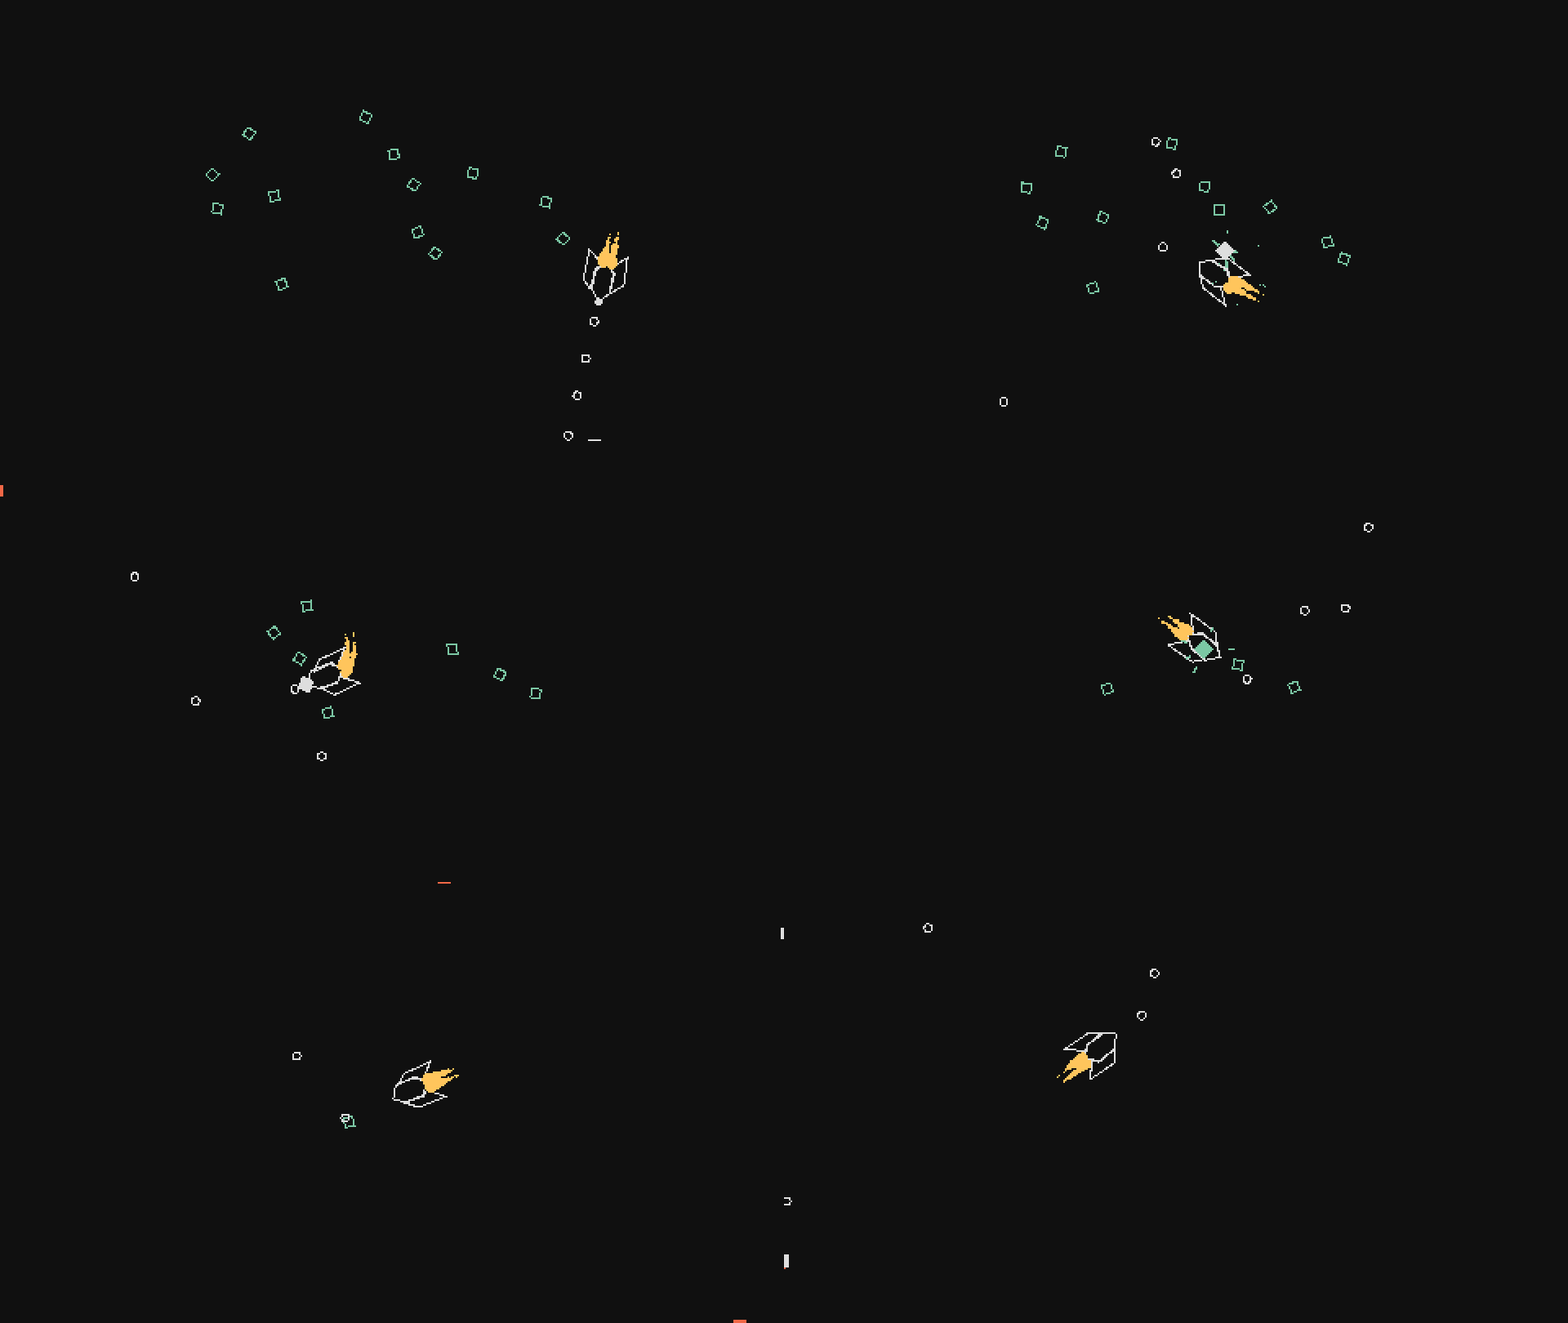
Finally, the only thing left to do is what happens when an ammo resource is collected. From the gif above you can see that a little effect plays (like the one for when a projectile dies), along with some particles, and then the player also gets +5 ammo.
Let's start with the effect. This effect follows the exact same logic as the ProjectileDeathEffect object, in that there's a little white flash and then the actual color of the effect comes on. The only difference here is that instead of drawing a square we will be drawing a rhombus, which is the same shape that we used to draw the ammo resource itself. I'll call this new object AmmoEffect and I won't really go over it in detail since it's the same as ProjectileDeathEffect. The way we call it though is like this:
function Ammo:die()
    self.dead = true
    self.area:addGameObject('AmmoEffect', self.x, self.y,
    {color = ammo_color, w = self.w, h = self.h})
    for i = 1, love.math.random(4, 8) do
    self.area:addGameObject('ExplodeParticle', self.x, self.y, {s = 3, color = ammo_color})
    end
end
Here we are creating one AmmoEffect object and then between 4 and 8 ExplodeParticle objects, which we already used before for the Player's death effect. The die function on an Ammo object will get called whenever it collides with the Player:
function Player:update(dt)
    ...
    if self.collider:enter('Collectable') then
        local collision_data = self.collider:getEnterCollisionData('Collectable')
        local object = collision_data.collider:getObject()
        if object:is(Ammo) then
            object:die()
        end
    end
end
Here first we use getEnterCollisionData to get the collision data generated by the last enter collision event for the specified tag. After this we use getObject to get access to the object attached to the collider involved in this collision event, which could be any object of the Collectable collision class. In this case we only have the Ammo object to worry about, but if we had others here's where we'd place the code to separate between them. And that's what we do, to really check that the object we get from getObject is the of the Ammo class we use classic's is function. If it is really is an object of the Ammo class then we call its die function. All that should look like this:
One final thing we forgot to do is actually add +5 ammo to the player whenever an ammo resource is gathered. For this we'll define an addAmmo function which simply adds a certain amount to the ammo variable and checks that it doesn't go over max_ammo:
function Player:addAmmo(amount)
    self.ammo = math.min(self.ammo + amount, self.max_ammo)
end
And then we can just call this after object:die() in the collision code we just added.
Boost Resource
Now for the boost. The final result should look like this:
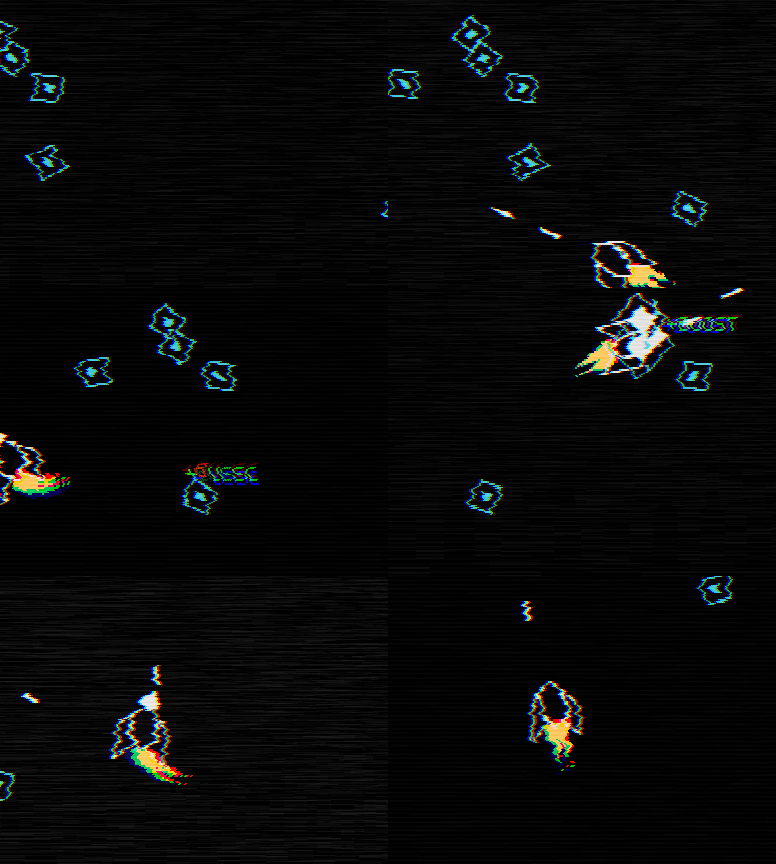
As you can see, the idea is almost the same as the ammo resource, except that the boost resource's movement is a little different, it looks a little different and the visual effect that happens when one is gathered is different as well.
So let's start with the basics. For every resource other than the ammo one, they'll be spawned either on the left or right of the screen and they'll move really slowly in a straight line to the other side. The same applies to the enemies. This gives the player enough time to move towards the resource to pick it up if he wants to.
The basic starting setup of the Boost class is about the same as the Ammo one and looks like this:
function Boost:new(...)
    ...

    local direction = table.random({-1, 1})
    self.x = gw/2 + direction*(gw/2 + 48)
    self.y = random(48, gh - 48)

    self.w, self.h = 12, 12
    self.collider = self.area.world:newRectangleCollider(self.x, self.y, self.w, self.h)
    self.collider:setObject(self)
    self.collider:setCollisionClass('Collectable')
    self.collider:setFixedRotation(false)
    self.v = -direction*random(20, 40)
    self.collider:setLinearVelocity(self.v, 0)
    self.collider:applyAngularImpulse(random(-24, 24))
end

function Boost:update(dt)
    ...

    self.collider:setLinearVelocity(self.v, 0)
end
There are a few differences though. The 3 first lines in the constructor are picking the initial position of this object. The table.random function is defined in utils.lua as follows:
function table.random(t)
    return t[love.math.random(1, #t)]
end
And as you can see what it does is just pick a random element from a table. In this case, we're picking either -1 or 1 to signify the direction in which the object will be spawned. If -1 is picked then the object will be spawned to the left of the screen, and if 1 is picked then it will be spawned to the right. More precisely, the exact positions chosen for its chosen position will be either -48 or gw+48, so slightly offscreen but close enough to the edge.
After this we define the object mostly like the Ammo one, with a few differences again only when it comes to its velocity. If this object was spawned to the right then we want it to move left, and if it was spawned to the left then we want it to move right. So its velocity is set to a random value between 20 and 40, but also multiplied by -direction, since if the object was to the right, direction was 1, and if we want to move it to the left then the velocity has to be negative (and the opposite for the other side). The object's velocity is always set to the v attribute on the x component and set to 0 on the y component. We want the object to remain moving in a horizontal line no matter what so setting its y velocity to 0 will achieve that.
The final main difference is in the way its drawn:
function Boost:draw()
    love.graphics.setColor(boost_color)
    pushRotate(self.x, self.y, self.collider:getAngle())
    draft:rhombus(self.x, self.y, 1.5*self.w, 1.5*self.h, 'line')
    draft:rhombus(self.x, self.y, 0.5*self.w, 0.5*self.h, 'fill')
    love.graphics.pop()
    love.graphics.setColor(default_color)
end
Here instead of just drawing a single rhombus we draw one inner and one outer to be used as sort of an outline. You can obviously draw all these objects in whatever way you want, but this is what I personally decided to do.
Now for the effects. There are two effects being used here: one that is similar to AmmoEffect (although a bit more involved) and the one that is used for the +BOOST text. We'll start with the one that's similar to AmmoEffect and call it BoostEffect.
This effect has two parts to it, the center with its white flash and the blinking effect before it disappears. The center works in the same way as the AmmoEffect, the only difference is that the timing of each phase is different, from 0.1 to 0.2 in the first phase and from 0.15 to 0.35 in the second:
function BoostEffect:new(...)
    ...
    self.current_color = default_color
    self.timer:after(0.2, function()
        self.current_color = self.color
        self.timer:after(0.35, function()
            self.dead = true
        end)
    end)
end
The other part of the effect is the blinking before it dies. This can be achieved by creating a variable named visible, which when set to true will draw the effect and when set to false will not draw the effect. By changing this variable from false to true really fast we can achieve the desired effect:
function BoostEffect:new(...)
    ...
    self.visible = true
    self.timer:after(0.2, function()
        self.timer:every(0.05, function() self.visible = not self.visible end, 6)
        self.timer:after(0.35, function() self.visible = true end)
    end)
end
Here we use the every call to switch between visible and not visible six times, each with a 0.05 seconds delay in between, and after that's done we set it to be visible in the end. The effect will die after 0.55 seconds anyway (since we set dead to true after 0.55 seconds when setting the current color) so setting it to be visible in the end isn't super important to do. In any case, then we can draw it like this:
function BoostEffect:draw()
    if not self.visible then return end

    love.graphics.setColor(self.current_color)
    draft:rhombus(self.x, self.y, 1.34*self.w, 1.34*self.h, 'fill')
    draft:rhombus(self.x, self.y, 2*self.w, 2*self.h, 'line')
    love.graphics.setColor(default_color)
end
We're simply drawing both the inner and outer rhombus at different sizes. The exact numbers (1.34, 2) were reached through pretty much trial and error based on what looked best.
The final thing we need to do for this effect is to make the outer rhombus outline expand over the life of the object. We can do that like this:
function BoostEffect:new(...)
    ...
    self.sx, self.sy = 1, 1
    self.timer:tween(0.35, self, {sx = 2, sy = 2}, 'in-out-cubic')
end
And then update the draw function like this:
function BoostEffect:draw()
    ...
    draft:rhombus(self.x, self.y, self.sx*2*self.w, self.sy*2*self.h, 'line')
    ...
end
With this, the sx and sy variables will grow to 2 over 0.35 seconds, which means that the outline rhombus will also grow to double its previous value over those 0.35 seconds. In the end the result looks like this (I'm assuming you already linked this object's die function to the collision event with the Player, like we did for the ammo resource):
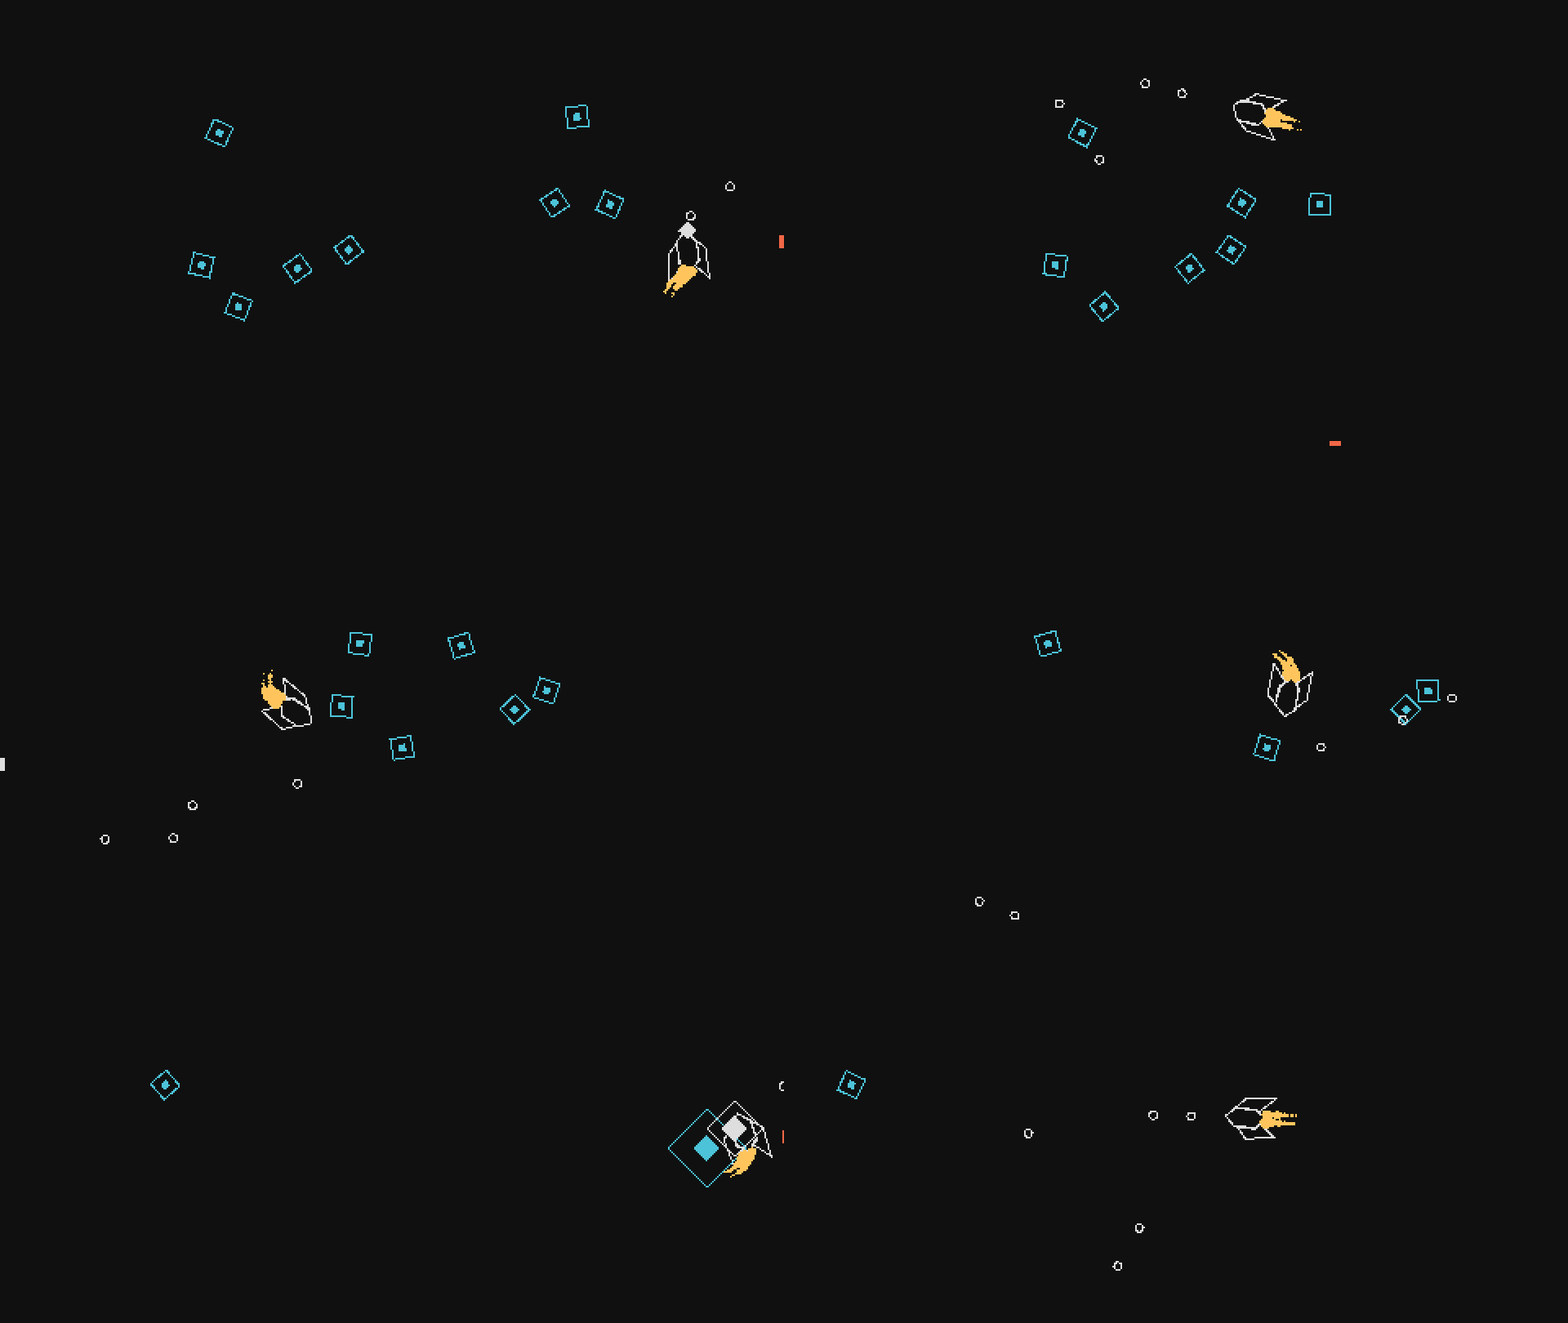
Now for the other part of the effect, the crazy looking text. This text effect will be used throughout the game pretty much everywhere so let's make sure we get it right. Here's what the effect looks like again:
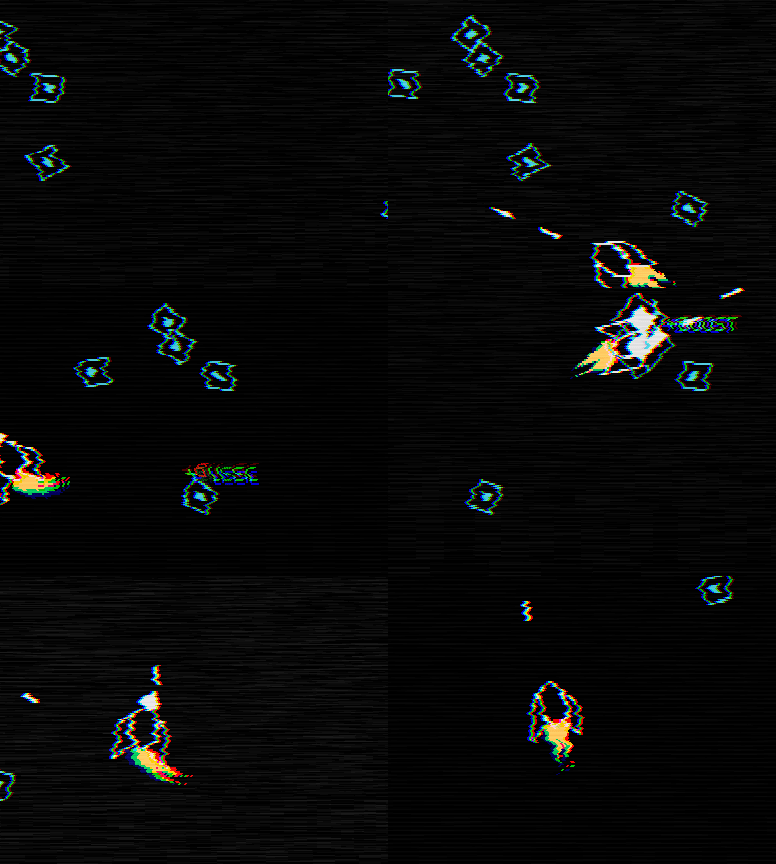
First let's break this effect down into its multiple parts. The first thing to notice is that it's simply a string being drawn to the screen initially, but then near its end it starts blinking like the BoostEffect object. That blinking part turns out to use exactly the same logic as the BoostEffect so we have that covered already.
What also happens though is that the letters of the string start changing randomly to other letters, and each character's background also changes colors randomly. This suggests that this effect is processing characters individually internally rather than operating on a single string, which probably means we'll have to do something like hold all characters in a characters table, operate on this table, and then draw each character on that table with all its modifications and effects to the screen.
So to start with this in mind we can define the basics of the InfoText class. The way we're gonna call it is like this:
function Boost:die()
    ...
    self.area:addGameObject('InfoText', self.x, self.y, {text = '+BOOST', color = boost_color})
end
And so the text attribute will contain our string. Then the basic definition of the class can look like this:
function InfoText:new(...)
    ...
    self.depth = 80

    self.characters = {}
    for i = 1, #self.text do table.insert(self.characters, self.text:utf8sub(i, i)) end
end
With this we simply define that this object will have depth of 80 (higher than all other objects, so will be drawn in front of everything) and then we separate the initial string into characters in a table. We use an utf8 library to do this. In general it's a good idea to manipulate strings with a library that supports all sorts of characters, and for this object it's really important that we do this as we'll see soon.
In any case, the drawing of these characters should also be done on an individual basis because as we figured out earlier, each character has its own background that can change randomly, so it's probably the case that we'll want to draw each character individually.
The logic used to draw characters individually is basically to go over the table of characters and draw each character at the x position that is the sum of all characters before it. So, for instance, drawing the first O in +BOOST means drawing it at something like initial_x_position + widthOf('+B'). The problem with getting the width of +B in this case is that it depends on the font being used, since we'll use the Font:getWidth function, and right now we haven't set any font. We can solve that easily though!
For this effect the font used will be m5x7 by Daniel Linssen. We can put this font in the folder resources/fonts and then load it. The code needed for loading it will be left as an exercise, since it's somewhat similar to the code used to load class definitions in the objects folder (exercise 14). By the end of this loading process we should have a global table called fonts that has all loaded fonts in the format fontname_fontsize. In this instance we'll use m5x7_16:
function InfoText:new(...)
    ...
    self.font = fonts.m5x7_16
    ...
end
And this is what the drawing code looks like:
function InfoText:draw()
    love.graphics.setFont(self.font)
    for i = 1, #self.characters do
        local width = 0
        if i > 1 then
            for j = 1, i-1 do
                width = width + self.font:getWidth(self.characters[j])
            end
        end

        love.graphics.setColor(self.color)
        love.graphics.print(self.characters[i], self.x + width, self.y,
      0, 1, 1, 0, self.font:getHeight()/2)
    end
    love.graphics.setColor(default_color)
end
First we use love.graphics.setFont to set the font we want to use for the next drawing operations. After this we go over each character and then draw it. But first we need to figure out its x position, which is the sum of the width of the characters before it. The inner loop that accumulates on the variable width is doing just that. It goes from 1 (the start of the string) to i-1 (the character before the current one) and adds the width of each character to a total final width that is the sum of all of them. After that we use love.graphics.print to draw each individual character at its appropriate position. We also offset each character up by half the height of the font (so that the characters are centered around the y position we defined).
If we test all this out now it looks like this:
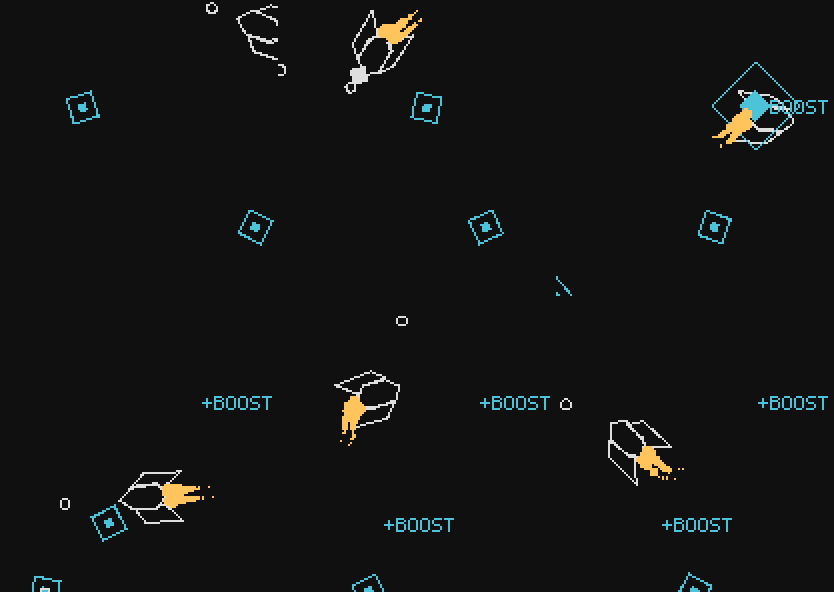
Which looks about right!
Now we can move on to making the text blink a little before disappearing. This uses the same logic as the BoostEffect object so we can just kinda copy it:
function InfoText:new(...)
    ...
    self.visible = true
    self.timer:after(0.70, function()
        self.timer:every(0.05, function() self.visible = not self.visible end, 6)
        self.timer:after(0.35, function() self.visible = true end)
    end)
    self.timer:after(1.10, function() self.dead = true end)
end
And if you run this you should see that the text stays normal for a while, starts blinking and then disappears.
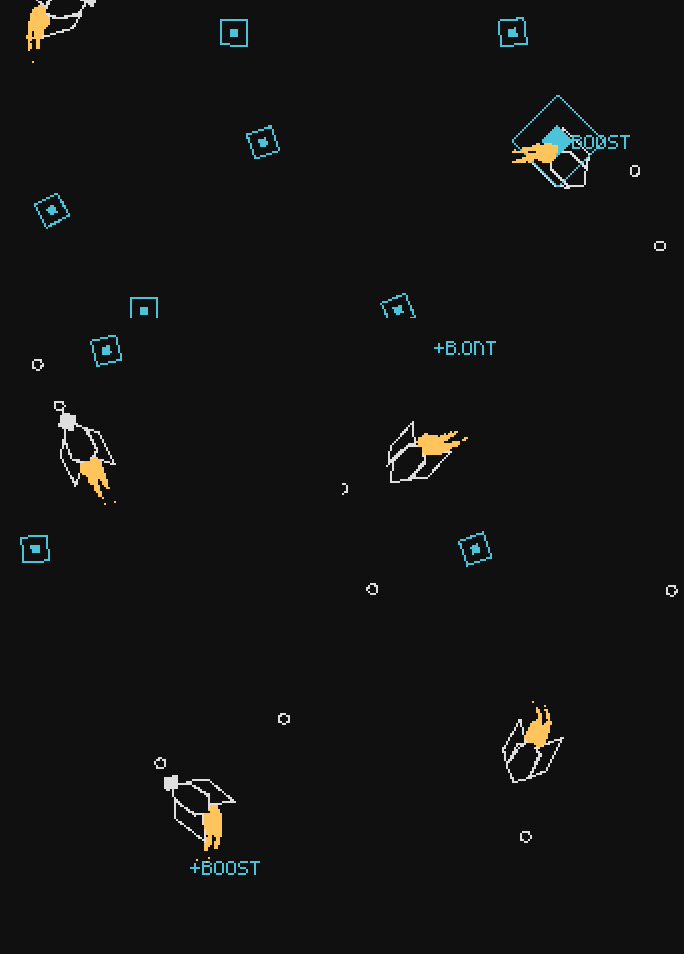
Now the hard part, which is making each character change randomly as well as its foreground and background colors. This changing starts at about the same that the character starts blinking, so we'll place this piece of code inside the 0.7 seconds after call we just defined above. The way we'll do this is that every 0.035 seconds, we'll run a procedure that will have a chance to change a character to another random character. That looks like this:
self.timer:after(0.70, function()
    ...
    self.timer:every(0.035, function()
    for i, character in ipairs(self.characters) do
            if love.math.random(1, 20) <= 1 then
            -- change character
            else
            -- leave character as it is
            end
       end
    end)
end)
And so each 0.035 seconds, for each character there's a 5% probability that it will be changed to something else. We can complete this by adding a variable named random_characters which is a string that contains all characters a character might change to, and then when a character change is necessary we pick one at random from this string:
self.timer:after(0.70, function()
    ...
    self.timer:every(0.035, function()
        local random_characters = '0123456789!@#$%¨&*()-=+[]^~/;?><.,|abcdefghijklmnopqrstuvwxyzABCDEFGHIJKLMNOPQRSTUVWYXZ'
    for i, character in ipairs(self.characters) do
            if love.math.random(1, 20) <= 1 then
            local r = love.math.random(1, #random_characters)
                self.characters[i] = random_characters:utf8sub(r, r)
            else
                self.characters[i] = character
            end
       end
    end)
end)
And if you run that now it should look like this:
We can use the same logic we used here to change the character's colors as well as their background colors. For that we'll define two tables, background_colors and foreground_colors. Each table will be the same size of the characters table and will simply hold the background and foreground colors for each character. If a certain character doesn't have any colors set in these tables then it just defaults to the default color for the foreground (boost_color ) and to a transparent background.
function InfoText:new(...)
    ...
    self.background_colors = {}
    self.foreground_colors = {}
end

function InfoText:draw()
    ...
    for i = 1, #self.characters do
    ...
    if self.background_colors[i] then
          love.graphics.setColor(self.background_colors[i])
          love.graphics.rectangle('fill', self.x + width, self.y - self.font:getHeight()/2,
          self.font:getWidth(self.characters[i]), self.font:getHeight())
      end
    love.graphics.setColor(self.foreground_colors[i] or self.color or default_color)
    love.graphics.print(self.characters[i], self.x + width, self.y,
      0, 1, 1, 0, self.font:getHeight()/2)
    end
end
For the background colors we simply draw a rectangle at the appropriate position and with the size of the current character if background_colors[i] (the background color for the current character) is defined. As for the foreground color, we simply set the color to draw the current character with using setColor. If foreground_colors[i] isn't defined then it defauls to self.color, which for this object should always be boost_color since that's what we're passing in when we call it from the Boost object. But if self.color isn't defined either then it defaults to white (default_color). By itself this piece of code won't really do anything, because we haven't defined any of the values inside the background_colors or the foreground_colors tables.
To do that we can use the same logic we used to change characters randomly:
self.timer:after(0.70, function()
    ...
    self.timer:every(0.035, function()
    for i, character in ipairs(self.characters) do
            ...
            if love.math.random(1, 10) <= 1 then
                -- change background color
            else
                -- set background color to transparent
            end

            if love.math.random(1, 10) <= 2 then
                -- change foreground color
            else
                -- set foreground color to boost_color
            end
       end
    end)
end)
The code that changes colors around will have to pick between a list of colors. We defined a group of 6 colors globally and we could just put those all into a list and then use table.random to pick one at random. What we'll do is that but also define 6 more colors on top of it which will be the negatives of the 6 original ones. So say you have 232, 48, 192 as the original color, we can define its negative as 255-232, 255-48, 255-192.
function InfoText:new(...)
    ...
    local default_colors = {default_color, hp_color, ammo_color, boost_color, skill_point_color}
    local negative_colors = {
        {255-default_color[1], 255-default_color[2], 255-default_color[3]},
        {255-hp_color[1], 255-hp_color[2], 255-hp_color[3]},
        {255-ammo_color[1], 255-ammo_color[2], 255-ammo_color[3]},
        {255-boost_color[1], 255-boost_color[2], 255-boost_color[3]},
        {255-skill_point_color[1], 255-skill_point_color[2], 255-skill_point_color[3]}
    }
    self.all_colors = fn.append(default_colors, negative_colors)
    ...
end
So here we define two tables that contain the appropriate values for each color and then we use the append function to join them together. So now we can say something like table.random(self.all_colors) to get a random color out of the 10 defined in those tables, which means that we can do this:
self.timer:after(0.70, function()
    ...
    self.timer:every(0.035, function()
    for i, character in ipairs(self.characters) do
            ...
            if love.math.random(1, 10) <= 1 then
                self.background_colors[i] = table.random(self.all_colors)
            else
                self.background_colors[i] = nil
            end

            if love.math.random(1, 10) <= 2 then
                self.foreground_colors[i] = table.random(self.all_colors)
            else
                self.background_colors[i] = nil
            end
       end
    end)
end)
And if we run the game now it should look like this:
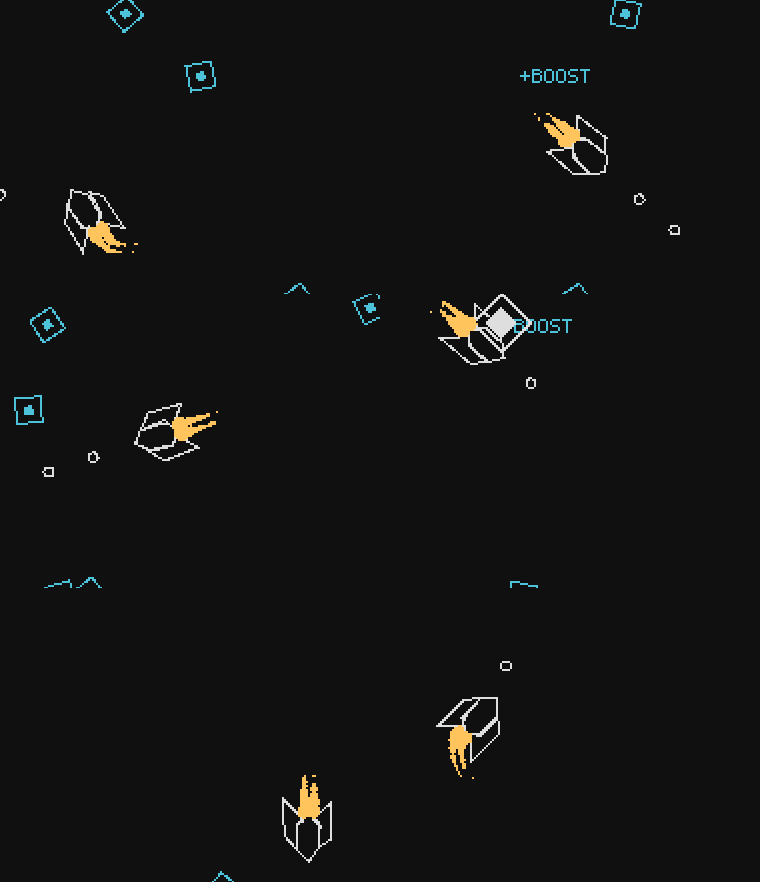
And that's it. We'll improve it even more later on (and on the exercises) but it's enough for now. Lastly, the final thing we should do is make sure that whenever we collect a boost resource we actually add +25 boost to the player. This works exactly the same way as it did for the ammo resource so I'm going to skip it.
Resources Exercises
95. Make it so that the Projectile collision class will ignore the Player collision class.
96. Change the addAmmo function so that it supports the addition of negative values and doesn't let the ammo attribute go below 0. Do the same for the addBoost and addHP functions (adding the HP resource is an exercise defined below).
97. Following the previous exercise, is it better to handle positive and negative values on the same function or to separate between addResource and removeResource functions instead?
98. In the InfoText object, change the probability of a character being changed to 20%, the probability of a foreground color being changed to 5%, and the probability of a background color being changed to 30%.
99. Define the default_colors, negative_colors and all_colors tables globally instead of locally in InfoText.
100. Randomize the position of the InfoText object so that it is spawned between -self.w and self.w in its x component and between -self.h and self.h in its y component. The w and h attributes refer to the Boost object that is spawning the InfoText.
101. Assume the following function:
function Area:getAllGameObjectsThat(filter)
    local out = {}
    for _, game_object in pairs(self.game_objects) do
        if filter(game_object) then
            table.insert(out, game_object)
        end
    end
    return out
end
Which returns all game objects inside an Area that pass a filter function. And then assume that it's called like this inside InfoText's constructor:
function InfoText:new(...)
    ...
    local all_info_texts = self.area:getAllGameObjectsThat(function(o)
        if o:is(InfoText) and o.id ~= self.id then
            return true
        end
    end)
end
Which returns all existing and alive InfoText objects that are not this one. Now make it so that this InfoText object doesn't visually collide with any other InfoText object, meaning, it doesn't occupy the same space on the screen as another such that its text would become unreadable. You may do this in whatever you think is best as long as it achieves the goal.
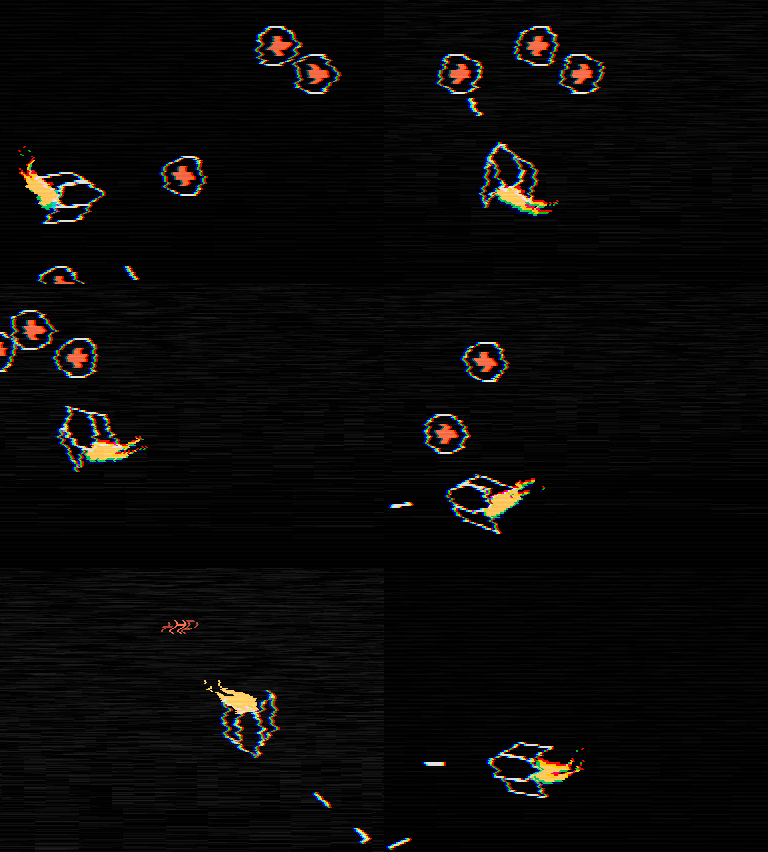
102. (CONTENT) Add the HP resource with all of its functionality and visual effects. It uses the exact same logic as the Boost resource, but instead adds +25 to HP instead. The resource and effects look like this:
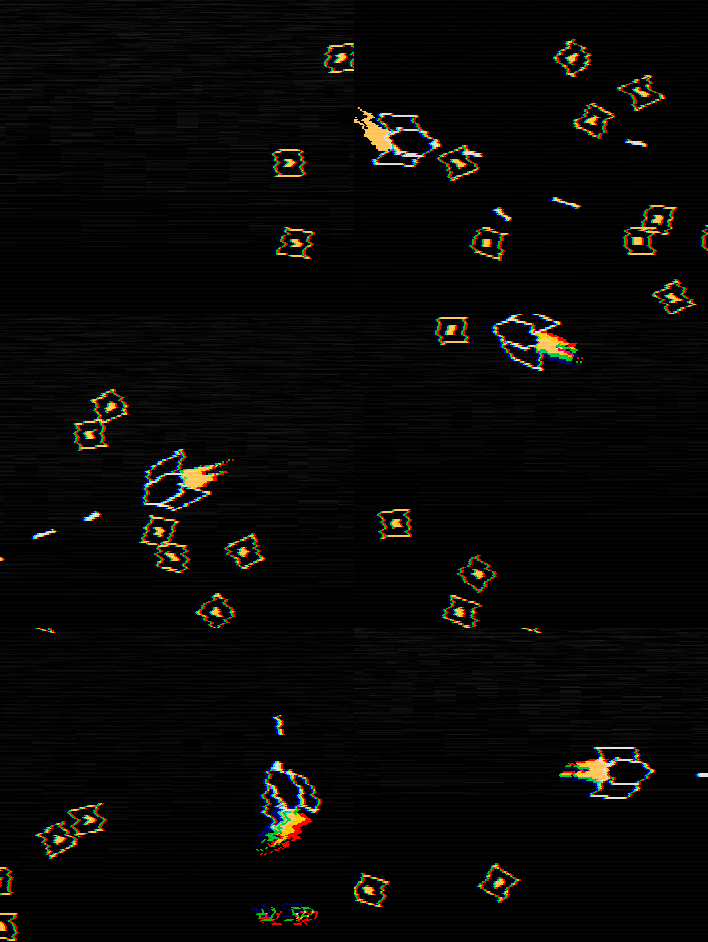
103. (CONTENT) Add the SP resource with all of its functionality and visual effects. It uses the exact same logic as the Boost resource, but instead adds +1 to SP instead. The SP resource should also be defined as a global variable for now instead of an internal one to the Player object. The resource and effects look like this:
Attacks
Alright, so now for attacks. Before anything else the first thing we're gonna do is change the way projectiles are drawn. Right now they're being drawn as circles but we want them as lines. This can be achieved with something like this:
function Projectile:draw()
    love.graphics.setColor(default_color)

    pushRotate(self.x, self.y, Vector(self.collider:getLinearVelocity()):angle())
    love.graphics.setLineWidth(self.s - self.s/4)
    love.graphics.line(self.x - 2*self.s, self.y, self.x, self.y)
    love.graphics.line(self.x, self.y, self.x + 2*self.s, self.y)
    love.graphics.setLineWidth(1)
    love.graphics.pop()
end
In the pushRotate function we use the projectile's velocity so that we can rotate it towards the angle its moving at. Then inside we use love.graphics.setLineWidth and set it to a value somewhat proportional to the s attribute but slightly smaller. This means that projectiles with bigger s will be thicker in general. Then we draw the projectile using love.graphics.line and importantly, we draw one line from -2*self.s to the center and then another from the center to 2*self.s. We do this because each attack will have different colors, and what we'll do is change the color of one those lines but not change the color of another. So, for instance, if we do this:
function Projectile:draw()
    love.graphics.setColor(default_color)

    pushRotate(self.x, self.y, Vector(self.collider:getLinearVelocity()):angle())
    love.graphics.setLineWidth(self.s - self.s/4)
    love.graphics.line(self.x - 2*self.s, self.y, self.x, self.y)
    love.graphics.setColor(hp_color) -- change half the projectile line to another color
    love.graphics.line(self.x, self.y, self.x + 2*self.s, self.y)
    love.graphics.setLineWidth(1)
    love.graphics.pop()
end
It will look like this:
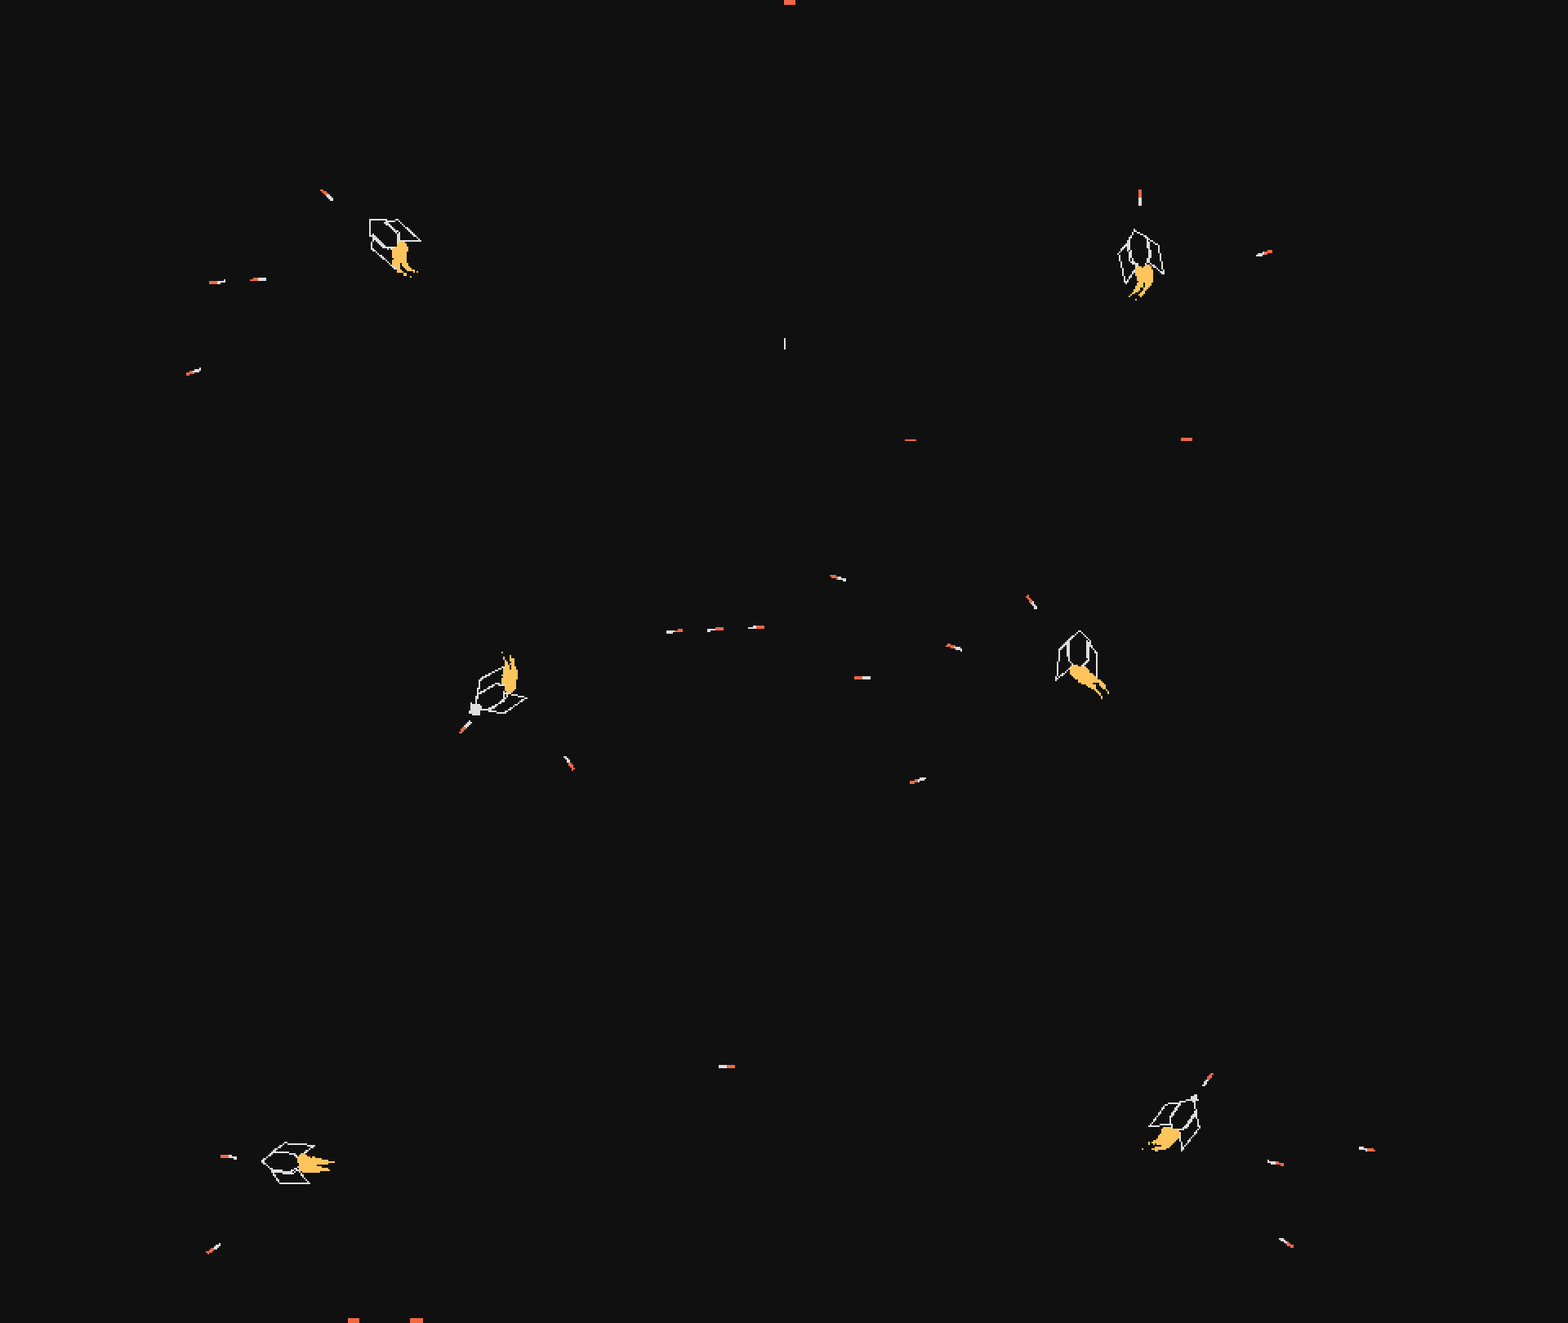
In this way we can make each attack have its own color which helps with letting the player better understand what's going on on the screen.
The game will end up having 16 attacks but we'll cover only a few of them now. The way the attack system will work is very simple and these are the rules:
- Attacks (except the Neutral one) consume ammo with every shot;
- When ammo hits 0 the current attack is changed to Neutral;
- New attacks can be obtained through resources that are spawned randomly;
- When a new attack is obtained, the current attack is removed and ammo is fully regenerated;
- Each attack consumes a different amount of ammo and has different properties.
The first we're gonna do is define a table that will hold information on each attack, such as their cooldown, ammo consumption and color. We'll define this in globals.lua and for now it will look like this:
attacks = {
    ['Neutral'] = {cooldown = 0.24, ammo = 0, abbreviation = 'N', color = default_color},
}
The normal attack that we already have defined is called Neutral and it simply has the stats that the attack we had in the game had so far. Now what we can do is define a function called setAttack which will change from one attack to another and use this global table of attacks:
function Player:setAttack(attack)
    self.attack = attack
    self.shoot_cooldown = attacks[attack].cooldown
    self.ammo = self.max_ammo
end
And then we can call it like this:
function Player:new(...)
    ...
    self:setAttack('Neutral')
    ...
end
Here we simply change an attribute called attack which will contain the name of the current attack. This attribute will be used in the shoot function to check which attack is currently active and how we should proceed with projectile creation.
We also change an attribute named shoot_cooldown. This is an attribute that we haven't created yet, but similar to how the boost_timer and boost_cooldown attributes work, they will be used to control how often something can happen, in this case how often an attack happen. We will remove this line:
function Player:new(...)
    ...
    self.timer:every(0.24, function() self:shoot() end)
    ...
end
And instead do the timing of attacks manually like this:
function Player:new(...)
    ...
    self.shoot_timer = 0
    self.shoot_cooldown = 0.24
    ...
end

function Player:update(dt)
    ...
    self.shoot_timer = self.shoot_timer + dt
    if self.shoot_timer > self.shoot_cooldown then
        self.shoot_timer = 0
        self:shoot()
    end
    ...
end
Finally, at the end of the setAttack function we also regenerate the ammo resource. With this we take care of rule 4. The next thing we can do is change the shoot function a little to start taking into account the fact that different attacks exist:
function Player:shoot()
    local d = 1.2*self.w
    self.area:addGameObject('ShootEffect',
    self.x + d*math.cos(self.r), self.y + d*math.sin(self.r), {player = self, d = d})

    if self.attack == 'Neutral' then
        self.area:addGameObject('Projectile',
      self.x + 1.5*d*math.cos(self.r), self.y + 1.5*d*math.sin(self.r), {r = self.r})
    end
end
Before launching the projectile we check the current attack with the if self.attack == 'Neutral' conditional. This function will grow based on a big conditional chain like this where we'll be checking for all 16 attacks that we add.
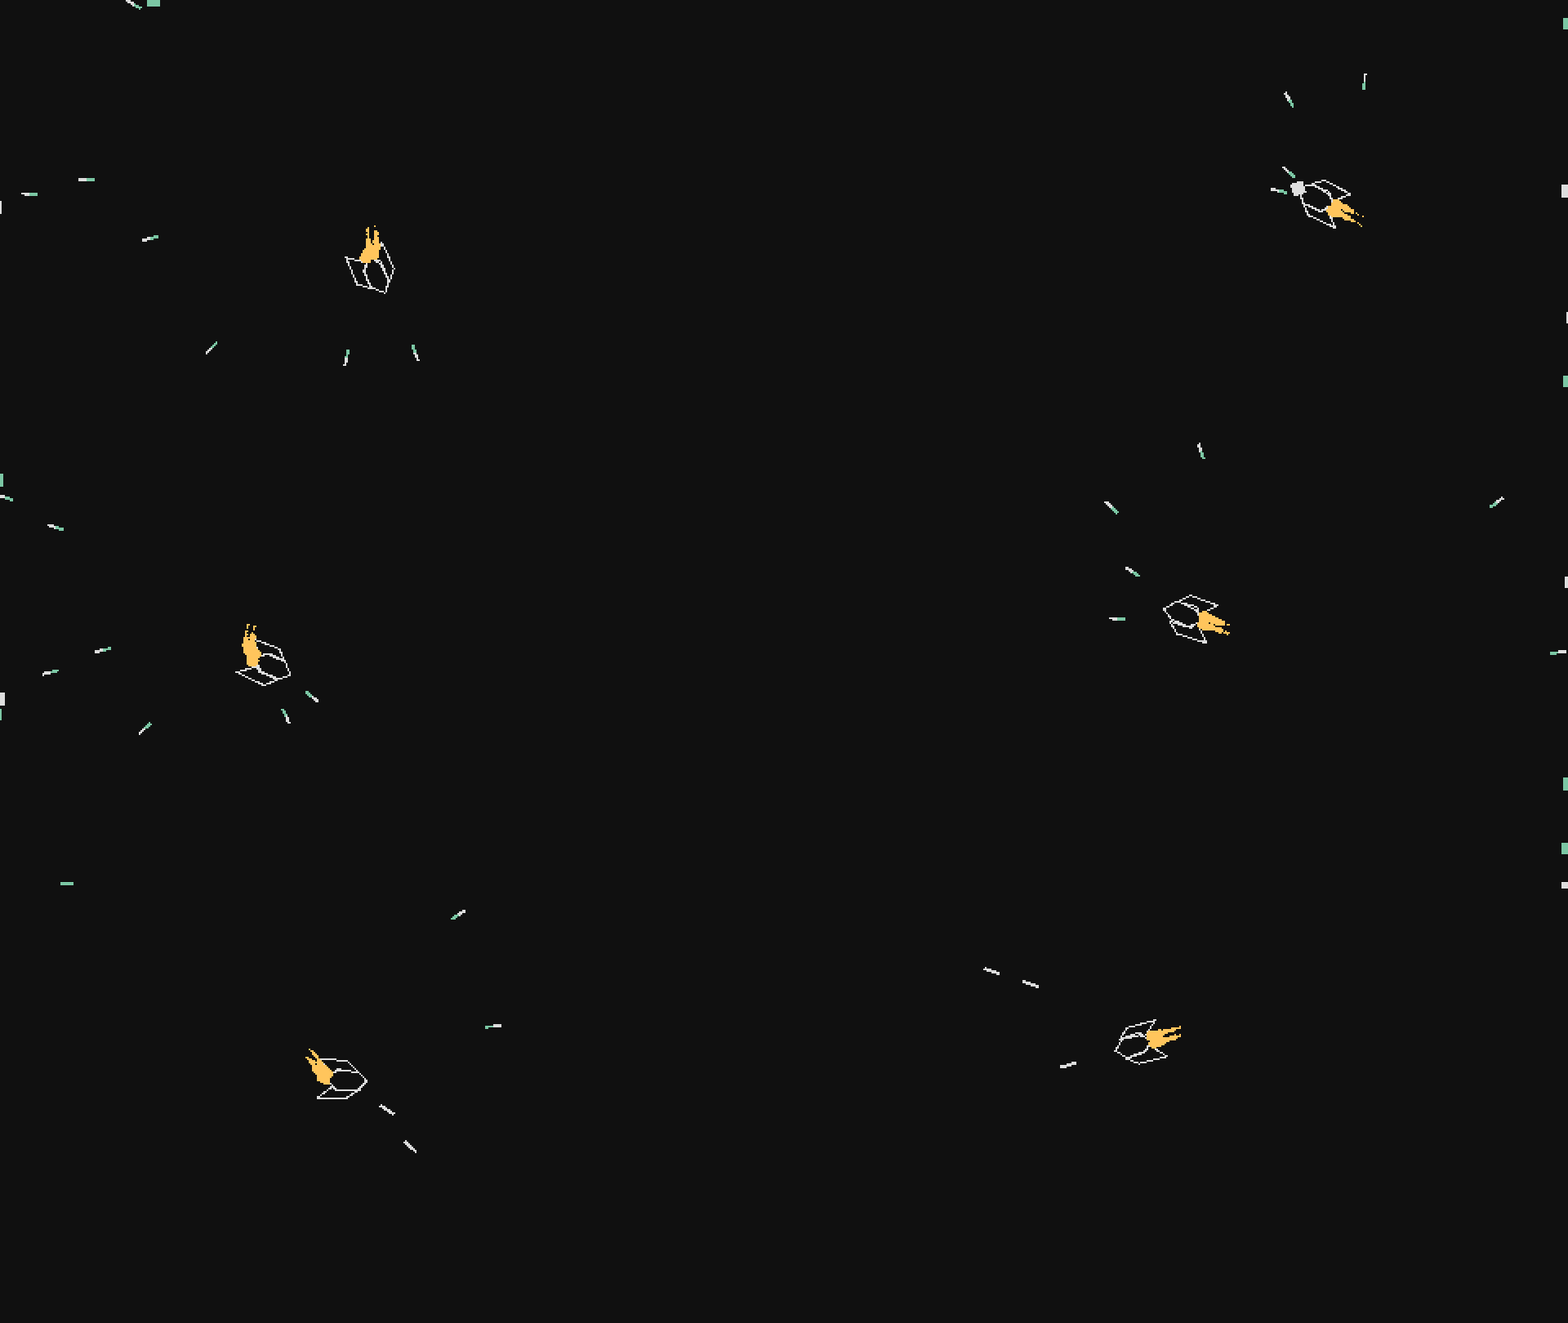
So let's get started with adding one actual attack to see what it's like. The attack we'll add will be called Double and it looks like this:
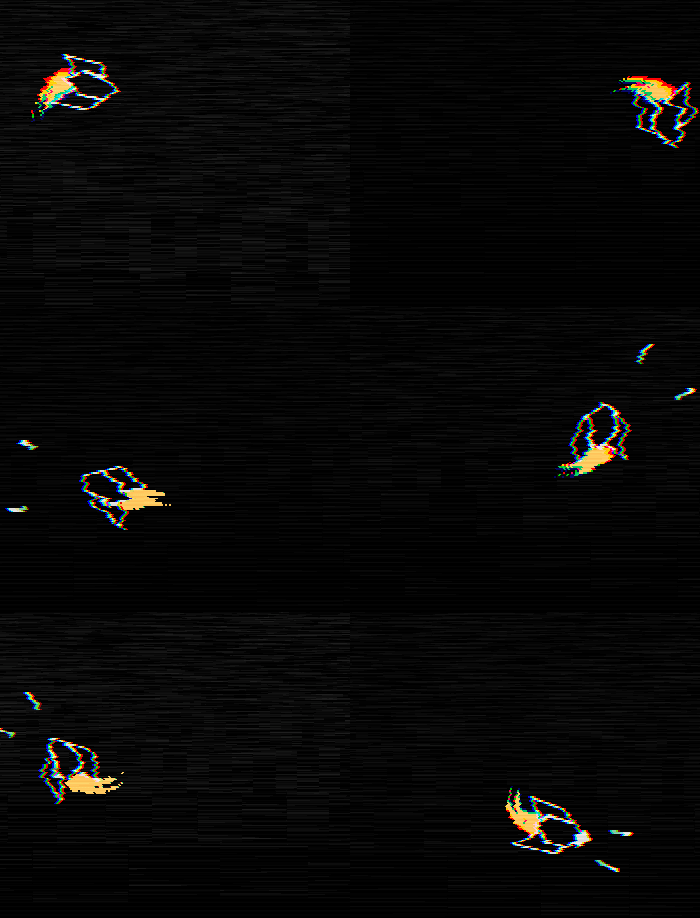
And as you can see it shoots 2 projectiles at an angle instead of one. To get started with this first we'll add the attack's description to the global attacks table. This attack will have a cooldown of 0.32, cost 2 ammo, and its color will be ammo_color (these values were reached through trial and error):
attacks = {
    ...
    ['Double'] = {cooldown = 0.32, ammo = 2, abbreviation = '2', color = ammo_color},
}
Now we can add it to the shoot function as well:
function Player:shoot()
    ...
    elseif self.attack == 'Double' then
        self.ammo = self.ammo - attacks[self.attack].ammo
        self.area:addGameObject('Projectile',
    self.x + 1.5*d*math.cos(self.r + math.pi/12),
    self.y + 1.5*d*math.sin(self.r + math.pi/12),
    {r = self.r + math.pi/12, attack = self.attack})

        self.area:addGameObject('Projectile',
    self.x + 1.5*d*math.cos(self.r - math.pi/12),
    self.y + 1.5*d*math.sin(self.r - math.pi/12),
    {r = self.r - math.pi/12, attack = self.attack})
    end
end
Here we create two projectiles instead of one, each pointing with an angle offset of math.pi/12 radians, or 15 degrees. We also make it so that the projectile receives the attack attribute as the name of the attack. For each projectile type we'll do this as it will help us identify which attack this projectile belongs to. That is helpful for setting its appropriate color as well as changing its behavior when necessary. The Projectile object now looks like this:
function Projectile:new(...)
    ...
    self.color = attacks[self.attack].color
    ...
end

function Projectile:draw()
    pushRotate(self.x, self.y, Vector(self.collider:getLinearVelocity()):angle())
    love.graphics.setLineWidth(self.s - self.s/4)
    love.graphics.setColor(self.color)
    love.graphics.line(self.x - 2*self.s, self.y, self.x, self.y)
    love.graphics.setColor(default_color)
    love.graphics.line(self.x, self.y, self.x + 2*self.s, self.y)
    love.graphics.setLineWidth(1)
    love.graphics.pop()
end
In the constructor we set color to the color defined in the global attacks table for this attack. And then in the draw function we draw one part of the line with its color being the color attribute, and another being default_color. For most projectile types this drawing setup will hold.
The last thing we forgot to do is to make it so that this attack obeys rule 1, meaning that we forgot to add code to make it consume the amount of ammo it should consume. This is a pretty simple fix:
function Player:shoot()
    ...
    elseif self.attack == 'Double' then
        self.ammo = self.ammo - attacks[self.attack].ammo
        ...
    end
end
With this rule 1 (for the Double attack) will be followed. We can also add the code that will make rule 2 come true, which is that when ammo hits 0, we change the current attack to the Neutral one:
function Player:shoot()
    ...
    if self.ammo <= 0 then
        self:setAttack('Neutral')
        self.ammo = self.max_ammo
    end
end
This must come at the end of the shoot function since we don't want the player to be able to shoot one extra time after his ammo resource hits 0.
If you do all this and try running it it should look like this:
Attacks Exercises
104. (CONTENT) Implement the Triple attack. Its definition on the attacks table looks like this:
attacks['Triple'] = {cooldown = 0.32, ammo = 3, abbreviation = '3', color = boost_color}
And the attack itself looks like this:
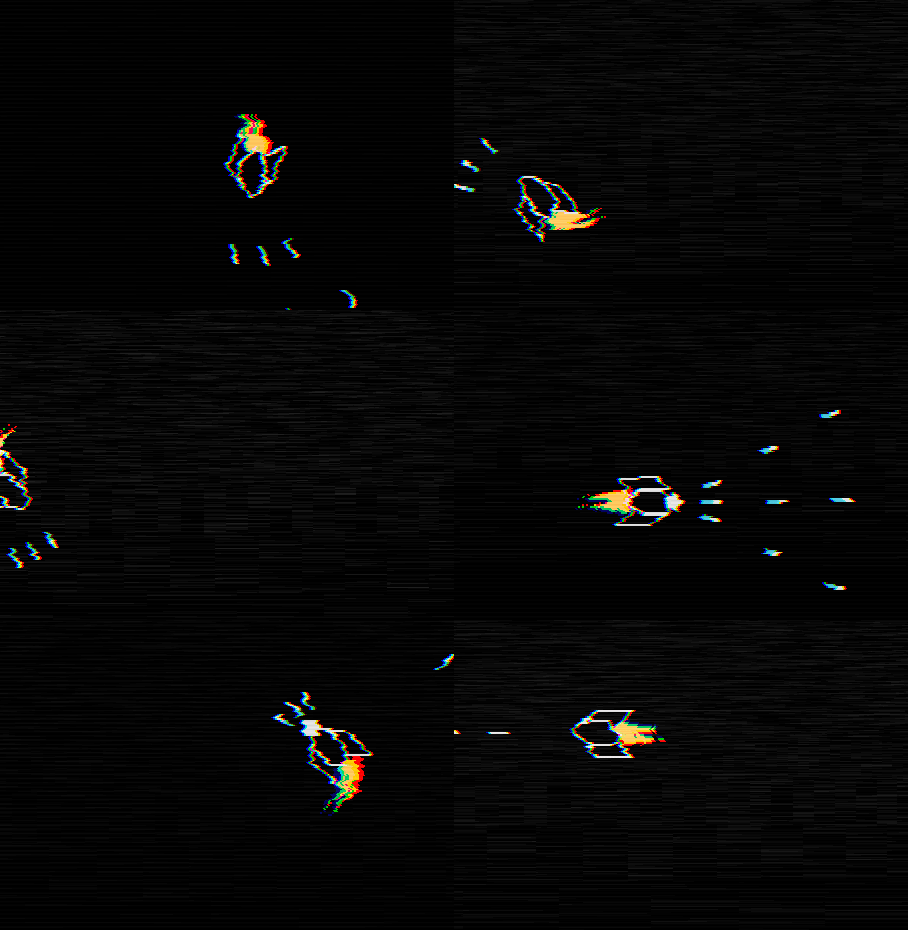
The angles on the projectile are exactly the same as Double, except that there's one extra projectile also being spawned along the middle (at the same angle that the Neutral projectile is spawned). Create this attack following the same steps that were used for the Double attack.
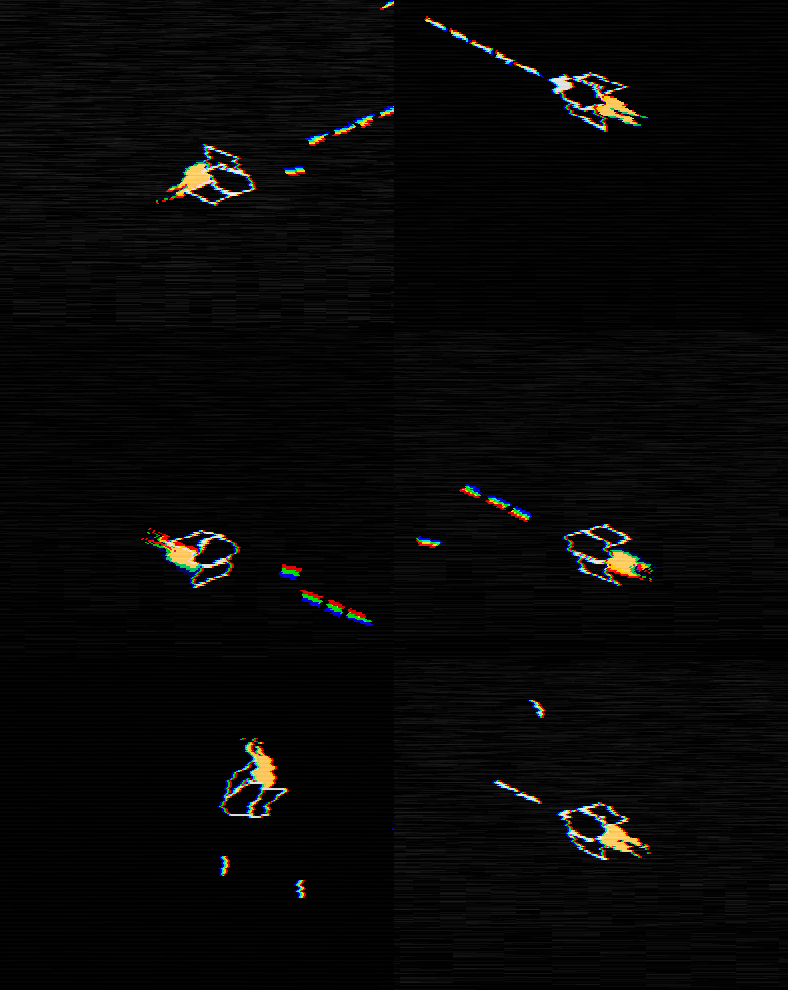
105. (CONTENT) Implement the Rapid attack. Its definition on the attacks table looks like this:
attacks['Rapid'] = {cooldown = 0.12, ammo = 1, abbreviation = 'R', color = default_color}
And the attack itself looks like this:
106. (CONTENT) Implement the Spread attack. Its definition on the attacks table looks like this:
attacks['Spread'] = {cooldown = 0.16, ammo = 1, abbreviation = 'RS', color = default_color}
And the attack itself looks like this:

The angles used for the shots are a random value between -math.pi/8 and +math.pi/8. This attack's projectile color also works a bit differently. Instead of having one color only, the color changes randomly to one inside the all_colors list every frame (or every other frame depending on what you think is best).
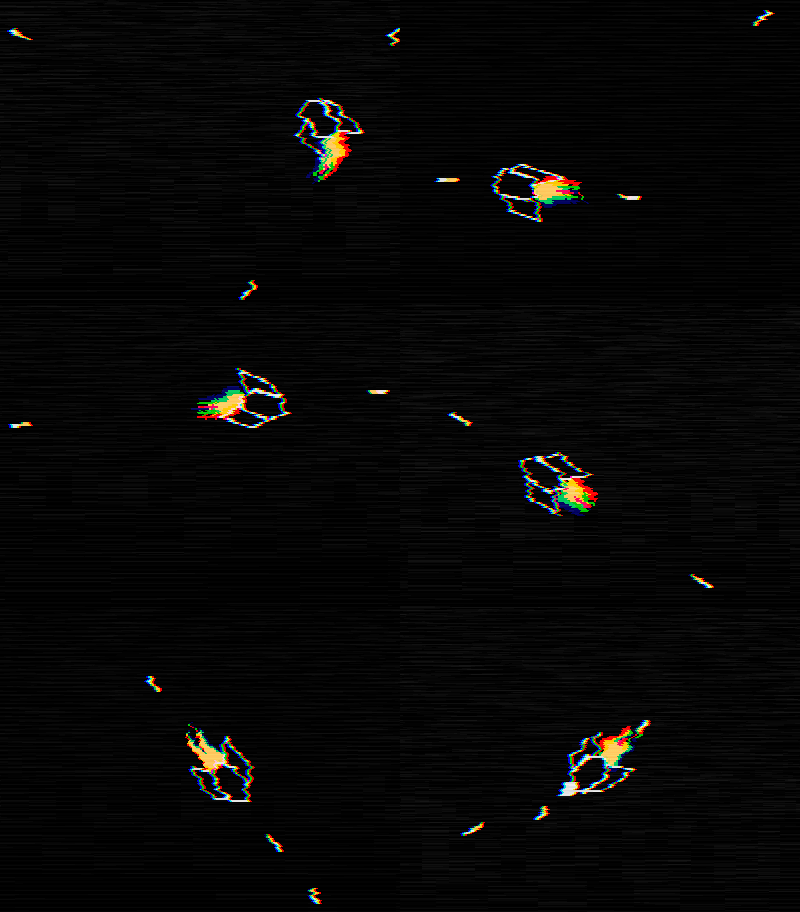
107. (CONTENT) Implement the Back attack. Its definition on the attacks table looks like this:
attacks['Back'] = {cooldown = 0.32, ammo = 2, abbreviation = 'Ba', color = skill_point_color}
And the attack itself looks like this:
108. (CONTENT) Implement the Side attack. Its definition on the attacks table looks like this:
attacks['Side'] = {cooldown = 0.32, ammo = 2, abbreviation = 'Si', color = boost_color}
And the attack itself looks like this:
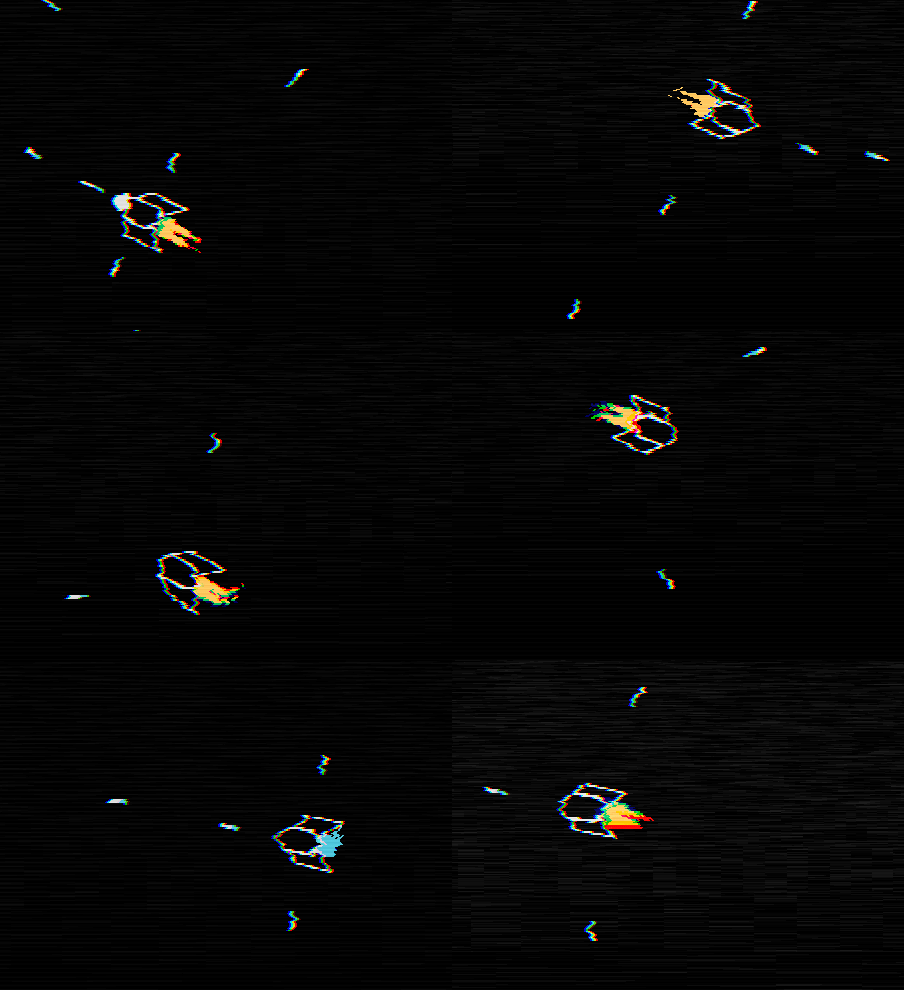
109. (CONTENT) Implement the Attack resource. Like the Boost and SkillPoint resources, the Attack resource is spawned from either the left or right of the screen at a random y position, and then moves inward very slowly. When the player comes into contact with an Attack resource, his attack is changed to the attack that the resource contains using the setAttack function.
Attack resources look a bit different from the Boost or SkillPoint resources, but the idea behind it and its effects are pretty much the same. The colors used for each different attack are the same as the ones used for its projectiles and the identifying name used is the one that we called abbreviation in the attacks table. Here's what they look like:
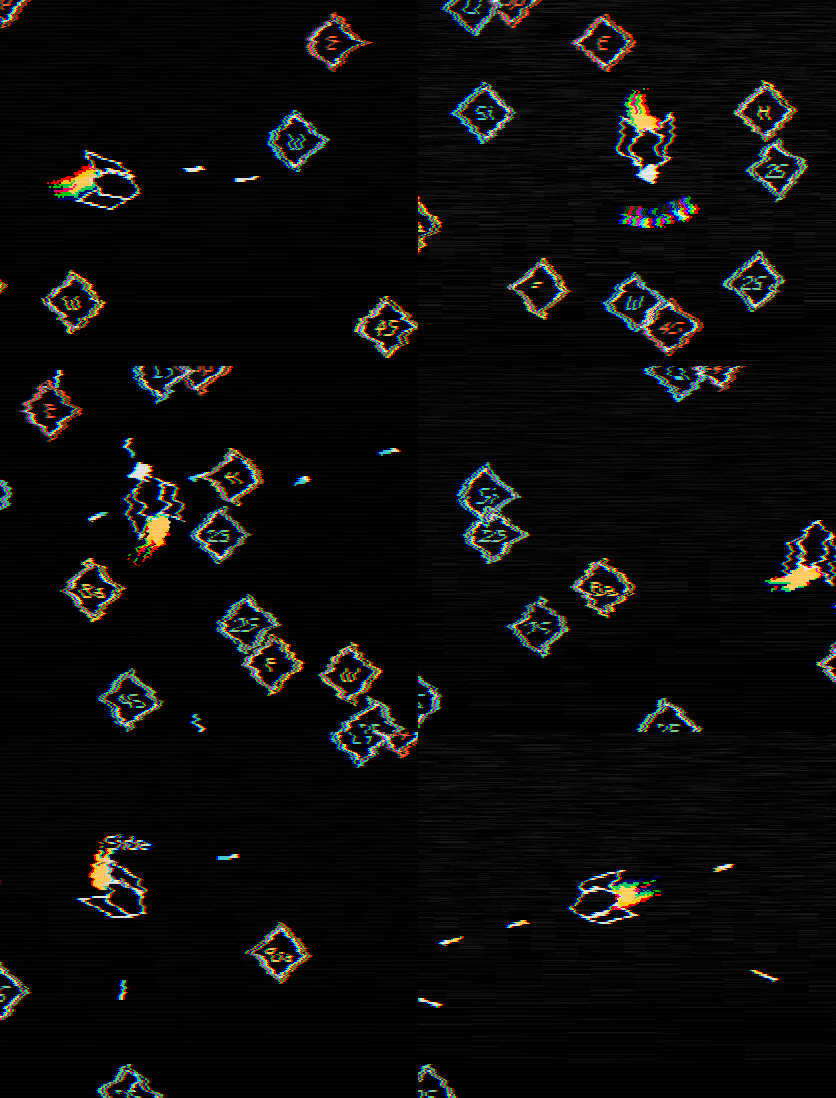
Don't forget to create InfoText objects whenever a new attack is gathered by the player!